

==========
Last Updated: August 2026
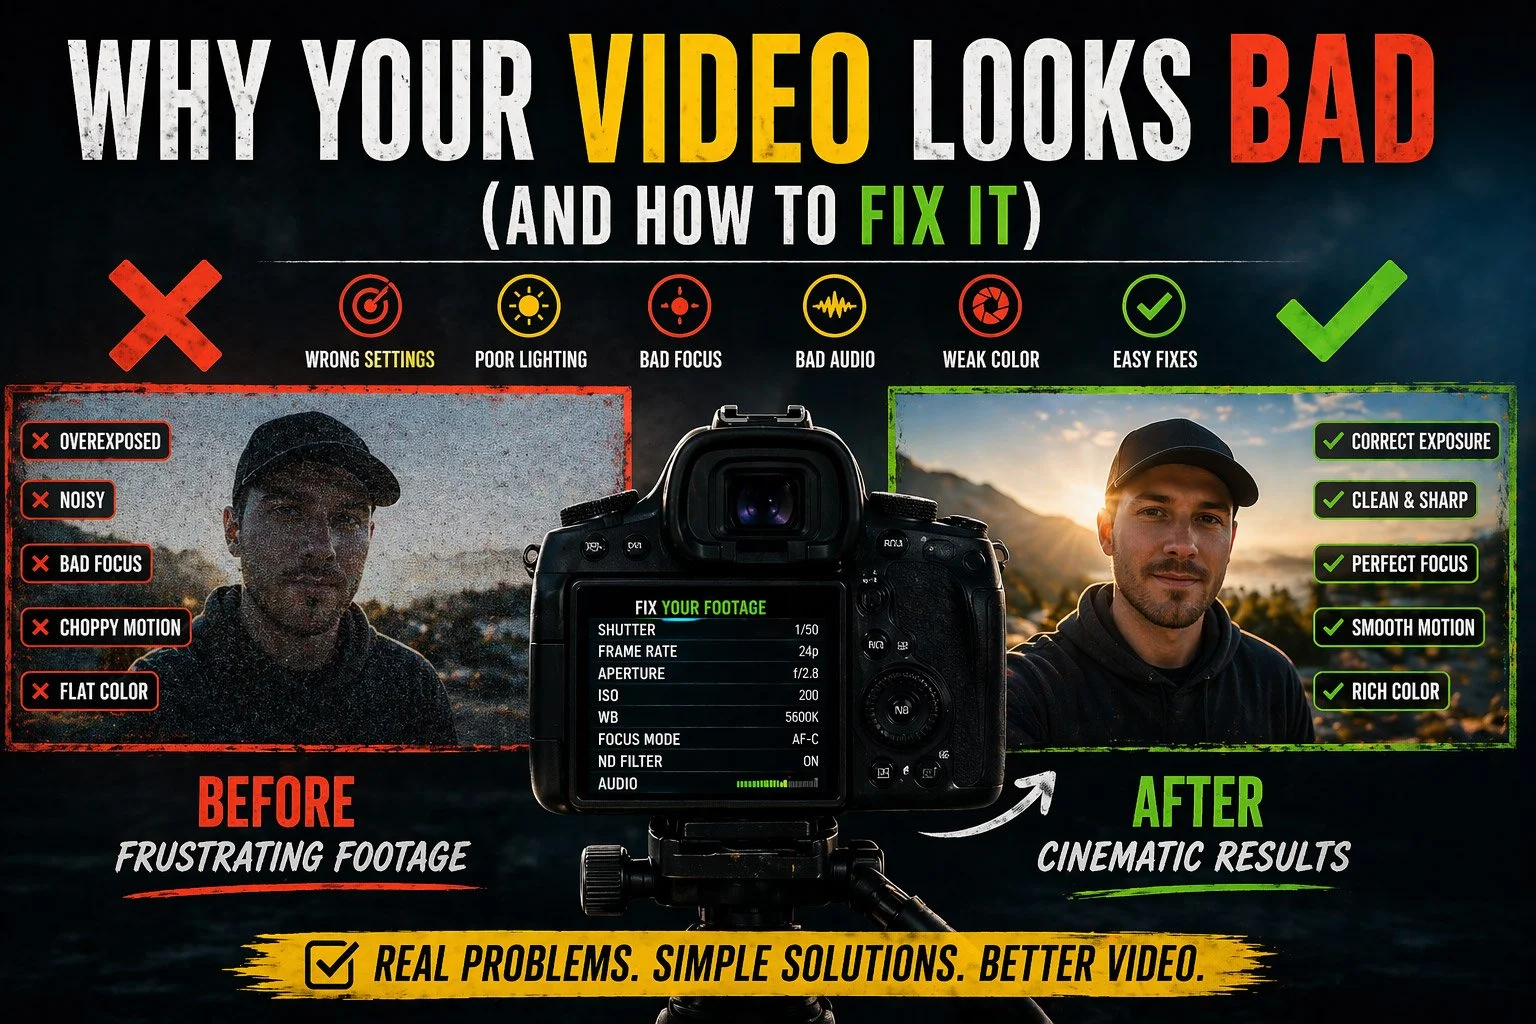
Most bad-looking video isn't caused by an expensive camera—or the lack of one.
It's usually the result of a few camera settings working against each other.
You can spend thousands of dollars on a camera and still end up with footage that looks:
blurry
noisy
overexposed
choppy
flat
amateur
On the other hand, modern hybrid cameras—even many entry-level models—are capable of producing impressive video when they're set up correctly.
The challenge is knowing which settings actually matter and how they work together.
In this guide, I'll walk through the most common reasons videos look bad, explain why those problems happen, and show you how to fix them using practical techniques I've relied on while filming concerts, live events, landscapes, and behind-the-scenes content.
Whether you're just getting started or trying to improve your current workflow, these changes can make an immediate difference.
Why Good Cameras Still Produce Bad Video
One of the biggest misconceptions in filmmaking is that better gear automatically creates better footage.
It doesn't.
Professional-looking video comes from understanding the relationship between:
frame rate
shutter speed
aperture
ISO
white balance
autofocus
lighting
composition
If just one of these is set incorrectly, the entire video can suffer.
For example:
A fast shutter speed creates harsh, unnatural motion.
Poor exposure produces noisy footage.
Incorrect autofocus settings cause distracting focus hunting.
Auto white balance constantly shifts colors during recording.
None of these problems require a new camera.
Most require only a few adjustments before you press record.
The Most Common Reasons Your Videos Look Bad
Most video quality issues fall into one of these categories.
Motion looks choppy.
Footage isn't sharp.
Exposure is incorrect.
Video is noisy or grainy.
Colors constantly change.
Footage doesn't feel cinematic.
Composition lacks depth.
Audio sounds poor.
Camera settings don't match the shooting environment.
Outdoor Video Looks Harsh or Overexposed
Low-Light Video Falls Apart
Sometimes Your Camera Really Is the Limiting Factor
We'll cover each of these in detail throughout this guide.
Problem #1: Your Motion Looks Choppy
One of the quickest ways to make otherwise beautiful footage look amateur is unnatural motion.
Instead of smooth movement, everything appears:
jittery
harsh
overly sharp
robotic
This usually happens because of an incorrect combination of:
frame rate
shutter speed
Many beginners increase shutter speed to reduce blur without realizing they're also removing the natural motion blur our eyes expect to see.
The result is video that feels mechanical instead of natural.
The Fix
Start by choosing an appropriate frame rate.
For most situations:
24 fps creates a cinematic look.
30 fps is ideal for general-purpose video.
60 fps is best when you intentionally want smoother motion or slow-motion footage.
Then match your shutter speed using the 180-degree shutter rule:
24 fps → 1/50 second
30 fps → 1/60 second
60 fps → 1/125 second
This creates natural motion blur and significantly improves how movement appears.
Related Guides
Problem #2: Your Footage Looks Blurry
Not all blurry video has the same cause.
Sometimes the subject is simply out of focus.
Other times the footage is soft because of:
camera shake
subject movement
missed autofocus
motion blur
poor lens quality
Understanding which type of blur you're seeing is the first step toward fixing it.
Motion Blur vs. Focus Blur
These two problems are often confused.
Motion Blur
Occurs when subjects move while the shutter is open.
Some motion blur is desirable.
Too much creates smeared movement.
Too little creates choppy, unnatural motion.
Focus Blur
Occurs when the autofocus misses the subject—or manual focus isn't accurate.
The image itself isn't moving.
It's simply out of focus.
This is usually caused by:
incorrect autofocus settings
poor subject tracking
low-light autofocus struggles
using the wrong focus area
The Fix
Ask yourself:
Is the image soft because it moved?
or
Is it soft because focus missed?
If it's motion blur:
verify your shutter speed
stabilize the camera
reduce unnecessary movement
If it's focus:
use continuous autofocus (AF-C / Servo AF)
enable subject detection
reduce tracking sensitivity
use manual focus when autofocus struggles
Related Guide
Problem #3: Your Video Is Too Dark or Too Bright
Exposure problems are among the most common issues beginners encounter.
If the image is too dark, details disappear into the shadows.
If it's too bright, highlights become permanently clipped.
Neither problem is ideal.
Why It Happens
Exposure is controlled by three settings:
aperture
shutter speed
ISO
Unlike photography, video limits how much you can change shutter speed because it also controls motion.
That leaves aperture and ISO doing much of the work.
Outdoor shooting introduces another challenge:
There is often too much light, forcing many beginners to raise shutter speed—which breaks natural motion.
The Fix
Rather than adjusting shutter speed first:
choose your frame rate
match the proper shutter speed
adjust aperture
adjust ISO
use an ND filter outdoors when necessary
This keeps motion looking natural while maintaining correct exposure.
Related Guides
Problem #4: Your Video Is Noisy or Grainy
Noise is one of the most common complaints among new videographers. While high ISO often gets blamed, it's usually only part of the problem.
In many cases, grainy footage is caused by underexposure, not simply using a high ISO.
Why it happens
Noise becomes more visible when:
Your scene is underexposed
You're filming in very low light
ISO is pushed beyond your camera's comfort zone
Shadows are brightened heavily during editing
Modern hybrid cameras are surprisingly capable at higher ISO values. A properly exposed ISO 6400 clip often looks cleaner than an underexposed ISO 1600 clip that's lifted in post.
How to fix it
Prioritize proper exposure before worrying about ISO.
A good starting point:
Open your aperture as wide as practical
Keep your shutter speed matched to your frame rate
Raise ISO only as much as necessary
Avoid intentionally underexposing to "reduce noise"
For concerts and other dark venues, acceptable noise is far preferable to unusable footage.
Related guide: Best Video Settings for Low Light (Concerts & Events)
Problem #5: Your Colors Keep Changing
Nothing makes footage feel less professional than colors that constantly shift throughout a clip.
Why it happens
Auto White Balance continuously analyzes the scene.
When lighting changes—even slightly—your camera may suddenly change color temperature.
This is especially common during:
Concert lighting
Wedding receptions
Stage performances
Outdoor events with passing clouds
Mixed LED and tungsten lighting
The result is footage that shifts between warm and cool colors during the same shot.
How to fix it
Whenever possible:
Set White Balance manually
Choose a Kelvin value that matches the scene
Keep it locked throughout the shoot
Even if the color isn't absolutely perfect, consistency makes editing dramatically easier.
Problem #6: Your Video Looks Flat or Lifeless
Sometimes footage is technically correct but still lacks impact.
This usually isn't a camera problem.
It's a storytelling problem.
Common causes
Flat midday lighting
No subject separation
Weak composition
Busy backgrounds
Shooting everything from eye level
No foreground or background depth
How to improve it
Instead of changing camera settings, change your shooting approach.
Try to include:
Foreground elements
Layered backgrounds
Leading lines
Interesting lighting
Side lighting instead of front lighting
Camera angles that create depth
Small composition changes often produce a much bigger improvement than expensive new gear.
Problem #7: Your Composition Isn't Guiding the Viewer
Sharp footage alone doesn't hold attention.
Composition determines where viewers look first—and whether they stay engaged.
Strong video composition often includes
Clear subject placement
Foreground interest
Background separation
Balanced framing
Camera movement with purpose
Clean edges of the frame
When filming events or concerts, constantly scan the entire frame—not just your subject.
Watch for:
Microphone stands growing out of heads
Bright distractions
Exit signs
Audience members entering the frame
Cluttered backgrounds
The cleaner your composition, the more cinematic your footage feels.
Problem #8: Your Audio Sounds Amateur
Viewers will often tolerate imperfect video.
They rarely tolerate poor audio.
Common audio mistakes
Using the built-in camera microphone
Recording too far from the subject
Audio clipping
Wind noise
Room echo
Crowd noise overwhelming dialogue
Better solutions
Depending on your project, consider:
External shotgun microphones
Wireless microphone systems
On-camera microphones
Soundboard feeds
Dedicated audio recorders
For concerts, the best results often combine:
Clean soundboard audio
Ambient crowd sound
Camera audio for synchronization
Good sound makes video feel dramatically more professional.
Related: → Improve Your Audio Quality
Problem #9: Your Lighting Is Working Against You
Even expensive cameras struggle with poor lighting.
Lighting affects:
Noise
Color
Dynamic range
Skin tones
Autofocus
Overall image quality
Indoor lighting challenges
Mixed color temperatures
Dim rooms
LED flicker
Uneven illumination
Outdoor lighting challenges
Harsh midday sunlight
Deep shadows
Backlit subjects
Constantly changing clouds
Learning to recognize good light—and adapt to difficult light—is one of the biggest skills a videographer develops.
Problem #10: Outdoor Video Looks Harsh or Overexposed
Bright daylight creates its own set of problems.
Many beginners respond by dramatically increasing shutter speed.
While this fixes exposure, it destroys natural-looking motion.
Better approach
Keep your shutter speed matched to your frame rate.
Instead, control exposure using:
ND filters
Aperture
ISO
This preserves natural motion blur while maintaining proper exposure.
Related guide: ND Filters for Video (Fix Bright Outdoor Footage)
Problem #11: Low-Light Video Falls Apart
Concerts, clubs, theaters, receptions, and live events push cameras to their limits.
You'll often face:
Rapid lighting changes
High ISO
Smoke and haze
Strong backlighting
Constant movement
Rather than chasing perfect image quality, focus on producing footage that's clean, well exposed, and consistent.
A practical low-light setup often includes:
24fps or 30fps
Proper shutter speed
Wide aperture
Appropriate ISO
Manual white balance
Continuous autofocus (when reliable)
Understanding these tradeoffs makes low-light filming far less frustrating.
Problem #12: Sometimes Your Camera Really Is the Limiting Factor
Technique solves most video problems.
But eventually, hardware becomes part of the equation.
Older or entry-level cameras may struggle with:
Autofocus reliability
High ISO performance
Dynamic range
Rolling shutter
Video codecs
Stabilization
Subject detection
That doesn't mean you need the newest flagship model.
In many cases, upgrading to a capable hybrid camera offers meaningful improvements in both image quality and ease of use.
Features worth prioritizing include:
Reliable continuous autofocus
Strong low-light performance
Good dynamic range
In-body image stabilization (IBIS)
Oversampled 4K recording
High-quality codecs
Excellent battery life
For creators who regularly shoot concerts, events, travel, or commercial work, these improvements often make filming easier—not just prettier.
Related guides:
Complete Video Troubleshooting Checklist
If your footage doesn't look the way you expected, work through this checklist before assuming your camera is the problem.
Motion
✓ Is your frame rate appropriate for the project?
✓ Is your shutter speed matched to your frame rate?
✓ Does movement look natural?
Exposure
✓ Is your subject properly exposed?
✓ Are highlights clipped?
✓ Are shadows excessively dark?
✓ Is ISO being used appropriately?
Focus
✓ Is autofocus configured correctly?
✓ Is subject tracking enabled when appropriate?
✓ Would manual focus work better?
White Balance
✓ Is white balance locked?
✓ Are colors remaining consistent throughout the clip?
Lighting
✓ Is your subject lit well?
✓ Are you working with the available light instead of fighting it?
✓ Could repositioning improve the image?
Audio
✓ Are you using an external microphone?
✓ Are audio levels clipping?
✓ Are background sounds overwhelming the subject?
Composition
✓ Is there a clear subject?
✓ Are distracting objects removed from the frame?
✓ Does the shot have foreground and background separation?
Camera Settings
✓ Correct frame rate
✓ Correct shutter speed
✓ Appropriate aperture
✓ Proper ISO
✓ Correct picture profile
✓ Stable camera movement
Most video problems can be solved simply by working through this checklist before pressing Record.
My Real-World Workflow for Better Video
Whether I'm filming concerts, live events, travel, or commercial work, my process stays largely the same.
Step 1 — Evaluate the Light
Before touching camera settings, I study the scene.
I look for:
Direction of light
Brightest highlights
Deepest shadows
Color temperature
Background distractions
Lighting determines nearly every decision that follows.
Step 2 — Set Frame Rate
I choose frame rate based on the final purpose.
Typically:
24fps for cinematic footage
30fps for general content
60fps only when slow motion or fast action is needed
Step 3 — Match Shutter Speed
Next, I lock shutter speed using the 180-degree shutter rule.
Examples:
24fps → 1/50 sec
30fps → 1/60 sec
60fps → 1/125 sec
This immediately gives natural-looking motion.
Step 4 — Choose Aperture
I decide how much depth of field I want.
Wide apertures:
Separate subjects
Gather more light
Reduce ISO
Smaller apertures:
Increase depth of field
Work well for landscapes
Require more light
Step 5 — Adjust Exposure
Exposure comes next.
Depending on conditions, I use:
ND filters outdoors
ISO indoors
Lighting adjustments when possible
I avoid underexposing simply to keep ISO low.
Step 6 — Configure Autofocus
For moving subjects:
Continuous AF
Face/Eye Detection
Moderate transition speed
Lower tracking sensitivity
For interviews or controlled scenes:
Manual focus when practical
Step 7 — Lock White Balance
I almost never leave Auto White Balance enabled during important shoots.
Consistent color makes editing dramatically easier.
Step 8 — Monitor Audio
Before recording:
Check microphone
Watch levels
Listen through headphones whenever possible
Poor audio is much harder to fix than poor video.
Step 9 — Record More Than You Think You'll Need
Live events rarely offer second chances.
I intentionally capture:
Wide shots
Medium shots
Tight shots
Crowd reactions
Environmental details
Cutaway footage
Extra coverage makes editing far easier.
Common Beginner Mistakes
Many new videographers make the same mistakes regardless of camera brand.
Chasing Low ISO
Proper exposure matters more than having the lowest possible ISO.
Ignoring Shutter Speed
Shutter speed affects motion just as much as exposure.
Fast shutter speeds often create harsh, unnatural-looking footage.
Leaving Everything on Auto
Modern cameras are intelligent—but they don't know your creative intent.
Learning to manually control key settings produces more consistent results.
Buying New Gear Too Soon
Many image quality problems come from technique rather than equipment.
Learning lighting, exposure, composition, and movement will improve your videos more than upgrading cameras.
Ignoring Audio
Viewers notice poor sound immediately.
Even an inexpensive external microphone often produces a larger improvement than a new camera body.
Advanced Techniques for Better Video Quality
Once you've mastered the fundamentals, these techniques can elevate your footage even further.
Shoot During Better Light
Golden hour naturally provides:
Softer contrast
Better color
More flattering light
Easier exposure
Sometimes timing improves footage more than any camera setting.
Learn to Read Histograms
Your LCD can be misleading.
Histograms provide a far more accurate representation of exposure.
Expose Consistently
Even when lighting changes, aim for consistent exposure between clips.
Editing becomes much easier when footage matches naturally.
Use Camera Movement Purposefully
Not every shot needs motion.
When you move:
Pan deliberately
Move slowly
Let subjects create energy
Intentional movement always looks more professional.
Build Better Sequences
Think beyond individual clips.
Capture:
Establishing shots
Medium coverage
Close details
Reaction shots
Environmental footage
Editors—and future you—will appreciate the variety.
When to Upgrade Your Gear (And When Not To)
Better gear absolutely helps.
But it should solve a specific problem.
Upgrade if you regularly struggle with:
Poor autofocus
High ISO performance
Rolling shutter
Limited dynamic range
Weak codecs
Poor stabilization
Don't upgrade if the problem is:
Incorrect shutter speed
Bad lighting
Weak composition
Poor audio
Unsteady camera movement
Inconsistent exposure
Technique should always come before equipment.
When your skills begin to exceed your camera's capabilities, that's the right time to upgrade.
Final Thoughts
Good-looking video rarely comes from a single camera setting.
Instead, it's the result of dozens of small decisions working together.
The biggest improvements usually come from understanding:
Motion
Exposure
Light
Focus
Composition
Audio
Consistency
Once those fundamentals become second nature, you'll spend less time troubleshooting and more time creating footage you're proud to share.
No camera is perfect.
But a well-prepared videographer can produce excellent results with almost any modern hybrid camera.
Frequently Asked Questions
Why does my video look blurry?
Blur can be caused by incorrect focus, excessive camera movement, slow shutter speeds, dirty lenses, or motion blur from fast-moving subjects.
Why does my video look grainy?
Grain usually comes from underexposure, high ISO, or extremely low-light conditions. Proper exposure often improves image quality more than simply lowering ISO.
Why does my video look choppy?
Your shutter speed may be too fast for your chosen frame rate. Following the 180-degree shutter rule creates smoother, more natural motion.
Why do my colors keep changing?
Auto White Balance continuously adjusts color temperature as lighting changes. Locking white balance manually creates much more consistent footage.
Why does autofocus keep hunting?
Autofocus hunting often occurs because of difficult lighting, low contrast, incorrect tracking sensitivity, or busy backgrounds.
Why does my outdoor video look harsh?
Bright sunlight creates extreme contrast. Using ND filters, filming during softer light, and improving composition can dramatically improve outdoor footage.
Do expensive cameras automatically produce better video?
Not necessarily.
Modern cameras are extremely capable, but technique still plays the biggest role in image quality.
What setting improves video quality the most?
There isn't one magic setting.
The biggest improvements usually come from combining:
Correct frame rate
Proper shutter speed
Good exposure
Controlled lighting
Consistent white balance
Strong composition
Clean audio
Should beginners shoot everything in Auto?
Auto modes are useful for learning, but understanding manual exposure and autofocus settings will produce more consistent and professional-looking results.
==========
Related Photography & Video Resources
Continue improving your filmmaking skills with these guides:
