

How to Shoot Your First Concert (Beginner Live Music Photography Guide)
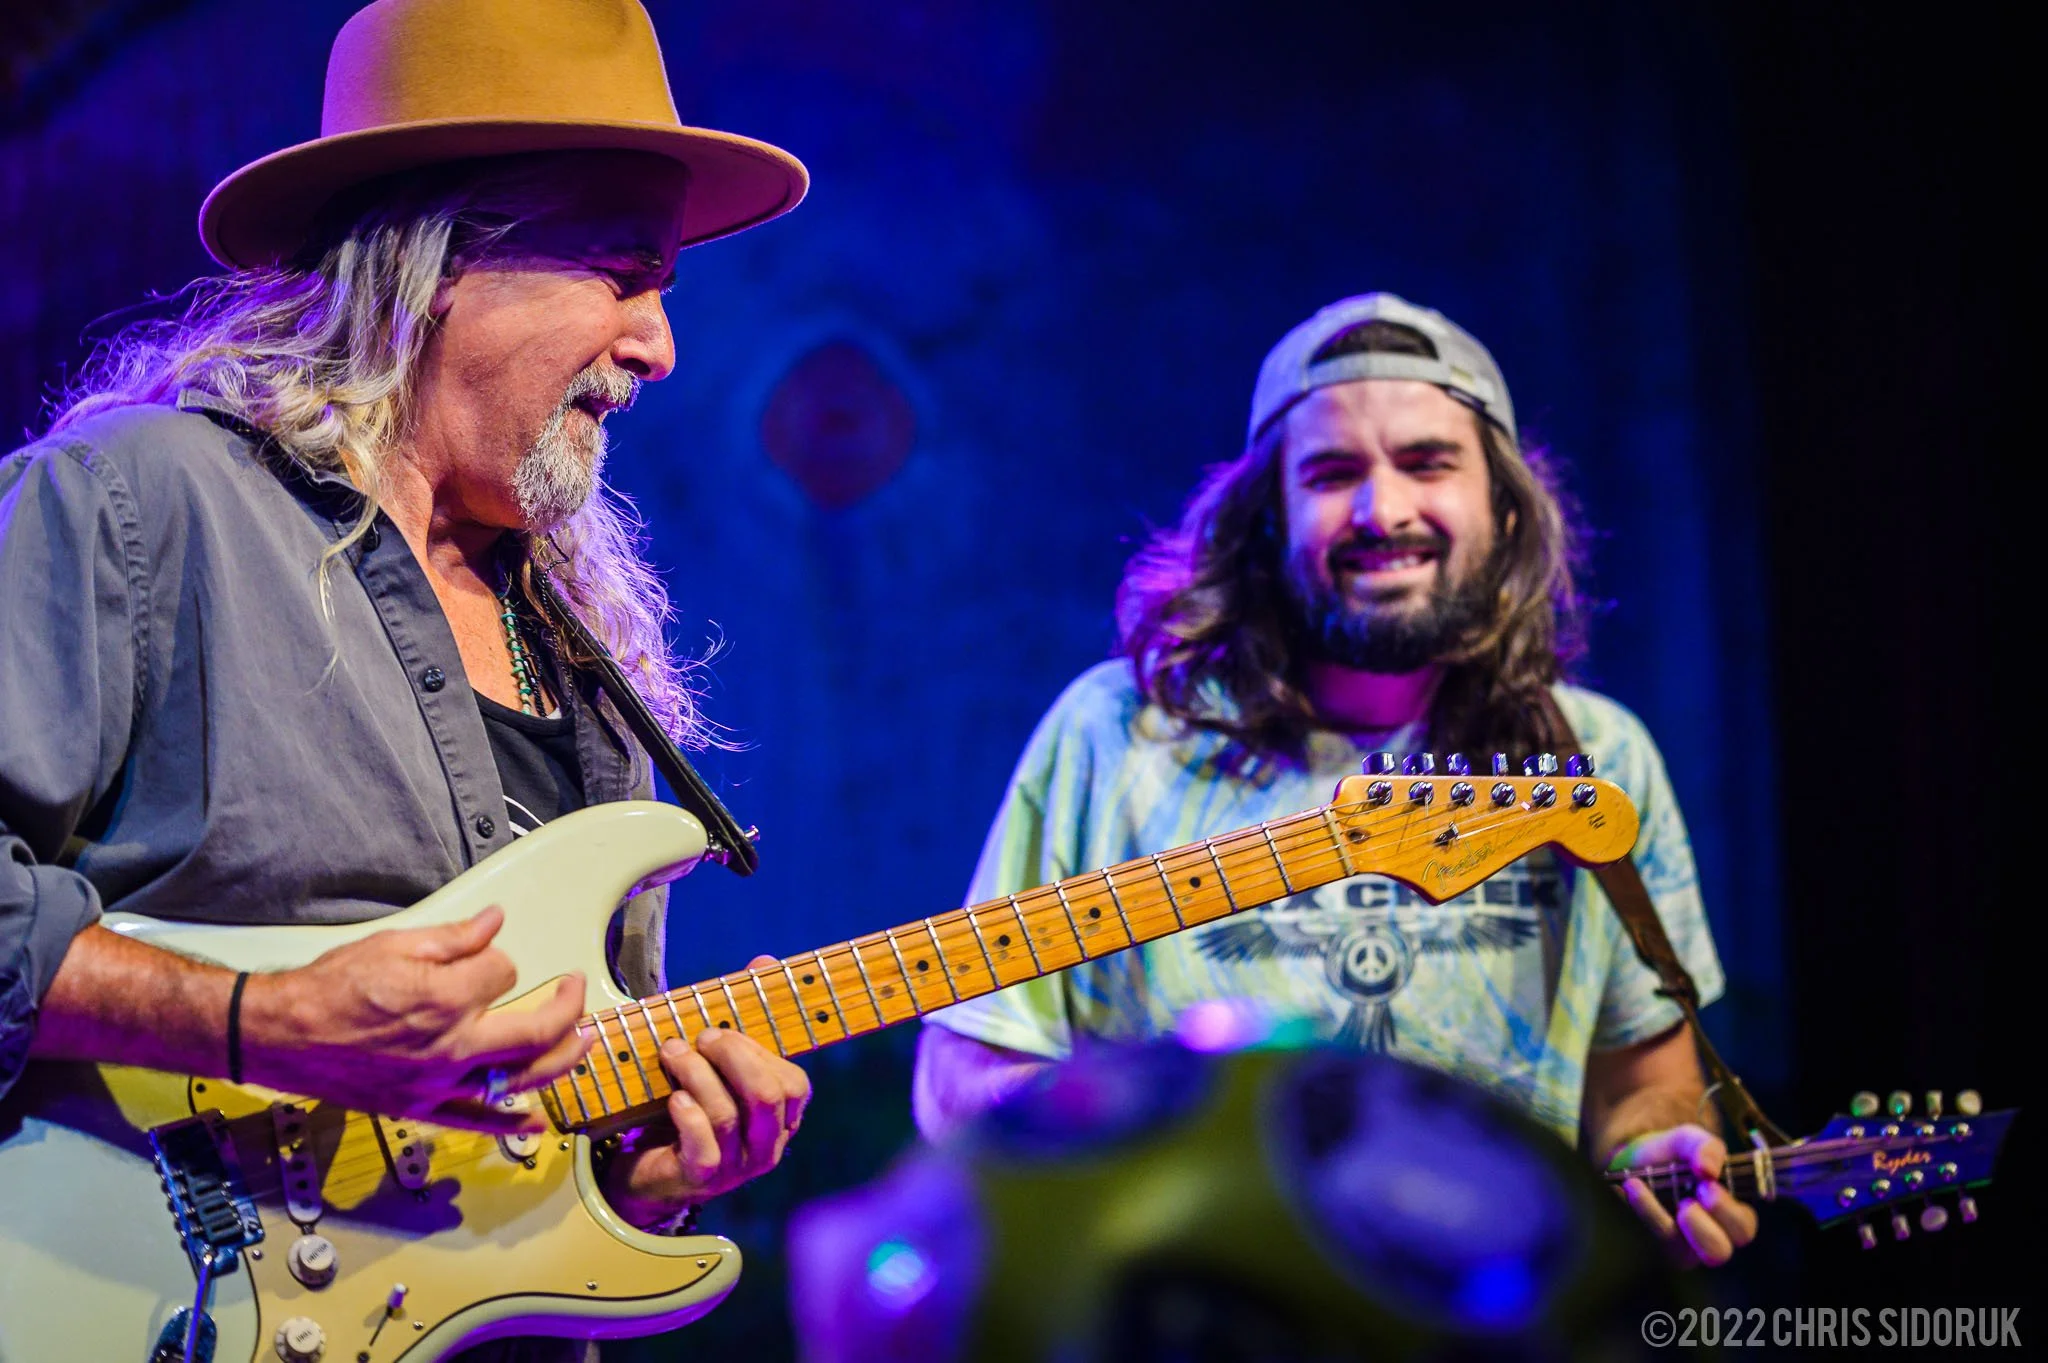
concert photography live music show
Last Updated: August 2026
Quick Jump
- What Makes Concert Photography Different
- Set Realistic Expectations for Your First Concert
- Before the Show: Preparation Matters
- Gear You Actually Need for Your First Concert
- Camera Settings for Your First Concert
- Finding the Best Shooting Position
- How to Anticipate Moments
- Composition During Live Performances
- Common Beginner Mistakes
- Final Thoughts
Shooting your first concert can feel intimidating.
The lighting is unpredictable. The performers move constantly. You have limited time to react, and there is usually no chance to recreate a moment.
But concert photography is also one of the most rewarding types of photography.
Unlike a controlled portrait session or landscape shoot, you are capturing something that only happens once:
a performer’s expression
a perfect moment of movement
the energy between an artist and the crowd
the atmosphere of a live performance
The good news?
You do not need the most expensive camera gear or years of experience to get started.
What matters most is understanding:
how to work in low light
how to anticipate moments
how to position yourself
how to use your camera settings effectively
This guide walks through everything you need to know before, during, and after your first concert shoot.
If you are completely new to live music photography, this is the foundation to start with.
👉 Once you build experience, continue with:
What Makes Concert Photography Different
Concert photography is different from almost every other type of photography.
You are working in an environment where almost nothing is controlled.
You do not control:
lighting changes
performer movement
stage position
crowd movement
how long you have access
Instead of creating the scene, you are reacting to it.
A landscape photographer can wait for the perfect light.
A portrait photographer can adjust the pose.
A concert photographer has seconds to recognize a moment and capture it.
That is why successful concert photography relies heavily on:
anticipation
timing
positioning
understanding light
Technical settings matter, but knowing when to take the photo is just as important as knowing how.
Set Realistic Expectations for Your First Concert
Your first concert shoot is not about creating a perfect portfolio.
It is about learning how live music photography actually works.
Expect to make mistakes.
Your first show will teach you:
how quickly lighting changes
how difficult focusing can be in darkness
how performers move on stage
how much positioning affects your images
A successful first concert does not mean every photo is perfect.
A successful first concert means you walk away understanding what worked and what you need to improve.
Focus on:
getting a few sharp images
learning your camera settings
understanding stage lighting
becoming comfortable shooting in unpredictable conditions
Every experienced concert photographer started by learning these same basics.
Before the Show: Preparation Matters
One of the easiest ways to improve your first concert experience is preparing before you arrive.
Concert photography moves quickly. The more decisions you make ahead of time, the more attention you can put toward capturing moments.
Before the show, research:
The Artist
Understand the type of performance you are photographing.
Some performers:
stay mostly stationary
move constantly across the stage
interact heavily with the crowd
use dramatic lighting effects
Knowing what to expect helps you anticipate moments.
The Venue
Venue size changes everything.
A small club may allow you to move closer and capture intimate images.
A larger venue may require longer lenses and more patience.
Look for:
stage layout
lighting setup
shooting restrictions
available positions
Your Gear
Before leaving:
charge batteries
clear memory cards
clean lenses
check camera settings
pack only what you need
The last thing you want is a technical problem during the best moment of the show.
Gear You Actually Need for Your First Concert
You do not need a huge professional kit to shoot your first concert.
A simple, reliable setup is often better than carrying too much equipment.
A good beginner concert photography setup includes:
a camera with good low-light performance
a fast lens
extra batteries
extra memory cards
That is enough to start learning.
The biggest mistake beginners make is thinking better gear automatically creates better images.
Gear helps, but understanding how to use it matters more.
A photographer with a basic camera who understands timing and lighting will often create stronger images than someone with expensive equipment who does not understand the environment.
Choosing a Camera for Concert Photograph
The most important camera features for concert photography are:
strong high ISO performance
reliable autofocus
good image quality
comfortable handling
Modern mirrorless cameras are excellent choices because they offer:
improved autofocus tracking
strong low-light performance
electronic viewfinders
compact designs
You do not need the newest flagship camera to begin.
Many photographers have created excellent concert images with older full-frame cameras and capable APS-C systems.
👉 Recommended starting points:
Best Cameras for Concert Photography
Choosing the Right Lens
Your lens choice can make a bigger difference than the camera body.
Concert environments are usually dark, so a fast lens is extremely helpful.
Look for:
wide maximum apertures
reliable autofocus
useful focal lengths
Popular beginner choices include:
24–70mm f/2.8
One of the most versatile concert lenses.
It allows you to capture:
full-stage images
performer portraits
environmental shots
70–200mm f/2.8
Useful for:
larger venues
performers farther from the stage
tighter compositions
Fast Primes
Examples:
35mm f/1.8
50mm f/1.8
85mm f/1.8
Advantages:
excellent low-light ability
strong subject separation
affordable options
👉 See the full guide:
Camera Settings for Your First Concert
Concert photography requires settings that prioritize sharpness.
The lighting may be beautiful, but it changes constantly.
A strong starting point:
Shutter Speed
1/250 minimum for most performers
1/400–1/500 for energetic movement
Aperture
f/2.8 or wider when possible
ISO
adjust as needed
do not be afraid of higher ISO
The most common beginner mistake is trying to keep ISO too low.
A slightly noisy image that is sharp is much more usable than a clean image ruined by motion blur.
Your priority order should usually be:
Sharp focus
Frozen movement
Proper exposure
Lowest possible ISO
👉 Full settings breakdown:
Finding the Best Shooting Position
Where you stand can have a bigger impact on your final images than the camera you use.
Many beginners focus entirely on settings and gear, but concert photography is also about positioning yourself where the best moments are likely to happen.
Before the performance starts, look for:
clear sightlines to performers
interesting backgrounds
good lighting angles
areas where you can move without blocking others
A few feet can completely change the image.
Moving slightly left or right can:
remove distracting microphones or stands
create cleaner backgrounds
improve separation between the performer and the stage
change how stage lighting falls on your subject
Front of Stage vs Back of Venue
Each position creates a different type of image.
Photo Pit / Front of Stage
Shooting close to the stage gives you:
intimate performer portraits
dramatic wide-angle images
strong emotional moments
Challenges:
limited shooting time
difficult upward angles
performers moving in and out of frame
Audience Area / Back of Venue
Shooting farther away allows you to capture:
stage atmosphere
crowd interaction
venue scale
lighting effects
Challenges:
longer focal lengths required
more potential distractions
lower light levels depending on the venue
Neither position is automatically better.
The strongest concert photographers learn how to use whatever position they have.
Look for the Light Before the Moment
Good positioning is not just about where the performer stands.
It is about where the light is going to be.
Watch for:
spotlights hitting the vocalist
colored lighting changes
backlighting behind performers
moments when multiple lights overlap
A technically sharp photo with poor lighting often feels flat.
A well-timed image with strong lighting can feel much more powerful.
Positioning Is Everything
Where you stand matters more than your gear.
Look for:
clean sightlines
angles that isolate the subject
lighting hitting the performer
Small position changes can completely change your shot.

concert photography angle positioning stage performer
How to Anticipate Moments
The biggest difference between beginners and experienced concert photographers is often anticipation.
Beginners react after something happens.
Experienced photographers recognize when something is about to happen.
Great moments usually have a buildup.
Watch for:
a singer moving toward the microphone
a guitarist stepping forward
a drummer preparing for a fill
a performer interacting with the crowd
a lighting change building in the background
Instead of constantly pressing the shutter, learn to predict.
The goal is:
see the moment forming → prepare your composition → capture the peak
Shoot the Peak Moment
The strongest concert photos often happen during:
a powerful vocal moment
a dramatic pose
an instrument movement
crowd interaction
a lighting peak
A performer standing still can create a clean portrait.
A performer fully engaged creates a story.
Composition During Live Performances
Concert photography composition is about creating order inside chaos.
You cannot control:
stage design
lighting placement
performer movement
background distractions
But you can control:
timing
framing
positioning
lens choice
Look for:
Subject Isolation
Make sure the viewer knows exactly where to look.
Use:
shallow depth of field
lighting contrast
cleaner backgrounds
tighter framing
Layering
Not every image needs to be perfectly clean.
Foreground elements can add depth:
audience hands
instruments
stage lights
silhouettes
Environmental Images
Remember that concerts are experiences.
Not every photo should be a close-up.
Wide images can show:
venue atmosphere
crowd energy
stage production
relationship between performer and audience
A strong concert gallery usually includes both intimate portraits and storytelling images.
👉 Improve your framing:
Concert Photography Composition Guide
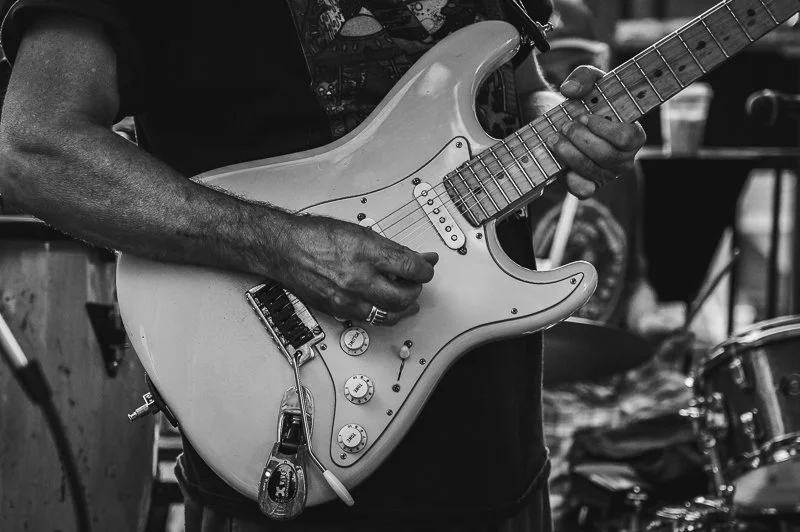
concert photography composition framing live music
Autofocus Techniques That Help Beginners
Autofocus is one of the biggest challenges when shooting moving performers.
The good news:
Modern cameras are extremely capable if configured correctly.
Start with:
Continuous Autofocus
Use:
AF-C on Nikon/Sony cameras
AI Servo on Canon cameras
Continuous autofocus allows the camera to adjust as performers move.
Use Tracking When Available
Modern subject tracking can help with:
vocalists moving across stage
musicians changing position
unpredictable movement
However, do not rely on it completely.
The camera still needs your guidance.
Avoid Overly Large Focus Areas
Large autofocus zones can lock onto:
microphones
instruments
stage lights
background objects
Smaller focus areas often provide more control.
Working With Difficult Lighting
Concert lighting is one of the hardest parts of live music photography.
You will encounter:
extremely bright spotlights
deep shadows
red or blue color casts
rapidly changing exposure
The biggest mistake beginners make is trying to make every frame perfectly exposed.
Concert photography is about adapting.
Watch the Light
Instead of fighting difficult conditions:
wait for better lighting moments
use shadows creatively
embrace dramatic contrast
A performer partially covered in shadow can create a much stronger image than a flat, evenly lit photo.
Expect Changing Settings
You may need to adjust:
ISO
shutter speed
exposure compensation
autofocus settings
during the same song.
That is normal.
👉 See full low light approach:
Concert Photography Low Light Tips

concert photography low light stage lighting example
Small Venue vs Large Venue Shooting
Concert photography changes dramatically depending on the environment.
Small Venues
Small venues often provide:
closer access
more intimate moments
stronger connection with performers
But they also create challenges:
poor lighting
limited movement
distracting backgrounds
tight spaces
Small venues reward photographers who can react quickly.
👉 See the full guide:
Small Venue Concert Photography Guide
Large Venues
Large concerts usually provide:
better lighting systems
more stage production
stronger separation from performers
Challenges include:
more distance
limited shooting locations
stricter photo rules
Large venues require stronger anticipation because you may have fewer opportunities.
Real-World Shooting Workflow
A simple workflow helps reduce mistakes during your first concerts.
Before the Show
Prepare:
batteries charged
memory cards cleared
camera settings checked
lenses cleaned
Research:
performers
stage layout
venue restrictions
lighting setup if possible
During the Performance
Focus on:
establishing shots
performer portraits
emotional moments
crowd interaction
unique angles
Do not spend the entire show chasing one type of image.
A complete gallery tells a story.
After the Show
Immediately:
back up images
create a first selection
mark strongest shots
avoid editing everything
The goal is not to keep every frame.
The goal is to build a collection of the best moments.
After the Show: Your First Concert Photography Workflow
The work does not stop when the concert ends.
A strong concert photography workflow continues after you leave the venue. The way you organize, select, and edit your images is just as important as how you captured them.
After your first concert, focus on building a repeatable process:
reviewing your images efficiently
selecting your strongest moments
editing consistently
learning from mistakes
The goal is not to keep every photo.
The goal is to build a smaller collection of images that actually represent the performance.
Culling Your First Concert Photos
One of the biggest beginner mistakes is keeping too many images.
Concerts create a lot of similar frames, especially when shooting bursts.
Instead of saving everything, look for:
sharp focus
strong expressions
interesting lighting
unique moments
clean compositions
A great concert gallery might only contain a small percentage of the images you capture.
Quality matters more than quantity.
Editing Your First Concert Photos
Concert photos often require more editing than photographers expect.
You will commonly deal with:
extreme color changes from stage lighting
high ISO noise
uneven exposure
strong shadows
A good editing workflow focuses on preserving the feeling of the performance.
Prioritize:
correcting exposure
balancing color
maintaining skin tones
reducing distracting elements
keeping the energy of the moment
Avoid over-processing.
Concert photography should still feel like a live performance—not a heavily edited studio portrait.
👉 Continue learning:
Common Beginner Mistakes
Every concert photographer makes mistakes when starting out.
The important thing is recognizing them quickly and adjusting.
Shooting With a Shutter Speed That Is Too Slow
This is one of the most common problems.
Photographers often try to keep ISO low and end up with blurry images.
Remember:
A noisy sharp image can usually be improved.
A blurry image cannot.
Prioritize:
freezing movement
accurate focus
usable images
Ignoring Positioning
Many beginners stay in one spot for the entire performance.
But small movements can completely change an image.
Try:
changing your angle
moving left or right
looking for cleaner backgrounds
finding better light
Your position affects:
composition
background distractions
subject separation
Relying Too Much on Gear
Better equipment helps, but it does not replace experience.
A professional camera cannot fix:
poor timing
weak composition
missed moments
Learning to see the image before pressing the shutter is more valuable than constantly upgrading equipment.
Shooting Everything Instead of Anticipating
Holding down the shutter button constantly can create thousands of similar photos.
Instead:
Watch the performer.
Look for:
movement
expressions
interaction
lighting changes
The strongest images often happen because you predicted the moment.
Over-Editing Your Images
Heavy edits are another common beginner mistake.
Avoid:
extreme saturation
excessive sharpening
unnatural colors
removing all shadows
The goal is to enhance the performance—not change what happened.
How to Improve After Your First Concert
Your first concert shoot is only the beginning.
The fastest way to improve is to review your own work.
After each show, ask:
What worked?
Were my shutter speeds fast enough?
Did I capture real moments?
Were my compositions strong?
Did my position help or hurt my images?
What needs improvement?
Focus accuracy?
Timing?
Lighting?
Lens choice?
Every concert teaches you something.
Build a Consistent Style
Over time, you will begin to notice patterns in your strongest images.
Your style develops through:
the moments you look for
the angles you prefer
the way you use light
the emotions you capture
Do not worry about copying other photographers.
Study great work, but develop your own approach.
Building Toward More Concert Photography Opportunities
Once you have photographed a few shows, the next step is building consistency.
Start by:
creating a focused portfolio
photographing local artists
sharing your strongest work
connecting with venues and musicians
Small venues are often the best place to build experience because they allow you to:
shoot more often
get closer access
experiment
improve faster
Many professional concert photographers started by photographing local bands and smaller shows.
How to Get More Access After Your First Show
Getting your first opportunity is often the hardest step.
Once you have examples of your work, you can begin reaching out.
Potential opportunities include:
local bands
independent artists
small venues
festivals
music publications
When reaching out, focus on what you offer.
Show:
your portfolio
examples from similar shows
your reliability
your understanding of music photography
Relationships matter as much as photography skills.
👉 Continue learning:
Final Thoughts
Shooting your first concert can feel intimidating.
The combination of:
low light
movement
limited access
unpredictable moments
makes live music photography challenging.
But it is also one of the most rewarding areas of photography.
You do not need perfect gear.
You need:
a camera you understand
a reliable lens
patience
good timing
willingness to learn
Your first concert will not be perfect.
That is normal.
Every experienced concert photographer started with a first show.
The goal is simple:
Show up. Learn. Improve. Shoot again.
Frequently Asked Questions
Do I need a professional camera to shoot my first concert?
No. You do not need expensive professional gear to get started.
A camera with decent low-light performance and a fast lens is enough to begin learning concert photography.
The most important skills are understanding exposure, timing, and composition.
What lens should I use for my first concert?
A versatile lens is usually the best starting point.
Popular choices include:
24–70mm f/2.8 zoom lenses
50mm f/1.8 primes
35mm fast primes
A fast lens helps you capture more light and maintain faster shutter speeds in darker venues.
What camera settings should I use for my first concert?
A good starting point:
Shutter speed: 1/250 or faster
Aperture: as wide as possible
ISO: adjust based on lighting conditions
Autofocus: continuous AF with tracking when available
Concert settings will change constantly depending on the venue.
How do I get permission to photograph concerts?
Start with smaller opportunities.
Good places to begin:
local bands
small venues
independent artists
Build a portfolio first, then use your work to request access to larger shows.
Should I shoot RAW for concert photography?
Yes.
RAW files provide much more flexibility when dealing with:
difficult lighting
changing exposure
strong color casts
Concert lighting can be unpredictable, so RAW gives you more recovery options.
How many photos should I take at my first concert?
There is no exact number, but focus on intentional shooting rather than volume.
Capturing hundreds or thousands of similar images makes editing harder.
Look for meaningful moments instead of simply increasing your frame count.
What is the hardest part of concert photography for beginners?
The biggest challenges are usually:
getting sharp images in low light
anticipating moments
learning where to position yourself
These skills improve quickly with experience.
How do I improve after my first concert?
Review your images after every show.
Look for patterns:
what settings worked
what moments you missed
what compositions were strongest
Each concert should teach you something new.
==========
All photographs © Chris Sidoruk. Images are protected by copyright and may not be used, copied, modified, or redistributed without written permission.
Related Resources
Continue building your concert photography skills:
