

Nubble Lighthouse Photography Guide | York, Maine
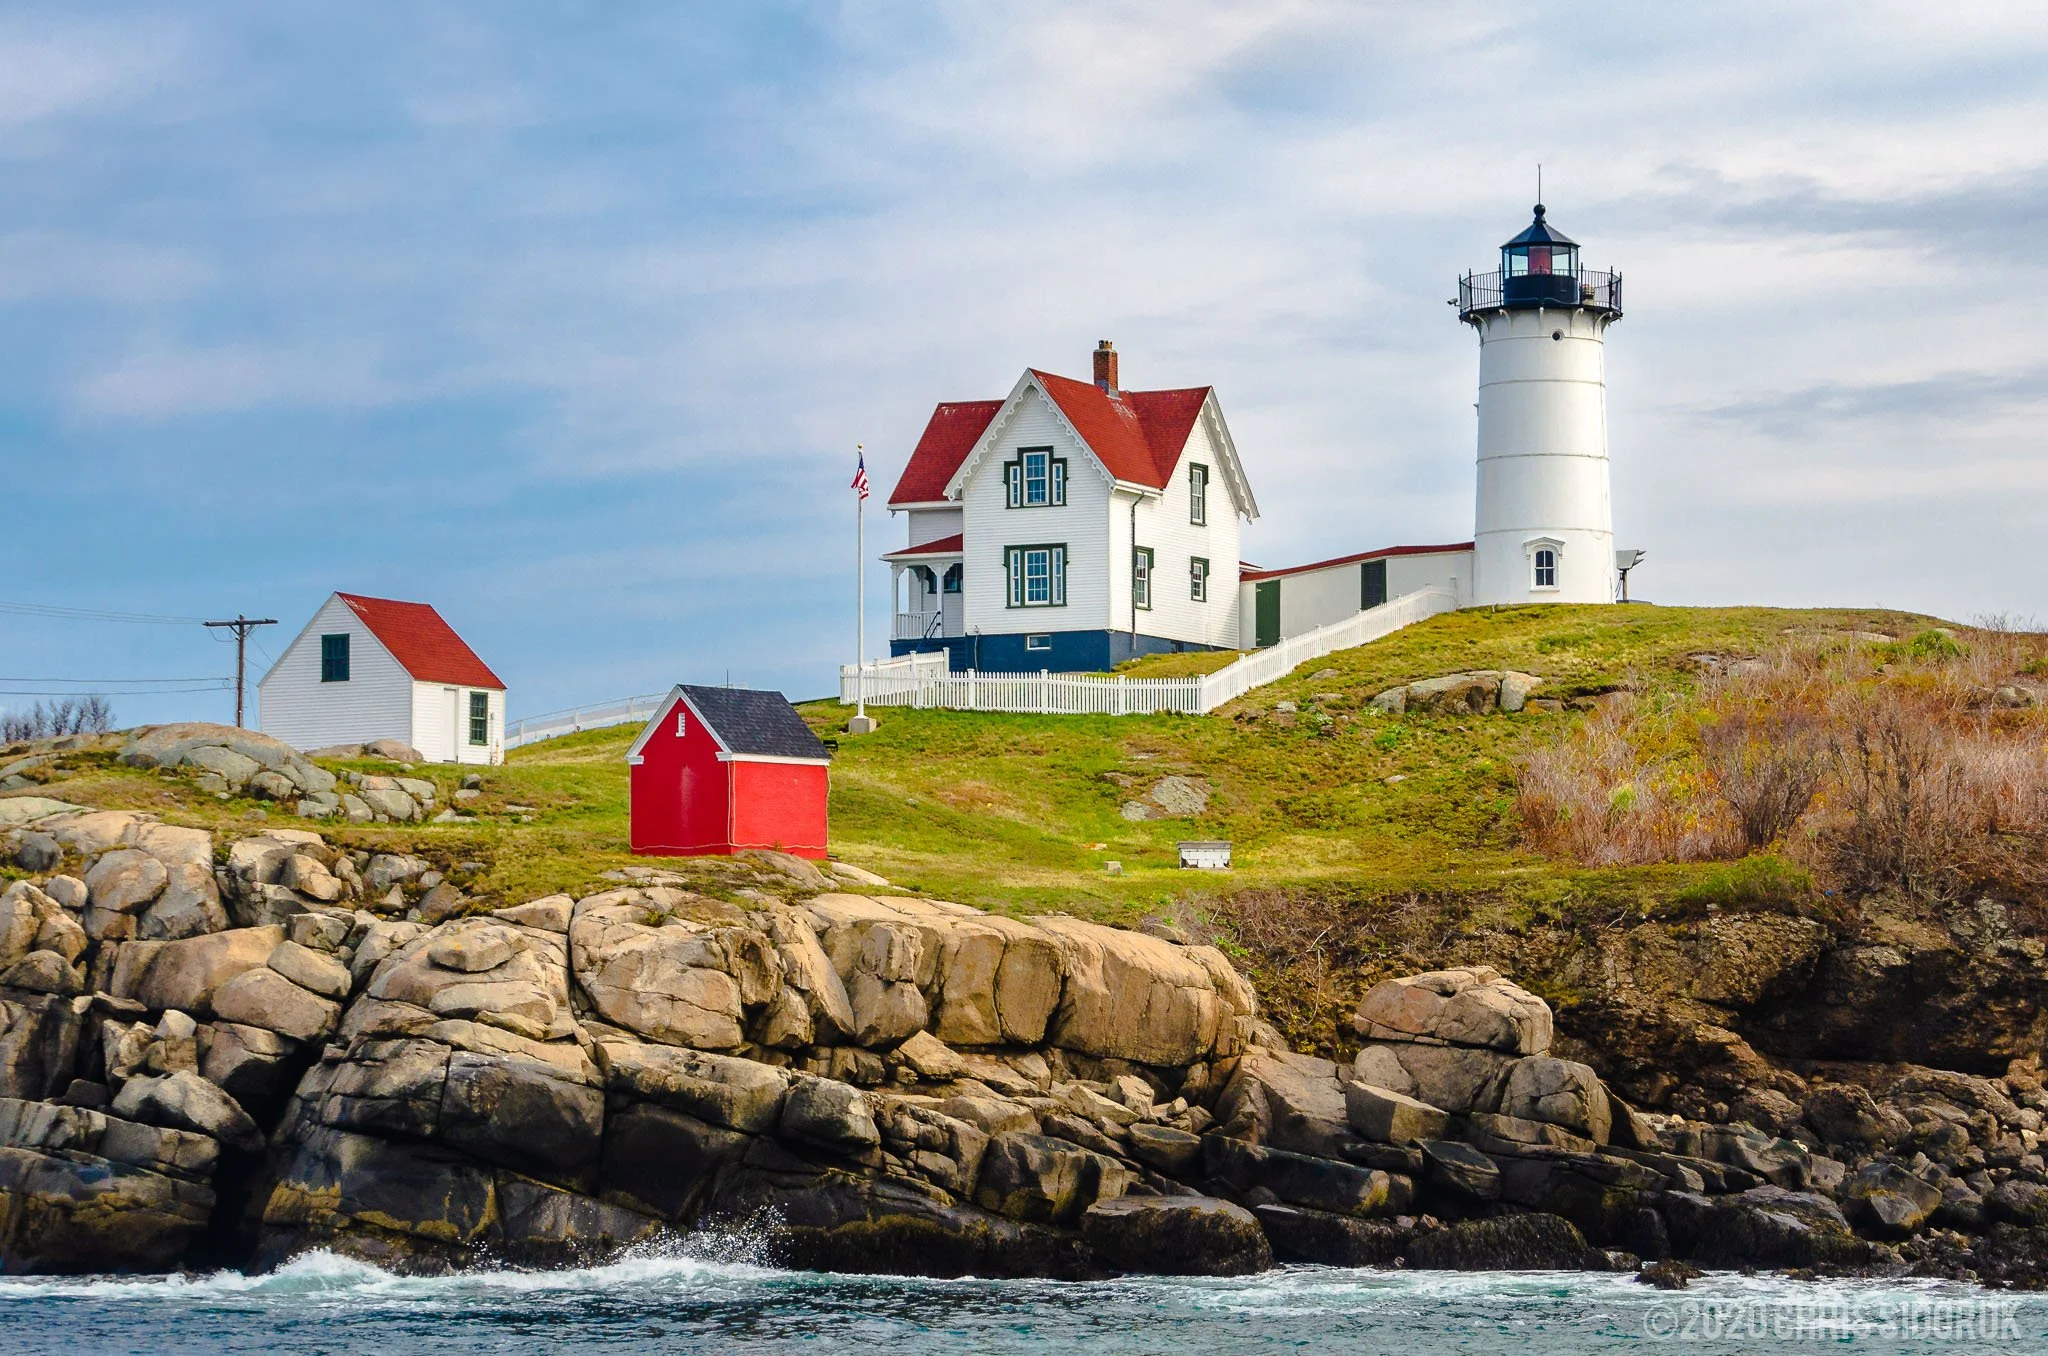
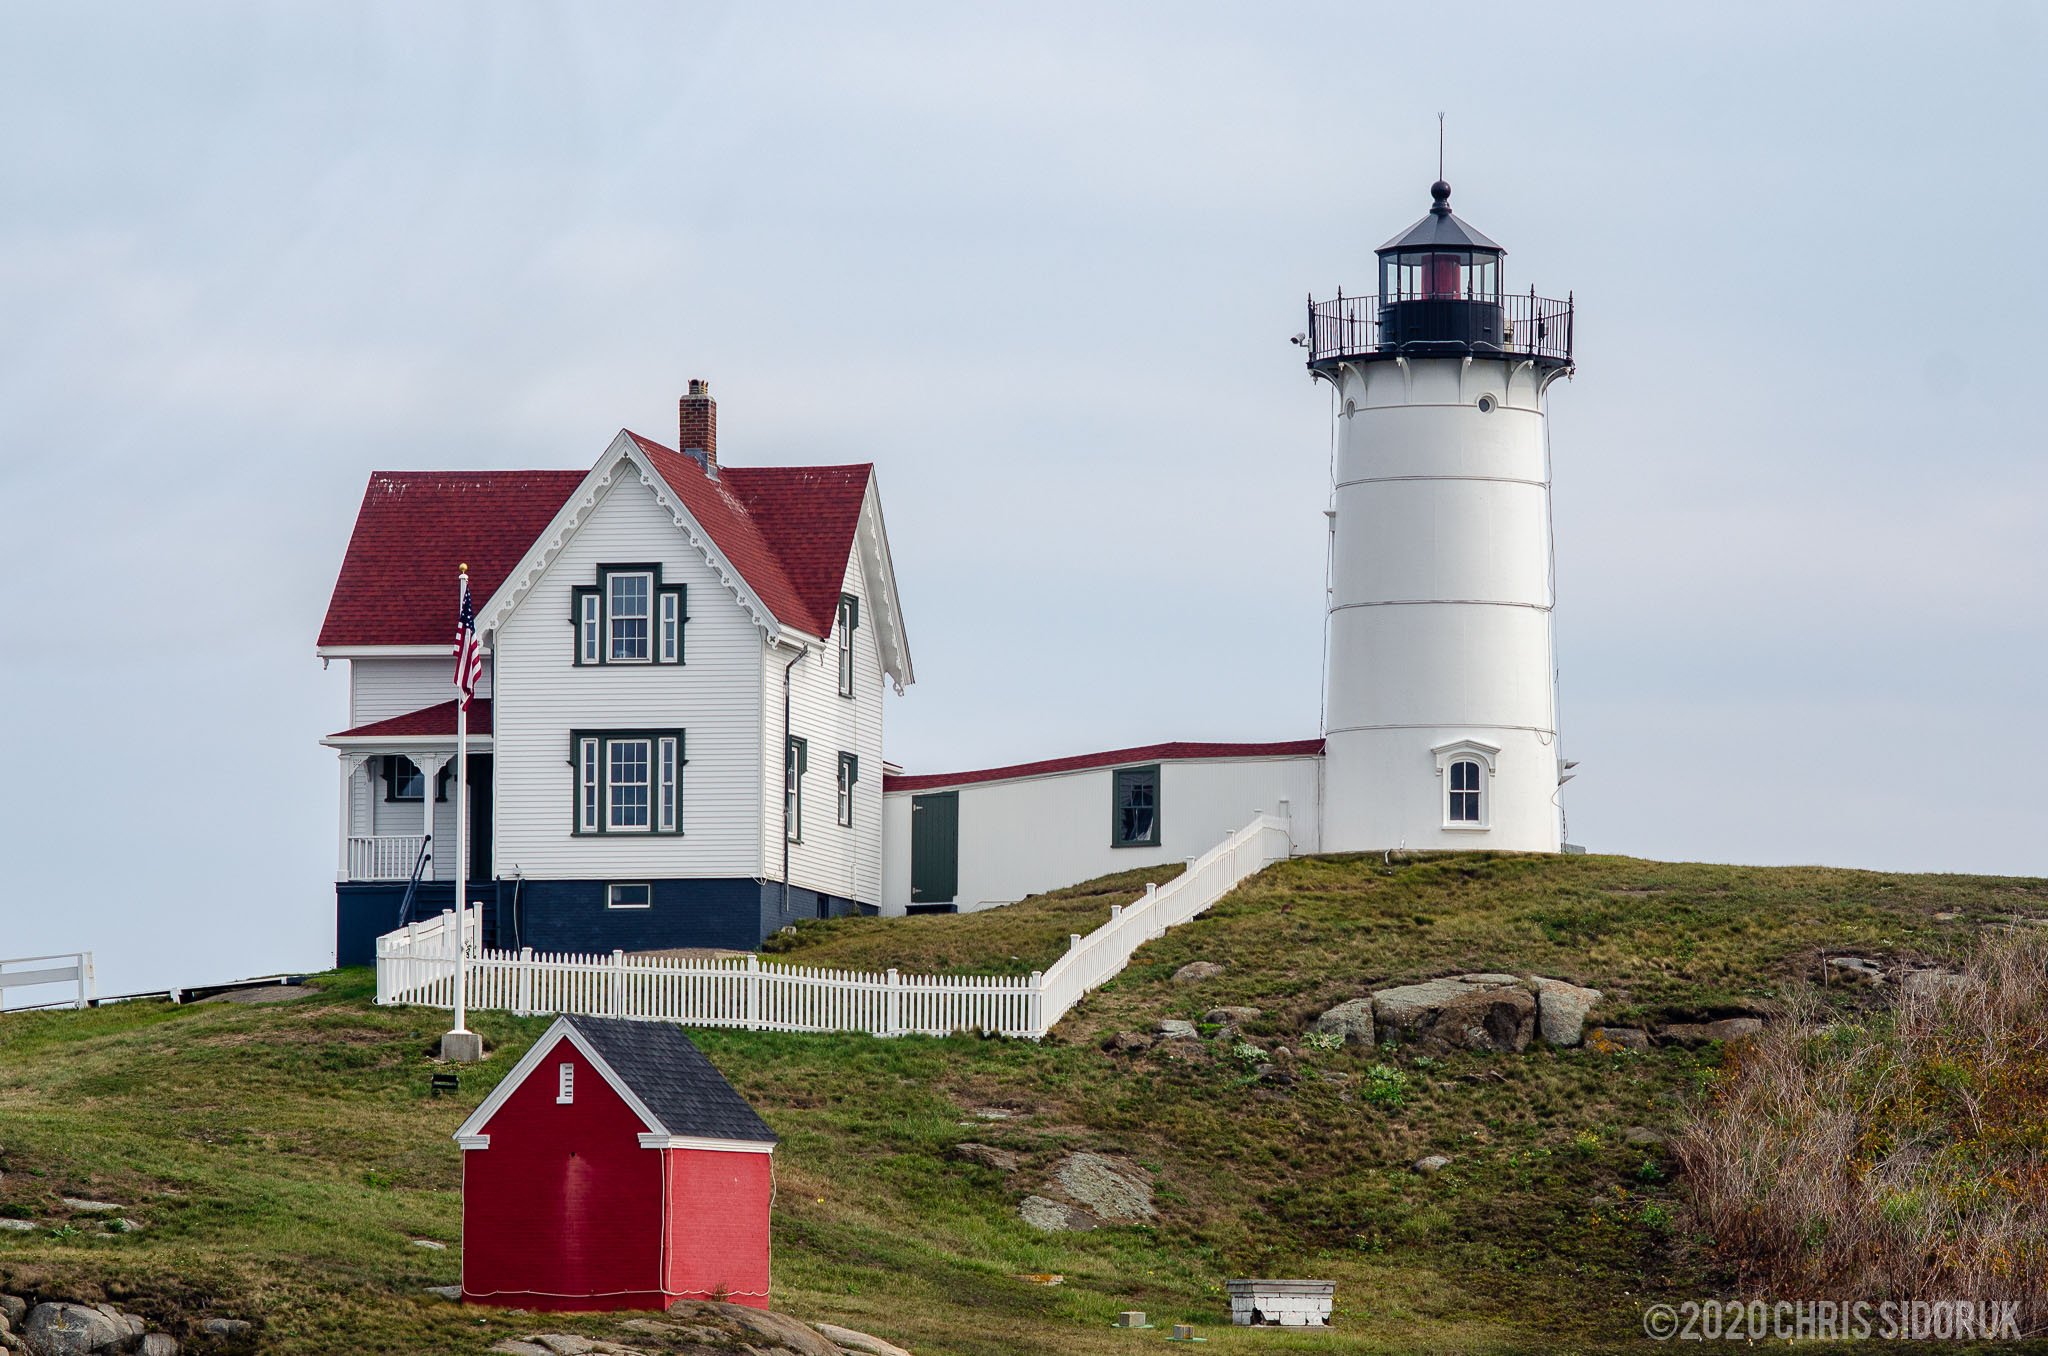
The scene above is also available as a fine art print of Nubble Lighthouse, capturing the balance of coastline, light, and atmosphere.
==========
Nubble Lighthouse is one of the most recognizable photography subjects on the Maine coast. Officially known as Cape Neddick Light, the lighthouse sits on a small rocky island just offshore from York, creating a clean and instantly recognizable coastal composition.
For photographers, the appeal is not simply the lighthouse itself. The scene changes continuously with the weather, ocean conditions, season, and quality of light. A calm summer sunrise can produce soft color and minimal water movement, while an approaching storm may transform the same view into a dramatic coastal landscape filled with textured surf and heavy clouds.
This guide is designed to help photographers plan a visit, understand how the location responds to different conditions, choose useful gear, and build stronger compositions from the mainland viewing area.
Unlike a general York, Maine travel guide, this page focuses specifically on photographing Nubble Lighthouse. It covers the practical and creative factors that can influence an image before you arrive and while you are working in the field.
Nubble Lighthouse Photography Overview
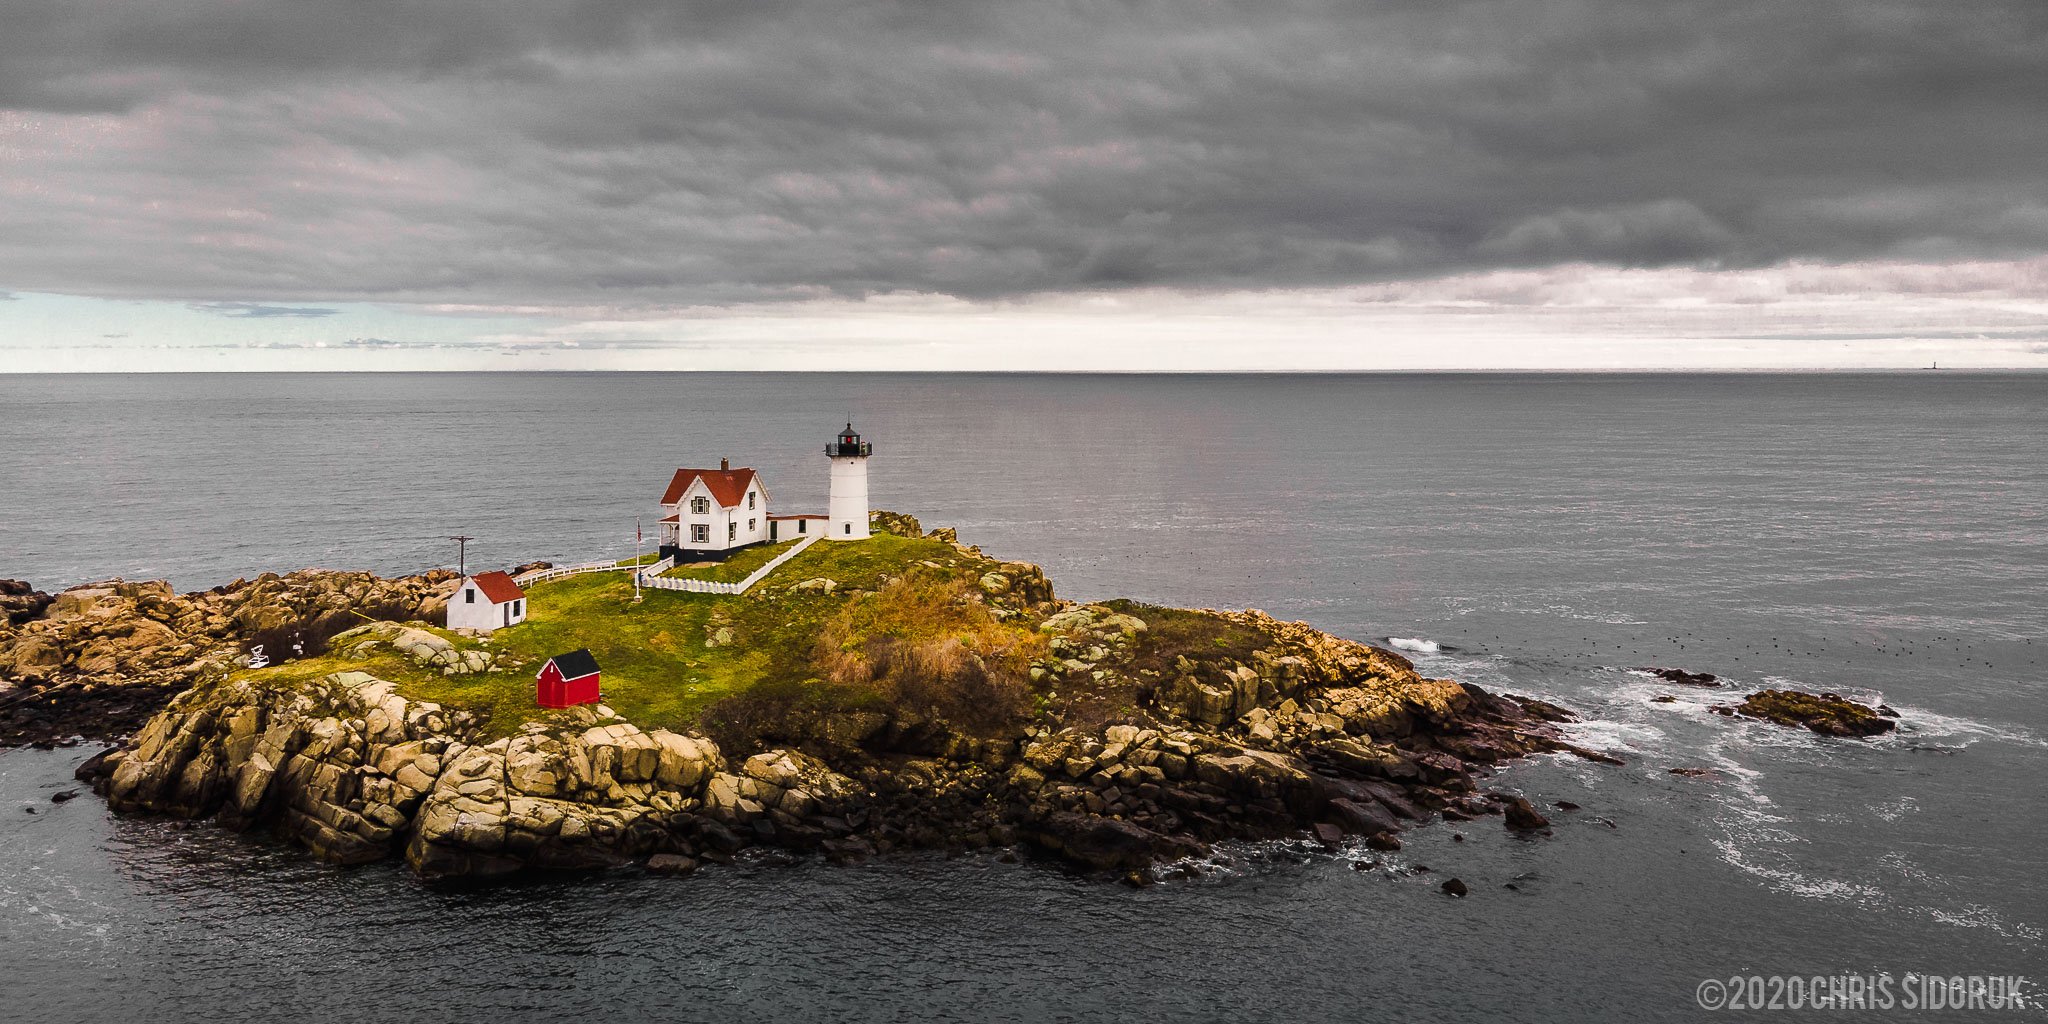
Nubble Lighthouse is located in York, Maine, along the southern coast of the state. The lighthouse stands on Nubble Island, a small rocky outcrop separated from the mainland by a narrow channel.
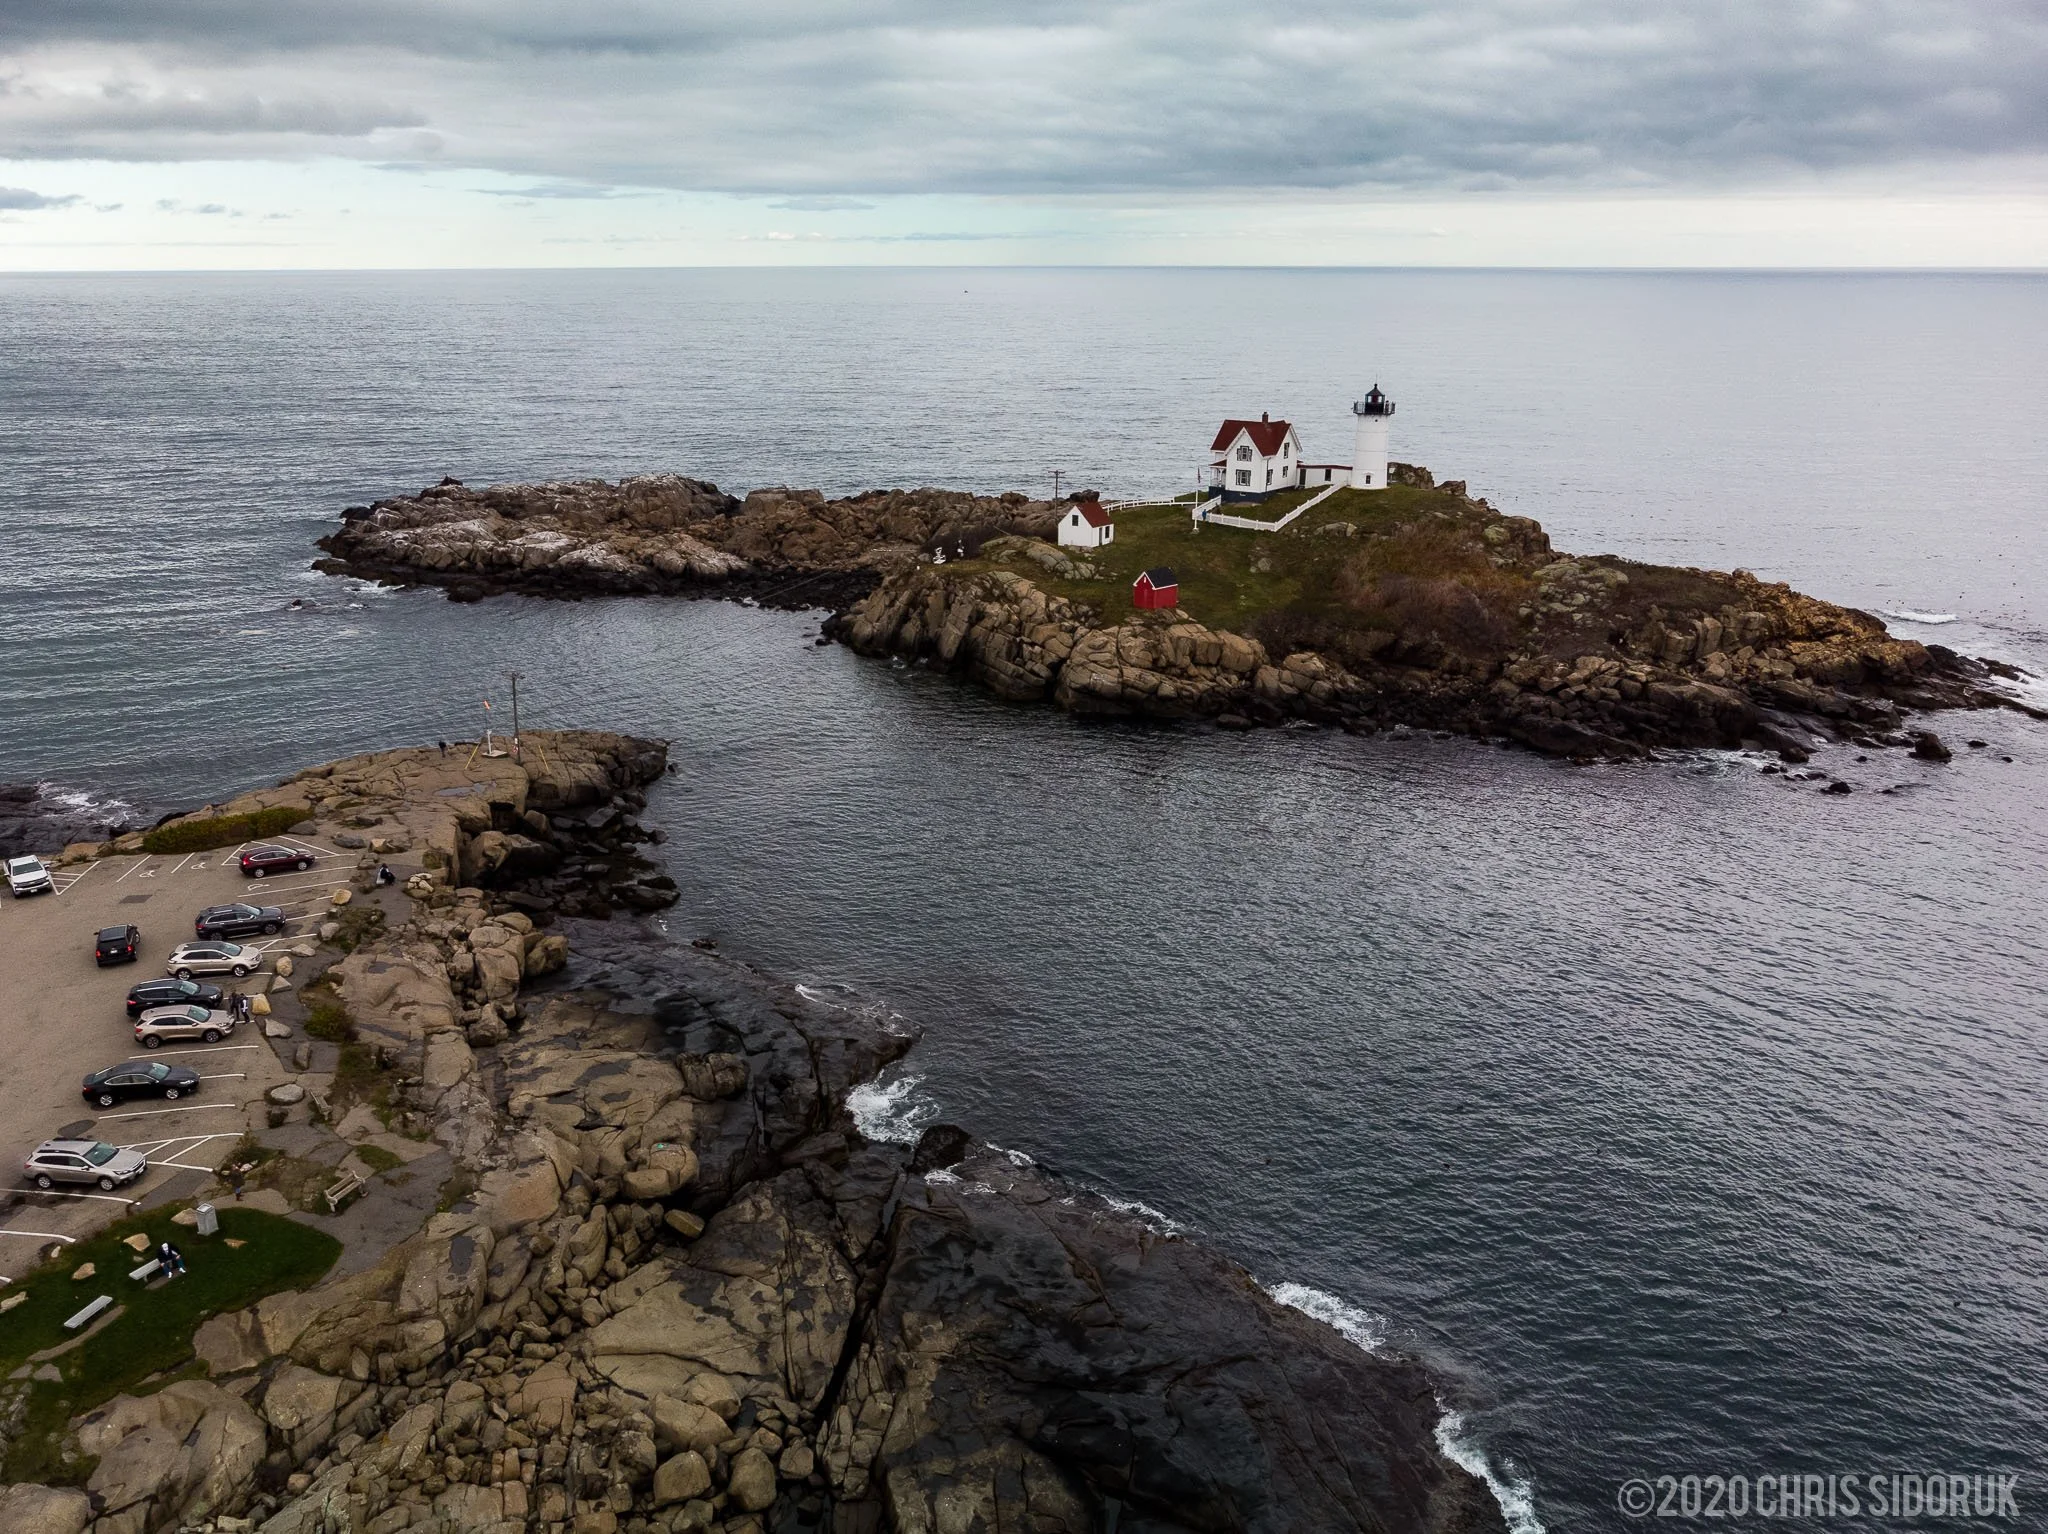
The island itself is not open for public photography access. Instead, visitors photograph the lighthouse from Sohier Park, the public viewing area directly across the water.
This setup gives the location several advantages for landscape photography:
The lighthouse remains clearly separated from the mainland
The rocky island creates a natural base beneath the structure
The Atlantic Ocean adds movement and atmosphere
The coastline provides multiple foreground and framing options
Small changes in weather can dramatically alter the appearance of the scene
Because the lighthouse remains in a fixed position while the environment changes around it, Nubble Lighthouse is a location that rewards repeat visits. The same composition may look completely different under clear skies, coastal fog, overcast conditions, colorful sunrise light, or rough surf.
The location is also approachable for photographers at different experience levels. A simple camera and standard zoom lens can produce strong images, while more advanced photographers can experiment with long exposures, telephoto compression, filters, atmospheric conditions, and detailed post-processing.
Why Nubble Lighthouse Is a Strong Photography Subject
Many coastal photography locations require extensive hiking, difficult access, or precise timing to find a usable composition. Nubble Lighthouse is different.
The primary viewing area is easy to reach, and the lighthouse provides an immediate focal point. This allows photographers to spend more time evaluating light, weather, foreground structure, and camera settings instead of searching for the subject.
The composition is also flexible.
A wider lens can include the surrounding coastline, ocean, sky, and rocky foreground. A mid-range zoom can create a balanced image centered on the lighthouse and island. A longer telephoto lens can isolate the structure, compress layers of waves, or emphasize the relationship between the lighthouse and changing ocean conditions.
The scene works particularly well because it combines several visual elements:
A clear focal point
The lighthouse immediately attracts attention and gives the image a recognizable subject.
Natural separation
The water surrounding Nubble Island helps separate the lighthouse from the mainland and reduces visual clutter.
Changing foregrounds
Rocks, shoreline textures, waves, and water movement can change the visual balance of an image.
Variable atmosphere
Fog, clouds, sea spray, and changing light can create dramatically different results from the same general viewpoint.
Strong seasonal character
Summer, fall, winter, and spring each bring different weather patterns, colors, ocean conditions, and photographic opportunities.
Nubble Lighthouse is therefore not a location with one “correct” photograph. It is a repeatable composition base that responds to changing environmental conditions.
Planning Your Photography Visit
A successful photography visit begins before you arrive. Because the lighthouse is visible from a public viewing area, access is relatively straightforward, but conditions can strongly influence the type of image you are able to create.
Before leaving, check the weather forecast, cloud cover, wind conditions, and expected sunrise or sunset timing. If you are planning a long-exposure image, also consider how wind and surf may affect the foreground and the stability of your tripod.
A clear forecast is not always the best forecast for photography.
Completely clear skies can produce clean color during sunrise or sunset, but they may also create a visually simple scene with limited cloud structure. Broken clouds can add depth and texture, while overcast conditions may create soft, even light. Coastal fog can simplify the composition and isolate the lighthouse against a muted background.
The conditions you choose should match the type of image you want to create.
For example:
Clear or partly cloudy mornings can work well for soft sunrise color
Broken clouds may create stronger sky structure and more dramatic light
Overcast weather can provide even exposure and subdued coastal tones
Fog can produce minimalist and atmospheric images
Wind and active surf can add motion and energy to the foreground
Calm conditions can create cleaner, more graphic compositions
If possible, arrive early enough to explore the viewing area before the best light begins. This gives you time to evaluate the shoreline, choose a composition, set up your tripod, and make test exposures without rushing.
Where to Photograph Nubble Lighthouse
The primary public photography location is Sohier Park, located on the mainland directly across from Nubble Island.
From the park, photographers have a clear view of the lighthouse, island, and surrounding Atlantic coastline. The main overlook provides the most recognizable view, but small movements along the shoreline can change the relationship between the foreground, water, island, and lighthouse.
You do not need to walk far to find different compositions. Moving a short distance can alter:
The amount of rocky foreground in the frame
The position of the lighthouse relative to the horizon
The direction and appearance of waves
The balance between ocean and sky
The amount of surrounding coastline included
This is especially useful when multiple photographers are working from the same general area. Rather than setting up directly beside another tripod, move along the accessible shoreline and look for a composition with a different foreground or visual balance.
For a dedicated breakdown of specific viewpoints, framing options, and composition ideas, visit:
Best Nubble Lighthouse Photo Spots in York, Maine →
That supporting page goes deeper into the individual photo locations and composition approaches. This hub focuses on the broader planning, lighting, weather, gear, and field techniques needed to photograph the location successfully.
What to Bring
You do not need an extensive camera setup to photograph Nubble Lighthouse. A camera, a useful zoom lens, and a stable tripod are enough for many strong coastal images.
A practical starting kit includes:
A camera capable of shooting RAW files
A wide-angle or standard zoom lens
A sturdy tripod
Extra batteries
A lens cloth for sea spray
Weather protection for your camera and bag
If you plan to photograph moving water with longer shutter speeds, a neutral-density filter can be useful. A remote shutter release or camera self-timer can also help reduce vibration during longer exposures.
Coastal conditions can change quickly, so it is worth bringing a light rain layer and protecting your equipment from wind-driven moisture. Salt spray can accumulate on the front element of a lens even when it is not raining, particularly during windy conditions or periods of active surf.
Keep a clean microfiber cloth accessible and check the front of your lens regularly. A small amount of moisture or salt residue can reduce contrast and create soft spots or flare in an otherwise sharp image.
Photography Access and Field Etiquette
Sohier Park is a public viewing area, but photographers should remain aware of changing conditions and other visitors.
Avoid climbing on unstable rocks or moving into areas that may be affected by waves. Ocean conditions can change quickly, and wet coastal surfaces may be slippery.
When using a tripod:
Keep walkways and viewing areas clear
Avoid blocking other visitors’ views
Be aware of your tripod legs in crowded conditions
Secure your equipment during strong wind
Do not leave camera gear unattended
If you are photographing during sunrise or after sunset, bring a small light for safely moving around the viewing area. Use it carefully so that it does not interfere with other photographers who may be making long exposures.
Best Time to Photograph Nubble Lighthouse
There is no single best time to photograph Nubble Lighthouse because the location changes significantly with the light, weather, ocean conditions, and season.
For many photographers, sunrise offers the best combination of softer light, lower visitor activity, and more time to work without distractions. Sunset can produce warmer color and stronger contrast, while overcast weather, fog, and coastal storms can create images with a completely different mood.
The best time for your visit depends on the type of photograph you want to create.
| Condition | What It Can Offer |
|---|---|
| Sunrise | Soft light, subtle color, fewer visitors |
| Sunset | Warmer tones, stronger contrast, dramatic skies |
| Overcast | Even exposure, soft detail, muted coastal color |
| Fog | Atmospheric isolation and minimalist compositions |
| Calm ocean | Clean, simple water and quieter compositions |
| Active surf | Motion, texture, energy, and stronger foregrounds |
| Winter weather | Dramatic conditions and fewer crowds |
| Fall weather | Changing atmosphere, stronger cloud patterns, and seasonal color |
Sunrise
What It Can Offer: Soft light, subtle color, fewer visitors
Sunset
What It Can Offer: Warmer tones, stronger contrast, dramatic skies
Overcast
What It Can Offer: Even exposure, soft detail, muted coastal color
Fog
What It Can Offer: Atmospheric isolation and minimalist compositions
Calm Ocean
What It Can Offer: Clean, simple water and quieter compositions
Active Surf
What It Can Offer: Motion, texture, energy, and stronger foregrounds
Winter Weather
What It Can Offer: Dramatic conditions and fewer crowds
Fall Weather
What It Can Offer: Changing atmosphere, stronger cloud patterns, and seasonal color
Instead of choosing a visit based only on the time of day, consider the entire combination of light, sky, wind, and ocean conditions.
A cloudy morning with calm water may produce a more compelling photograph than a clear sunrise. Likewise, a stormy afternoon may create stronger coastal atmosphere than a warm but cloudless sunset.
Sunrise Photography at Nubble Lighthouse
Sunrise is often one of the most productive times to photograph Nubble Lighthouse.
Early morning light can create softer tonal transitions across the ocean and reduce the harsh contrast that develops later in the day. The lower angle of the sun may add subtle definition to the lighthouse, rocky island, and surrounding shoreline without creating overly bright highlights.
Sunrise also tends to be quieter than the middle of the day. Arriving before the sun comes up gives you time to explore the viewing area, select a composition, and set up your camera before the strongest color appears.
For sunrise photography, arrive at least 30 to 45 minutes before the published sunrise time. The sky may begin developing color well before the sun reaches the horizon, and some of the most balanced light can occur during civil twilight.
Look for:
Soft pink, orange, or blue color in the sky
Thin clouds that may reflect early sunlight
Calm or moderately active water
Low coastal haze
Reflections or subtle highlights around the island
A clear separation between the lighthouse and the background
If the sky is completely clear, the sunrise may be less dramatic but can still produce clean color and a simple coastal composition. If broken clouds are present, the light may change rapidly, creating brief periods of stronger color or directional illumination.
Avoid packing up immediately after sunrise. The light can remain useful for another 20 to 40 minutes as the sun rises higher and begins illuminating the coastline.
Sunrise Composition Ideas
At sunrise, try several approaches rather than photographing only the standard lighthouse view.
A wider composition can include:
The lighthouse and rocky island
A larger section of the ocean
Color developing across the sky
Foreground rocks or shoreline texture
A mid-range composition can emphasize:
The lighthouse as the primary subject
The shape of Nubble Island
A balanced amount of sky and water
A telephoto composition can isolate:
The lighthouse and keeper’s house
Layers of waves in front of the island
Details in the structure
Atmospheric haze around the coastline
If the water is calm, a cleaner composition may work best. If waves are active, look for patterns that lead toward the lighthouse or create movement across the foreground.
Sunset Photography at Nubble Lighthouse
Sunset can create warmer color and stronger contrast, but the results depend heavily on cloud cover and the direction of the light.
As the sun lowers, the scene may develop richer tones across the rocks, ocean, and sky. Depending on the conditions, sunset can create more pronounced texture in the water and stronger separation between illuminated and shaded areas.
Sunset photography can be especially effective when:
Broken clouds are present
The sky has visible structure
The ocean has moderate movement
Warm light reaches the rocks or surrounding coastline
The sky continues developing color after the sun sets
Arrive early enough to photograph the changing light before sunset. The scene may become increasingly contrasty as the sun gets lower, so monitor your highlights and review your histogram rather than relying only on the camera’s preview screen.
After the sun drops below the horizon, remain in place for the possibility of afterglow. The color after sunset may become softer and more evenly distributed, producing a calmer image with less contrast.
This period can be especially useful for long exposures because the lower light levels allow longer shutter speeds without requiring extremely strong neutral-density filters.
Sunset Photography Tips
Bracket exposures when the sky is much brighter than the foreground
Watch for clipped highlights in bright clouds
Use a tripod as light levels decrease
Try both short and long exposures
Check the horizon for level alignment
Continue shooting after the sun sets
If the sky remains clear and color is limited, shift your attention toward the lighthouse, ocean texture, and foreground structure rather than relying on the sunset alone.
Overcast Conditions
Overcast weather is often underestimated for coastal photography.
Cloud cover can reduce extreme contrast and provide more even illumination across the lighthouse, island, ocean, and foreground. This makes it easier to preserve detail throughout the frame without requiring aggressive exposure blending.
Overcast conditions can work particularly well when you want to emphasize:
The shape of the lighthouse
Texture in the rocky island
Subtle color in the water
Long-exposure movement
A quiet or understated coastal mood
The softer light may also make it easier to photograph later in the morning or earlier in the afternoon, when direct sunlight would otherwise create stronger contrast.
A flat gray sky is not always visually interesting on its own. If the cloud cover is featureless, consider reducing the amount of empty sky in the composition and giving more attention to the lighthouse, ocean, and foreground.
You can also use a longer focal length to tighten the frame and minimize areas that do not contribute to the image.
Fog and Coastal Haze
Fog can create some of the most atmospheric photographs at Nubble Lighthouse.
As visibility decreases, distant details may fade while the lighthouse remains partially isolated against the surrounding atmosphere. The scene can become quieter, simpler, and more minimal.
Fog may reduce the visual separation between the sky and ocean, creating a softer background around the lighthouse. This can make the structure appear more prominent even when the overall scene has less contrast.
When photographing in fog:
Use manual focus or carefully confirm autofocus accuracy
Check the lens frequently for moisture
Increase exposure slightly if the camera underexposes the bright fog
Keep the composition simple
Avoid excessive clarity or dehaze adjustments in post-processing
Fog does not always remain consistent. It may move across the coastline in waves, briefly revealing or concealing parts of the island and lighthouse.
Be patient and continue watching the scene. A short opening in the fog may create the strongest image of the session.
Wind, Waves, and Ocean Conditions
The Atlantic Ocean is not simply a background at Nubble Lighthouse. The condition of the water can change the visual energy of the entire composition.
Calm water creates a cleaner and more graphic image. Moderate waves add texture and movement. Strong surf can create dramatic foreground action, but it may also make composition and exposure more difficult.
Calm Ocean Conditions
Calm water works well for:
Minimalist compositions
Soft sunrise color
Clean reflections
Simple lighthouse-centered framing
Long exposures with smooth tonal gradients
When the ocean is relatively quiet, the lighthouse and island may become the dominant visual elements. This can produce an image with a strong sense of balance and simplicity.
Moderate Ocean Conditions
Moderate wave activity often provides the most flexible photography conditions.
The water adds movement and texture without overwhelming the lighthouse. You can use different shutter speeds to control how much detail remains visible in the waves.
Try:
Faster exposures to preserve wave texture
Medium shutter speeds to show controlled motion
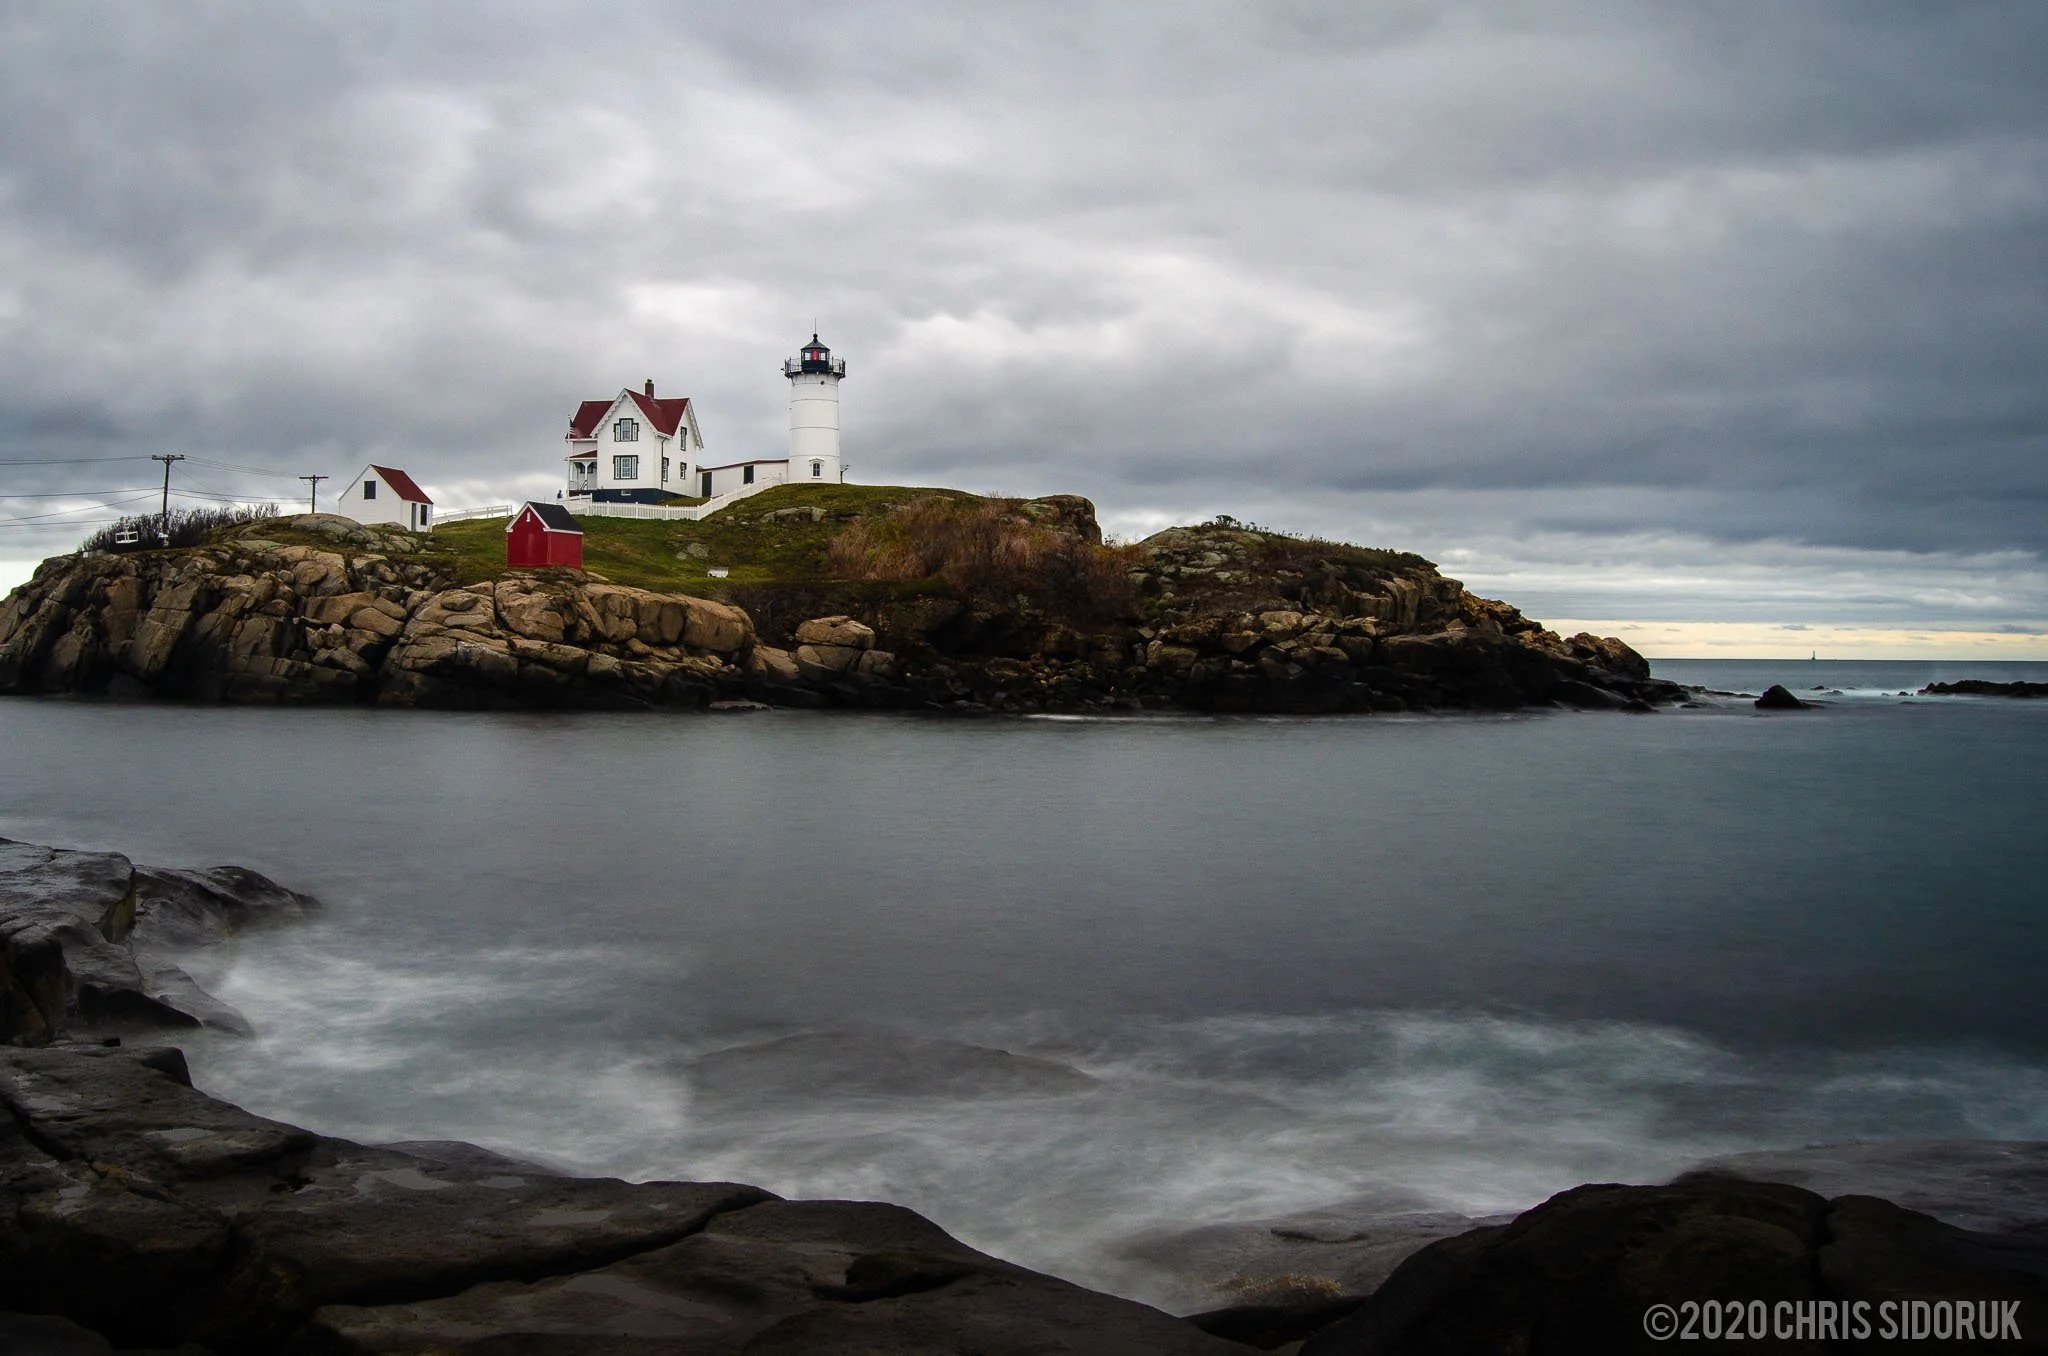
Longer exposures to soften the water while retaining the lighthouse as a sharp focal point
Moderate surf can also create leading lines that guide the viewer toward Nubble Island.
Rough Surf and Storm Conditions
Strong wind and active surf can create dramatic coastal images, especially when combined with heavy clouds or changing light.
However, difficult conditions require additional caution.
Stay well back from exposed shoreline areas, avoid slippery rocks, and do not move into locations that may be affected by unexpected waves. Protect your camera from wind-driven spray and keep your tripod stable.
In strong wind:
Extend tripod legs carefully
Avoid raising the center column
Use a heavier, more stable tripod when possible
Keep a hand near the camera during gusts
Remove loose straps that may move during an exposure
Clean salt spray from the lens regularly
Rough conditions may create powerful images, but safety should always take priority over getting closer to the water.
How Weather Changes the Photograph
Weather affects more than the appearance of the sky.
Cloud cover changes the quality of light. Wind changes the texture of the ocean. Humidity and haze affect visibility. Rain can deepen the color of rocks and create reflective surfaces. Fog can simplify the entire scene.
Before your visit, look beyond the basic weather icon.
Consider:
Cloud coverage at sunrise or sunset
Wind speed and direction
The possibility of coastal fog
Recent or approaching weather systems
Ocean and surf conditions
Visibility along the coast
A forecast showing “cloudy” may still produce excellent photography if the clouds have structure or are changing quickly. A forecast showing “clear” may be useful for clean color but may provide less dramatic sky detail.
The goal is not to wait for perfect weather. It is to understand how different conditions may influence your composition.
Seasonal Photography at Nubble Lighthouse
Nubble Lighthouse can be photographed throughout the year, but every season brings different conditions.
Spring
Spring often brings rapidly changing weather, coastal haze, clouds, rain, and periods of active ocean movement.
Photography opportunities may include:
Atmospheric cloud formations
Changing weather systems
Fresh coastal color
Variable surf conditions
Fewer visitors than peak summer periods
Spring conditions can be unpredictable, so flexible planning is useful. A forecast may change quickly near the coast.
Summer
Summer generally offers warmer temperatures and easier conditions for longer photography sessions. It is also one of the busiest times of year.
Summer photography may provide:
Comfortable early-morning conditions
Clear skies
Calmer ocean periods
Longer daylight hours
More accessible travel conditions
The main challenge is visitor activity, particularly later in the day. Sunrise is often the best option if you want more space to work and fewer people in the frame.
Summer haze can also reduce distant contrast. This may create softer images but can make the lighthouse appear less defined when using longer focal lengths.
Fall
Fall can bring some of the most varied weather conditions of the year.
The coastline may experience:
Stronger cloud formations
Cooler air
Changing ocean conditions
More dramatic light
Reduced visitor activity compared with peak summer
Although Nubble Island itself is not a fall-foliage location, the surrounding coastal environment can take on warmer seasonal color. Fall weather may also create more atmospheric variety than stable summer conditions.
Winter
Winter can produce some of the most dramatic coastal photographs, but it also presents the greatest challenges.
Potential advantages include:
Strong weather systems
Dramatic clouds
Active surf
Lower visitor activity
Cold, clear light
Snow or ice in the surrounding landscape
Challenges may include:
Freezing temperatures
Strong wind
Slippery surfaces
Reduced comfort during long sessions
Difficult travel conditions
Bring extra batteries and keep them warm when possible. Cold temperatures can reduce battery life, especially during long exposures or extended Live View use.
Winter photography may produce powerful results, but conditions should be evaluated carefully before traveling.
Choosing the Best Conditions for Your Style
Different photographers may prefer different conditions at the same location.
If you prefer clean, natural coastal landscapes, look for:
Calm water
Soft sunrise light
Light cloud cover
Clear visibility
If you prefer dramatic images, look for:
Active surf
Broken or stormy clouds
Strong wind
Changing weather
If you prefer minimalist photography, look for:
Fog
Low contrast
Calm water
Simple compositions
If you want to create long exposures, look for:
Moderate water movement
Stable footing
Manageable wind
Soft light before or after sunrise or sunset
The strongest conditions are often the ones that support your intended visual style—not necessarily the conditions that look most impressive in a weather forecast.
Best Nubble Lighthouse Photography Locations
Nubble Lighthouse is photographed from the mainland at Sohier Park in York, Maine. The lighthouse sits offshore on Nubble Island, creating a clear visual separation between the structure and the surrounding coastline.
Because the island is not open to public access, the photography experience is centered on finding the strongest composition from the public viewing areas. The location is relatively compact, but small changes in position can noticeably affect the foreground, horizon, wave patterns, and overall balance of an image.
The most recognizable view is available near the main overlook, where the lighthouse, keeper’s house, and rocky island can be photographed together. This is a strong starting point, but it should not be the only composition you explore.
Move gradually along the accessible viewing area and pay attention to how the scene changes. A shift of only a few feet may alter:
The amount of rocky foreground in the frame
The position of the lighthouse relative to the horizon
The spacing between the lighthouse and the island’s edges
The direction of wave movement
The balance between sky, ocean, and land
The amount of nearby coastline included
The goal is not simply to find the closest view. It is to find a position where the foreground and surrounding environment support the lighthouse rather than compete with it.
For a dedicated breakdown of individual viewpoints and photo-spot ideas, see:
Best Nubble Lighthouse Photo Spots in York, Maine →
That supporting page focuses more specifically on viewpoint selection and composition variations. This guide continues with the broader field techniques that help photographers make the most of those locations.
The Main Sohier Park Overlook
The main overlook provides the classic Nubble Lighthouse composition.
From this area, photographers can usually include:
Cape Neddick Light
The keeper’s house
The rocky island
The surrounding Atlantic Ocean
A portion of the coastal shoreline
A large section of sky
This view works well because the lighthouse is immediately recognizable and remains visually separated from the mainland.
A standard composition often places the lighthouse near the center of the frame, but centered framing is not the only option. Depending on the sky and foreground, shifting the lighthouse slightly left or right may create a more balanced image.
When working from the main overlook, evaluate the scene in layers:
Foreground: rocks, water movement, shoreline texture, or wave patterns
Middle ground: the ocean and Nubble Island
Background: the sky, clouds, fog, or distant atmosphere
A strong image usually gives each layer a purpose. If the foreground is empty or distracting, simplify the composition. If the sky is dramatic, allow more space above the lighthouse. If the sky is flat, reduce the amount of empty space and emphasize the island and ocean.
Moving Along the Shoreline
The best way to find a more personal composition is to move slowly along the accessible shoreline rather than photographing only from the first viewpoint.
Small lateral changes can affect the image more than changing lenses.
As you move, watch for:
Foreground rocks that lead toward the lighthouse
Open areas of water that create visual breathing room
Wave patterns that point toward Nubble Island
Shoreline curves that add depth
Cleaner separation between the lighthouse and the horizon
Foreground elements that frame rather than block the subject
Avoid adding foreground simply because it is close to the camera. A rock or shoreline feature should contribute to the composition by creating depth, direction, texture, or scale.
If the foreground is visually heavy, it may pull attention away from the lighthouse. In that case, move closer, change your camera height, use a longer focal length, or simplify the frame.
Wide-Angle Photography
A wide-angle lens is useful when you want to show Nubble Lighthouse as part of a larger coastal environment.
A focal length in the approximate 16–35mm range on a full-frame camera can include:
The surrounding coastline
Foreground rocks
Ocean movement
Large cloud formations
Sunrise or sunset color
The lighthouse and island within a broader scene
Wide-angle compositions work especially well when the foreground is strong and the sky contains useful structure.
However, going wider does not automatically create a better landscape photograph. If the lighthouse becomes too small or the foreground is empty, the image may lose its visual focus.
When using a wide-angle lens:
Move closer to foreground elements
Keep the lighthouse large enough to remain recognizable
Check the edges of the frame for distractions
Avoid excessive empty water
Use shoreline lines or wave patterns to guide attention inward
Keep the horizon level
A low camera position can make foreground rocks appear larger and more prominent. This may add depth, but it can also create distortion or cause the foreground to dominate the image.
Experiment with camera height before changing your entire composition. Raising or lowering the tripod by a small amount can significantly change the relationship between the foreground and lighthouse.
Standard Zoom Photography
A standard zoom is often the most flexible lens for Nubble Lighthouse.
A lens covering approximately 24–70mm on a full-frame camera allows you to move between environmental compositions and tighter lighthouse-focused images without changing lenses.
This range is useful for:
Balanced lighthouse-and-island compositions
Moderate amounts of ocean and sky
Sunrise and sunset scenes
Cleaner framing with less foreground distortion
Quick adjustments as the light changes
Around the middle of the zoom range, the lighthouse may appear more naturally proportioned than it does with an ultra-wide lens.
A standard zoom can also help simplify the scene by excluding unnecessary foreground or empty sky.
If you are visiting with only one lens, a standard zoom may provide the best overall balance of flexibility and image quality.
Telephoto Photography
A telephoto lens can create some of the most distinctive Nubble Lighthouse photographs.
A focal length in the approximate 70–200mm range can help isolate the lighthouse and compress the visual distance between the structure, ocean, and waves.
Telephoto photography is useful for:
Tighter views of the lighthouse and keeper’s house
Isolating architectural details
Emphasizing layers of waves
Reducing empty sky
Simplifying the composition
Creating a more graphic or abstract image
Longer focal lengths can make wave patterns appear closer to the lighthouse. This compression can create a stronger sense of energy when the ocean is active.
Telephoto images are also useful when the sky is uninteresting. Instead of including a large area of flat cloud cover, tighten the frame around the lighthouse, island, and water.
When using a longer lens, pay close attention to camera stability. Even small movements can become visible, particularly in windy conditions.
Use a sturdy tripod, disable unnecessary camera movement, and check sharpness at high magnification.
Choosing the Right Focal Length
There is no single best lens for Nubble Lighthouse.
The right focal length depends on what you want the image to communicate.
| Focal-Length Range | Best Use |
|---|---|
| 16–24mm | Large sky, coastline, dramatic foregrounds |
| 24–35mm | Balanced environmental lighthouse compositions |
| 35–70mm | Natural perspective and simplified framing |
| 70–200mm | Lighthouse isolation, wave compression, tighter details |
16–24mm
Best Use: Large sky, coastline, dramatic foregrounds
24–35mm
Best Use: Balanced environmental lighthouse compositions
35–70mm
Best Use: Natural perspective and simplified framing
70–200mm
Best Use: Lighthouse isolation, wave compression, tighter details
If you have multiple lenses, avoid choosing one before you see the conditions.
Start by observing the scene with your eyes. Ask:
Is the sky visually important?
Is there a useful foreground?
Are the waves creating strong patterns?
Does the lighthouse need more visual emphasis?
Is the scene better as a broad landscape or a tighter study?
Then choose the focal length that supports the answer.
Foreground Ideas for Nubble Lighthouse Photography
Foreground elements can add depth and make a familiar lighthouse image feel more connected to the location.
Useful foreground subjects may include:
Coastal rocks
Textured shoreline surfaces
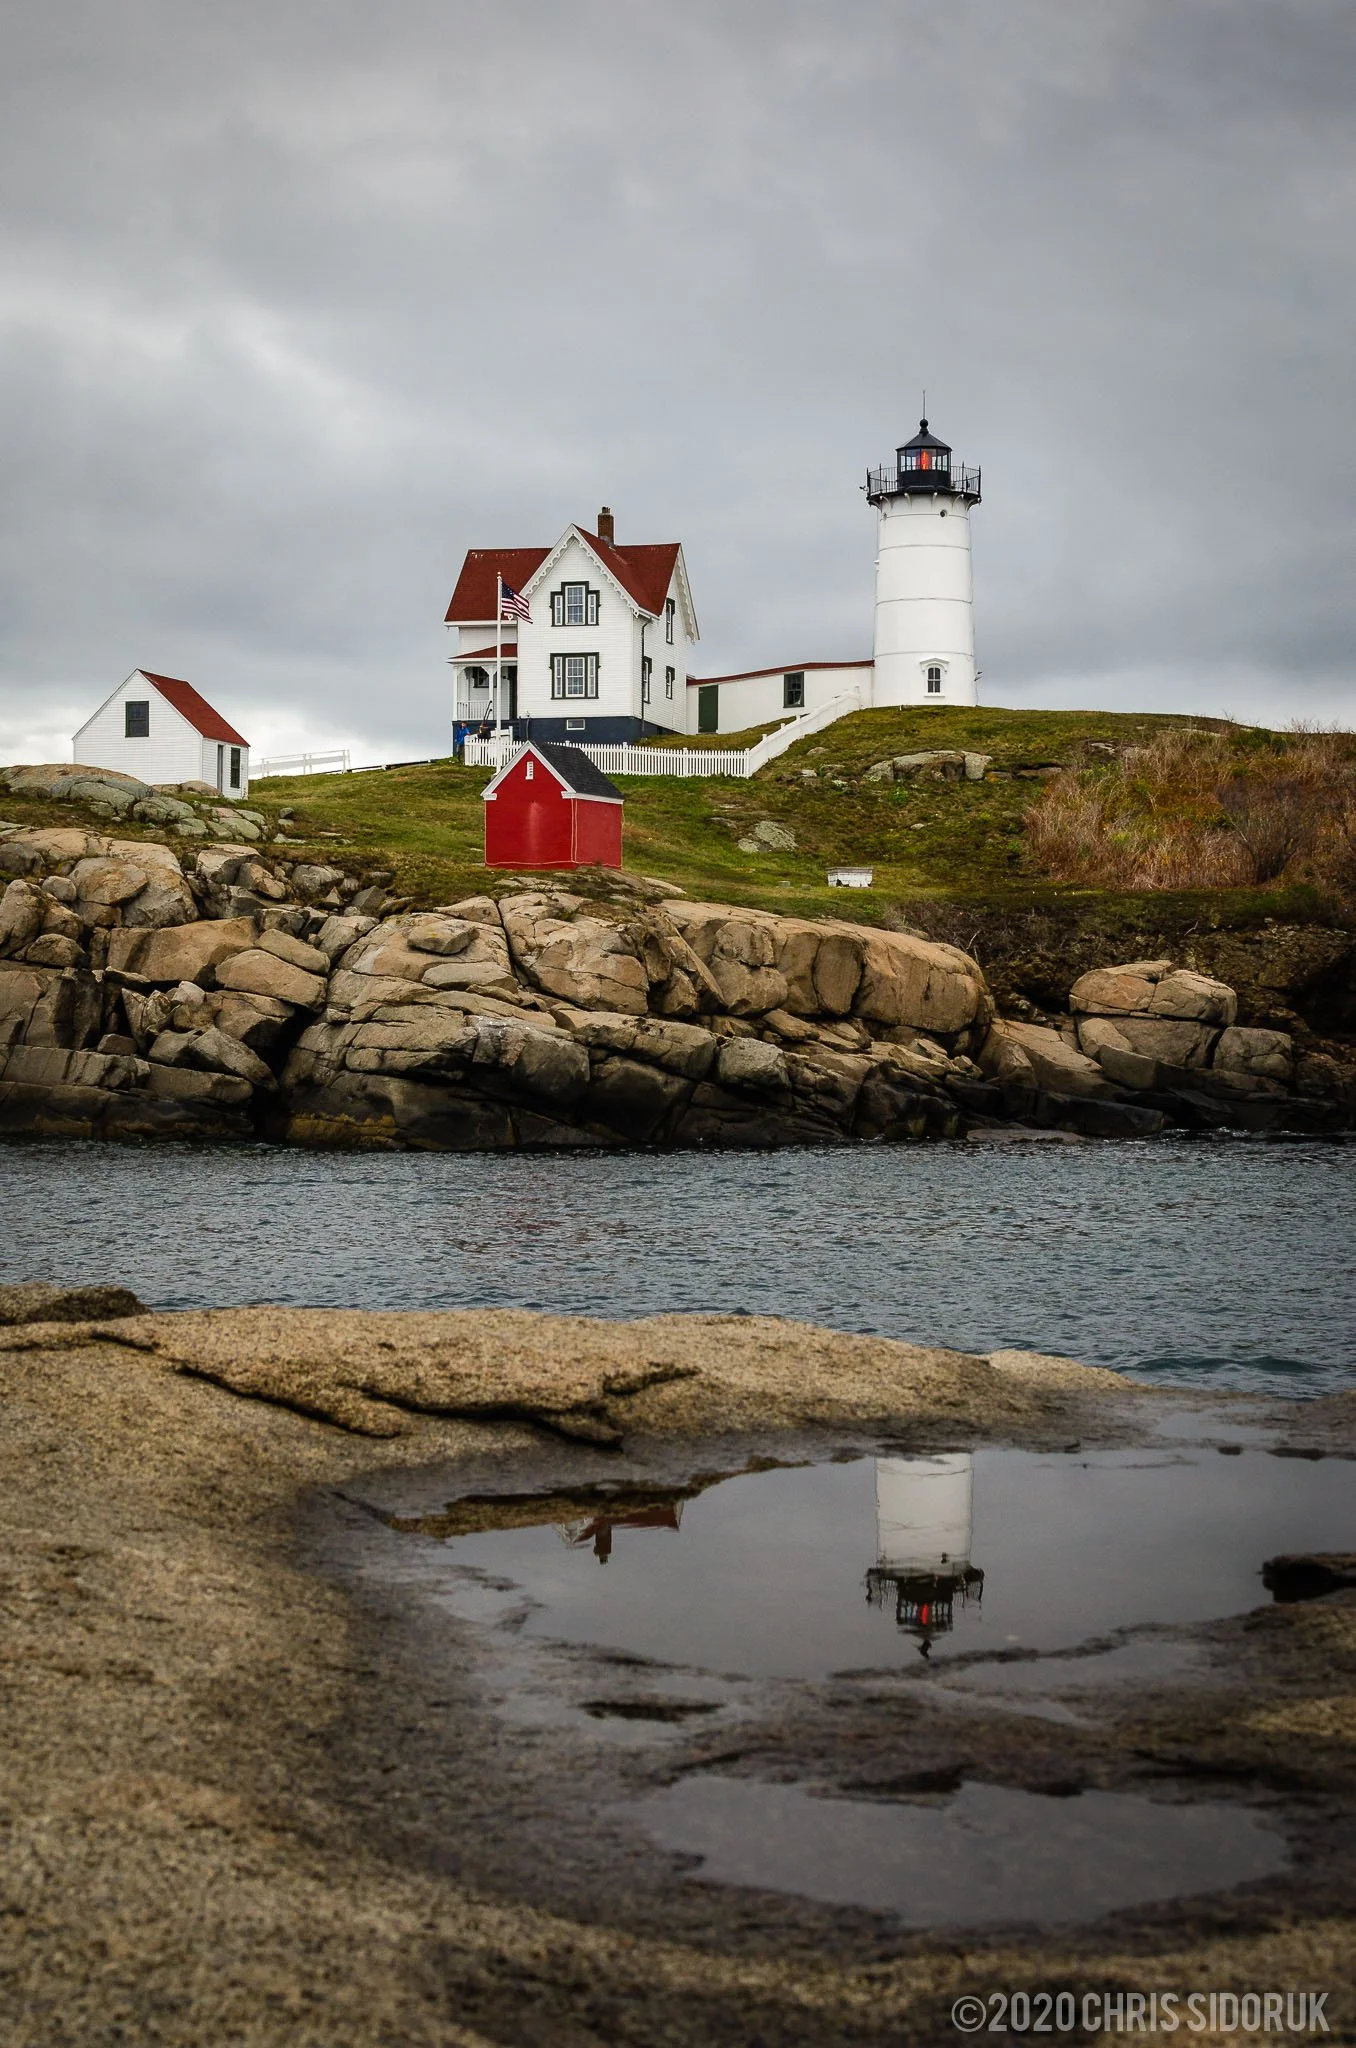
Small pools of water
Moving waves
Sea foam
Curves in the coastline
Natural patterns created by the tide
The strongest foregrounds usually create a visual path toward the lighthouse.
Look for lines, curves, or repeating patterns that move from the bottom of the frame toward Nubble Island. A foreground does not need to point directly at the lighthouse, but it should help guide the viewer through the image.
Be selective.
A large rock placed randomly in the foreground may add depth, but it can also become a distraction. If the foreground does not support the subject, simplify the composition.
Try changing:
Your distance from the foreground
Camera height
Focal length
Horizontal position
The amount of foreground included
These adjustments may produce a stronger result than adding more elements to the frame.
Using Ocean Movement as a Composition Tool
The ocean can act as a leading line, a textured foreground, or a simplified visual surface.
Wave direction changes constantly, so watch the water before beginning a long series of exposures.
Look for:
Repeating wave lines
Diagonal movement toward the lighthouse
Foam patterns around foreground rocks
Alternating areas of smooth and textured water
Waves that create depth between the camera and island
A faster shutter speed can preserve the shape and energy of individual waves.
A longer shutter speed can soften the water into flowing patterns or a smoother tonal surface.
Try photographing the same composition at several shutter speeds. The result may change from energetic and detailed to calm and minimal without moving the camera.
For example:
A faster exposure may preserve wave texture
A medium exposure may show visible motion
A longer exposure may smooth the water and simplify the scene
The best choice depends on the mood you want to create.
Using the Sky Effectively
The sky can either strengthen or weaken a Nubble Lighthouse composition.
If clouds have shape, color, or directional movement, include enough sky to show that structure.
If the sky is flat and featureless, reduce its presence and emphasize the lighthouse, island, and ocean.
Before setting your composition, ask:
Is the sky contributing to the photograph?
If yes, give it space.
If no, simplify the frame.
A dramatic sky may support a wider composition, while a plain sky may work better with a standard or telephoto lens.
Be careful not to overemphasize the sky simply because it is visually large. The lighthouse should remain a clear focal point unless the image is intentionally designed around the atmosphere.
Horizontal vs Vertical Compositions
Most Nubble Lighthouse photographs are created in horizontal orientation, but vertical compositions can also work.
Horizontal Orientation
Horizontal framing is useful for:
Showing the coastline
Including ocean movement
Capturing wide cloud formations
Creating a traditional landscape composition
Showing the lighthouse within its environment
Vertical Orientation
Vertical framing is useful for:
Emphasizing the lighthouse’s height
Including dramatic clouds
Creating stronger foreground-to-subject depth
Using a close foreground rock or wave pattern
A vertical composition may be especially effective with a wide-angle lens when a strong foreground leads toward the lighthouse.
Try both orientations before leaving a composition. The image may feel more balanced in one format than the other.
Creating More Original Nubble Lighthouse Images
Nubble Lighthouse is one of the most photographed landmarks in Maine. The challenge is not finding a view—it is making thoughtful decisions about conditions, composition, and visual style.
You do not need to find an entirely unknown location to create an original photograph.
Originality can come from:
Unusual weather
Different ocean conditions
A distinctive foreground
A carefully chosen focal length
Long-exposure techniques
Fog or coastal haze
Seasonal changes
A different camera height
A tighter or more minimalist composition
Instead of trying to avoid the classic view, use it as a starting point.
Photograph the recognizable composition first. Then ask what can be changed.
Can you move several feet?
Can you lower the camera?
Can you simplify the frame?
Can you use a longer focal length?
Can you wait for a different wave pattern?
Can you return under different weather?
The strongest images often come from responding to the conditions rather than forcing a predetermined composition.
Common Composition Mistakes
Including Too Much Empty Water
A large area of water may make the lighthouse feel small or disconnected.
Fix: Tighten the composition or use foreground texture to create more depth.
Using a Wide Lens Without a Strong Foreground
An ultra-wide lens can make the lighthouse appear too distant.
Fix: Move closer to a useful foreground or switch to a longer focal length.
Centering the Lighthouse Automatically
Centered compositions can work, but they are not always the strongest choice.
Fix: Test small shifts left or right and compare the balance of the sky, ocean, and foreground.
Ignoring the Edges of the Frame
Rocks, railings, people, or partial objects near the edges can distract from the lighthouse.
Fix: Review the entire frame before taking the final image.
Making the Foreground Too Dominant
A large foreground object may overpower the lighthouse.
Fix: Raise the camera, move farther back, or use a longer focal length.
Photographing Only One View
The standard overlook is useful, but stopping there limits your options.
Fix: Explore the accessible shoreline and test small changes in position.
Seasonal Photography at Nubble Lighthouse
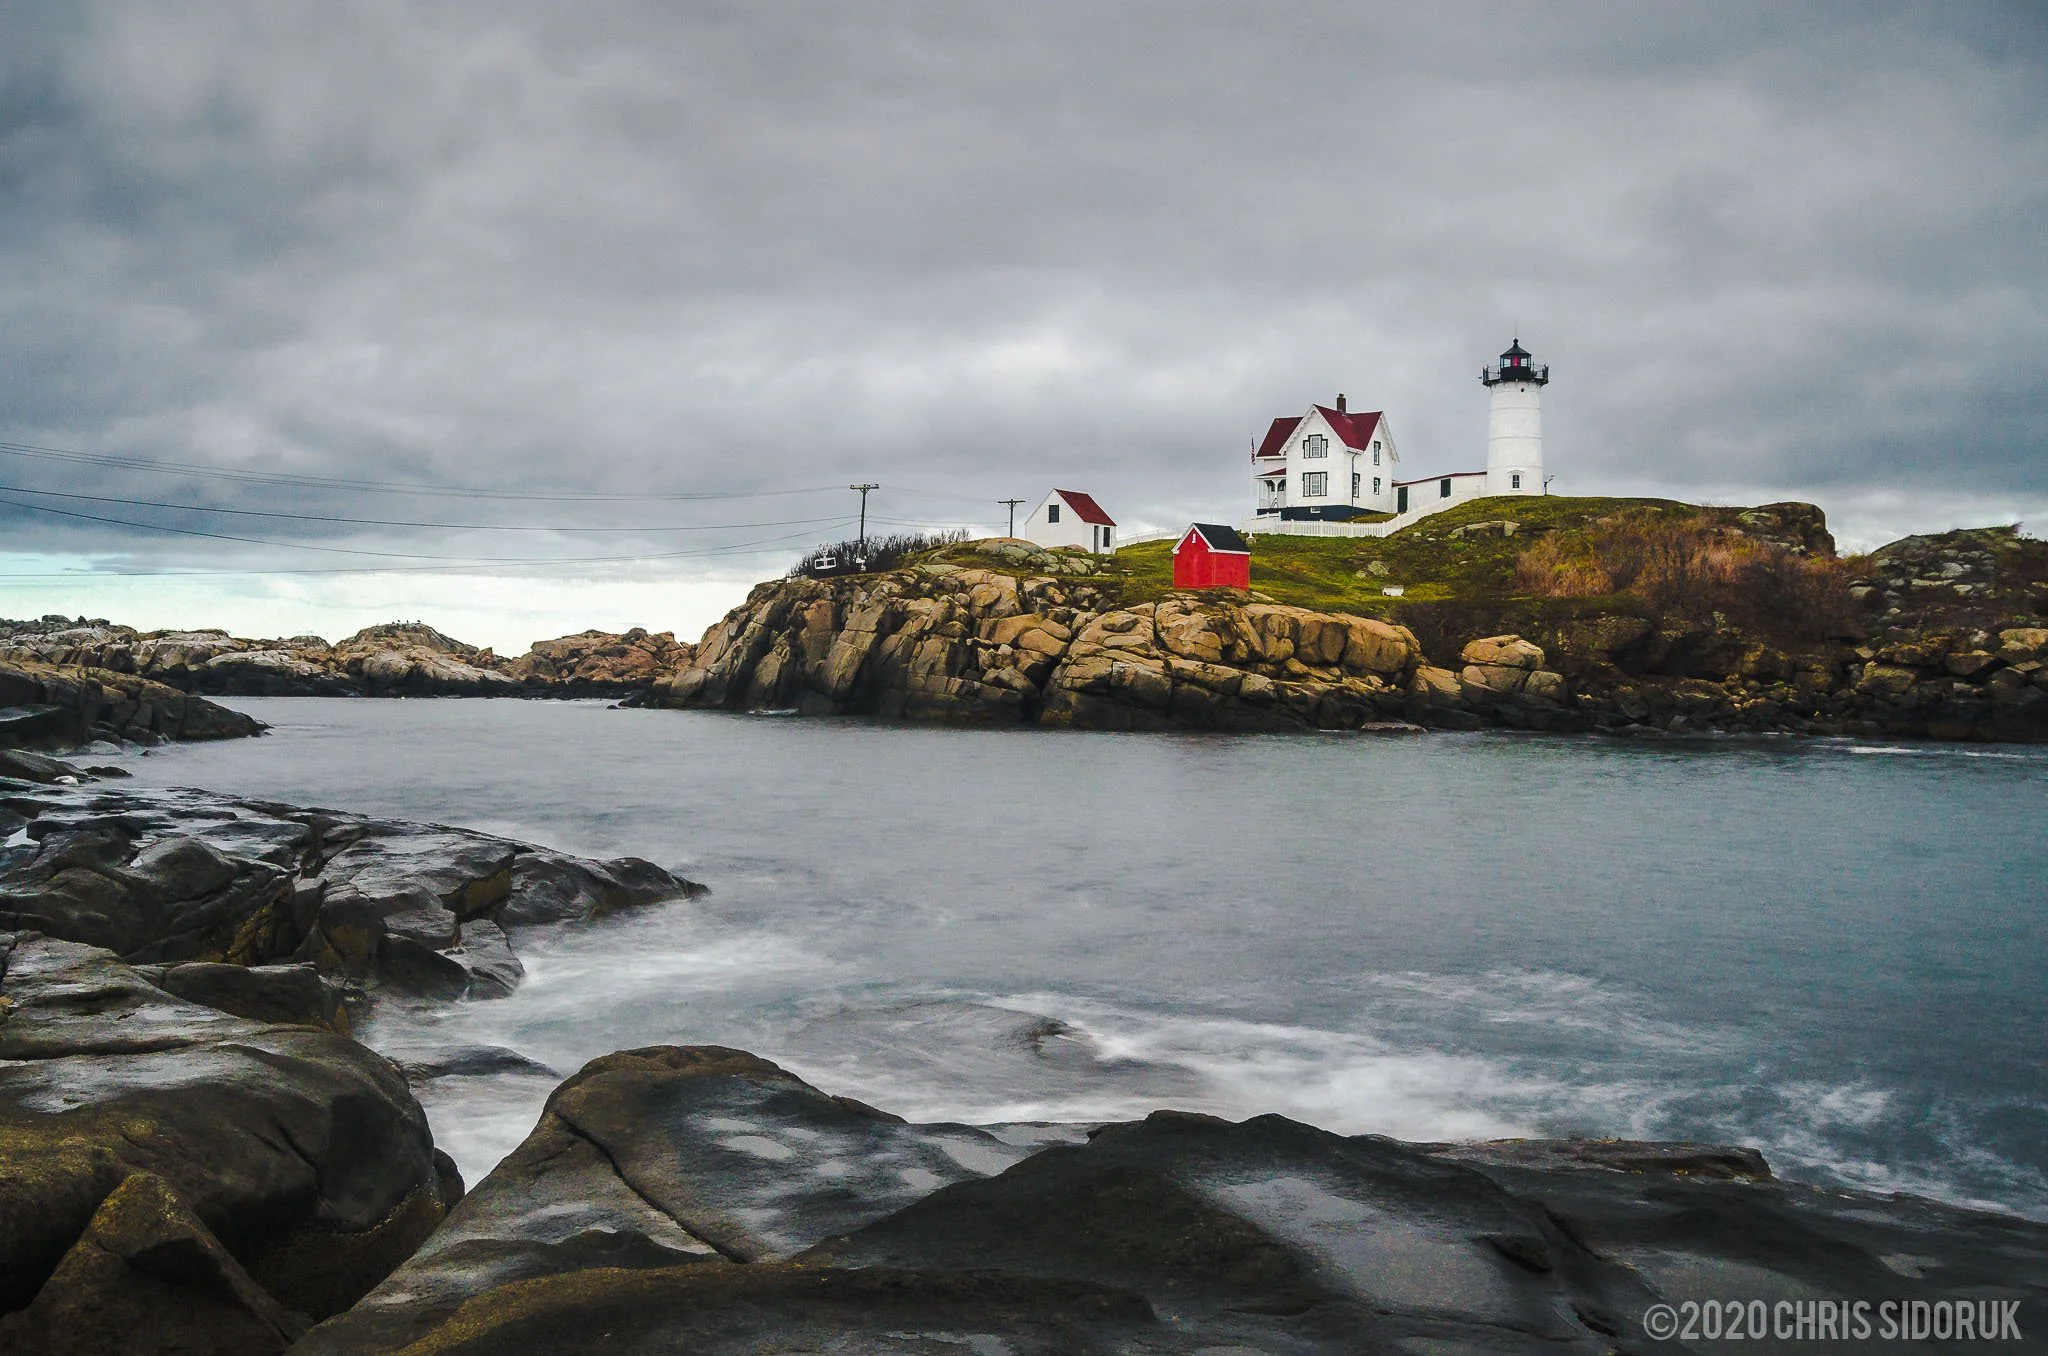
Nubble Lighthouse can be photographed throughout the year, but each season changes the experience, the surrounding landscape, and the type of image you are most likely to create. The lighthouse remains visually consistent, while the light, weather, ocean conditions, vegetation, and visitor activity change around it.
For photographers, that makes seasonal timing an important creative decision rather than simply a question of weather.
Summer: Clear Views, Longer Days & More Activity
Summer is one of the easiest times to visit Nubble Lighthouse. Longer daylight hours, generally comfortable weather, and more predictable access make it a practical season for first-time visitors.
Photography conditions often include:
Green coastal vegetation
Clearer skies
Longer sunrise and sunset windows
Calmer ocean conditions on many days
More people around the main overlook
Summer can work especially well for bright, clean coastal images that show the lighthouse within a wider New England landscape. The challenge is that midday light may create strong contrast, glare on the water, and a flatter-looking sky.
For better results, prioritize:
Early morning before the main crowds arrive
Late-day light when the scene becomes warmer
Overcast conditions for softer tones
Longer focal lengths to simplify busy areas around the overlook
Summer is also useful for experimenting with different viewpoints because the location is generally easier to explore without winter weather or difficult conditions.
Fall: Strong Color & Changing Coastal Weather
Fall can be one of the most rewarding seasons for photographing Nubble Lighthouse. The weather becomes more variable, the summer crowds begin to decrease, and changing atmospheric conditions can create more dramatic skies.
Potential conditions include:
Cooler, clearer mornings
Stronger cloud formations
More frequent weather changes
Richer sunrise and sunset color
Increased ocean texture during coastal weather systems
Although the lighthouse itself is surrounded primarily by rock and ocean, seasonal color can still appear in nearby vegetation and the broader coastal environment. Fall is often less about photographing bright foliage and more about capturing the transition toward a moodier, more atmospheric coastline.
This season can be especially productive when a weather system moves through shortly before sunrise or sunset. Broken clouds may create more depth and color than a completely clear sky.
Winter: Dramatic Conditions & Minimalist Coastal Scenes
Winter can produce some of the most dramatic photographs of Nubble Lighthouse. Cold air, stronger coastal weather, lower sun angles, and reduced visitor activity can create a very different visual character from summer.
Winter photography may include:
Stronger wave action
Darker storm clouds
Snow or frost along the shoreline
Low-angle light throughout more of the day
Cleaner, more minimalist scenes
The lighthouse can appear especially isolated when surrounded by rough water, fog, snow, or muted winter tones. These conditions can emphasize the contrast between the permanent structure and the changing Atlantic environment.
Winter also requires more preparation. Coastal rocks may be slippery, wind can be intense, and conditions can change quickly. Keep a safe distance from waves, avoid unstable shoreline areas, and protect camera equipment from moisture and wind-driven spray.
Winter is often best for photographers looking for:
Dramatic weather
Strong ocean movement
Moody black-and-white images
Minimalist compositions
A quieter experience at the location
Spring: Atmospheric Change & Unpredictable Conditions
Spring brings a mix of winter-like weather and emerging coastal color. Conditions can change quickly, making the season less predictable but potentially rewarding.
Spring photography may offer:
Fog and low clouds
Rapidly changing weather
Fresh greenery
Variable ocean conditions
Softer light on overcast days
Because the weather can shift between clear skies, rain, fog, and wind, spring is a useful season for repeat visits. A location that appears flat or ordinary on one day may look completely different after a weather change.
Rather than planning around a single ideal forecast, watch for changing conditions near sunrise or sunset. A partly cloudy forecast can sometimes produce more interesting light than a completely clear one.
How to Build a Repeat-Visit Photography Strategy
Nubble Lighthouse is a location that rewards returning more than once.
The basic composition is accessible and recognizable, but the environment changes constantly. Ocean movement, cloud cover, fog, tide, seasonal light, and weather can all produce a different result from the same general viewpoint.
Instead of trying to capture every possible image during one visit, treat the location as a long-term photography subject.
Visit 1: Learn the Location
Use the first visit to understand:
The main viewing area
The relationship between the lighthouse and shoreline
Where foreground rocks enter the frame
How different focal lengths change the composition
Which areas become crowded
Focus on building a reliable composition rather than chasing unusual conditions immediately.
A wide-angle image can establish the overall landscape, while a mid-range lens can help isolate the lighthouse and island more cleanly.
Visit 2: Return in Different Light
Revisit during a different time of day.
Compare:
Sunrise versus sunset
Clear skies versus overcast conditions
Calm water versus active surf
Warm light versus cooler blue-hour tones
The same composition may feel completely different when the direction and quality of light change.
Visit 3: Photograph Changing Weather
Watch for:
Fog
Incoming clouds
Coastal storms
Rain clearing near sunrise or sunset
Strong wind creating visible wave movement
Weather often creates more visual variation than changing camera settings.
A dramatic sky can add scale to a wide composition, while fog may simplify the scene and place more emphasis on the lighthouse itself.
Visit 4: Refine One Composition
After becoming familiar with the location, choose one composition and improve it over multiple visits.
Refine:
Foreground placement
Horizon position
Lighthouse size within the frame
Wave timing
Exposure length
Sky-to-water balance
This approach can produce a more intentional final image than constantly changing viewpoints.
Photographing Nubble Lighthouse in Different Conditions
Clear Skies
Clear weather can create clean, recognizable images, especially during sunrise or sunset.
To avoid an empty-looking sky:
Use foreground rocks to add depth
Include more ocean or coastline
Try a tighter composition
Photograph during blue hour
Use a telephoto lens to simplify the frame
Clear skies are often better for emphasizing color and structure than for creating dramatic atmosphere.
Overcast Skies
Overcast conditions provide softer, more even light.
These conditions can help:
Preserve detail in the lighthouse
Reduce harsh shadows
Control bright highlights on the water
Create subtle coastal color
Support black-and-white editing
A flat gray sky may still need a strong foreground or tighter composition. If the sky adds little visual interest, reduce the amount of it included in the frame.
Fog
Fog can create some of the most distinctive Nubble Lighthouse photographs.
As visibility decreases, the scene becomes simpler. Background detail fades, contrast is reduced, and the lighthouse may appear isolated against the surrounding atmosphere.
For fog photography:
Watch exposure carefully
Avoid over-brightening the fog
Use manual focus and verify sharpness
Try both wide and telephoto compositions
Look for subtle separation between the lighthouse, island, and water
Fog often works well for minimalist color palettes and black-and-white images.
Wind & Active Surf
Wind changes the visual energy of the entire scene.
Stronger waves can add:
Foreground movement
Texture across the water
More dramatic coastal atmosphere
A stronger contrast between the lighthouse and the ocean
A fast shutter speed can freeze individual waves, while a longer exposure can blend movement into softer patterns.
Always prioritize safety. Ocean conditions can change quickly, and waves may reach farther than expected.
Nearby Coastal Photography Locations
Nubble Lighthouse can be part of a broader southern Maine photography trip. Nearby beaches, coastal paths, and shoreline viewpoints provide different subjects while maintaining the same general coastal character.
Long Sands Beach
Long Sands Beach offers a more open shoreline environment than Sohier Park.
Photography opportunities may include:
Wide beach compositions
Long-exposure water movement
Reflections near the shoreline
Sunrise color
Seasonal coastal conditions
The open beach can provide a useful contrast to the rocky foregrounds around Nubble Lighthouse.
Short Sands Beach
Short Sands Beach offers a more compact coastal setting with a different relationship between shoreline, water, and nearby development.
It can work well for:
Beach-focused landscapes
Coastal details
Evening light
Wider environmental scenes
Because the visual environment differs from the lighthouse overlook, it can add variety to a photography trip without requiring a long drive.
Ogunquit Coastline
The coastline around Ogunquit offers more elevation, rocky shoreline structure, and changing perspectives.
Potential subjects include:
Layered coastal views
Rock formations
Ocean texture
Walking-path compositions
Distant shoreline geometry
This area can be useful when you want a broader coastal landscape rather than a single landmark-focused image.
Marginal Way
Marginal Way provides elevated views along the Atlantic coastline and creates opportunities to photograph:
Curving shoreline patterns
Rocky cliffs
Ocean layers
Distant coastal structures
Repeating foreground-to-background relationships
The location is visually different from Nubble Lighthouse because the composition changes continuously as you move along the path.
For a broader collection of regional locations, explore the New England Photography Guide.
Creating a Coastal Photography Itinerary
If Nubble Lighthouse is the main subject, avoid trying to photograph every nearby location during the same short window.
A more focused approach could look like this:
Sunrise: Photograph Nubble Lighthouse from Sohier Park.
Morning: Explore nearby shoreline areas while the light remains soft.
Midday: Scout locations, review compositions, or photograph smaller coastal details.
Late afternoon: Return to Nubble Lighthouse or move toward Ogunquit for a different coastal perspective.
Sunset: Photograph the location with the strongest sky and weather potential.
This approach keeps Nubble Lighthouse as the primary subject while allowing nearby locations to add variety.
Final Nubble Lighthouse Photography Field Checklist
Before leaving for Nubble Lighthouse, use this checklist to prepare for the conditions and make the most of your time at the location.
Camera and Lens Gear
Camera body with fully charged batteries
Wide-angle lens for environmental coastal scenes
Standard zoom for flexible compositions
Telephoto lens for lighthouse isolation and wave compression
Extra memory cards
Lens hood
Microfiber lens cloth
Tripod and Filters
Sturdy tripod
Secure tripod plate
Neutral-density filter for long exposures
Circular polarizer when appropriate
Remote shutter release or camera self-timer
Weather and Coastal Preparation
Check the forecast before leaving
Review cloud cover and wind conditions
Monitor ocean and surf conditions
Bring weather-resistant clothing
Wear footwear suitable for wet or uneven surfaces
Protect camera equipment from salt spray
Bring extra batteries during cold weather
Composition Checklist
Before taking the photograph, look for:
A clean separation between the lighthouse and the horizon
Foreground rocks or shoreline patterns that lead toward the subject
Distracting overlaps between the lighthouse and background elements
Strong wave patterns or water texture
A balanced amount of sky
A level horizon
A composition that works at both wide and tighter focal lengths
Move a short distance in either direction and compare the foreground. A small change in position can improve the alignment of rocks, waves, and the lighthouse.
Exposure Checklist
Shoot in RAW
Keep ISO as low as practical
Check the histogram instead of relying only on the LCD preview
Protect highlight detail in bright clouds
Use exposure bracketing when the scene has a large brightness range
Review sharpness at high magnification
Clean salt spray or moisture from the lens regularly
Before You Leave
Take one final look at the scene before packing up. Coastal conditions can change quickly, and a brief break in the clouds or shift in the light may create a stronger photograph than the images captured earlier.
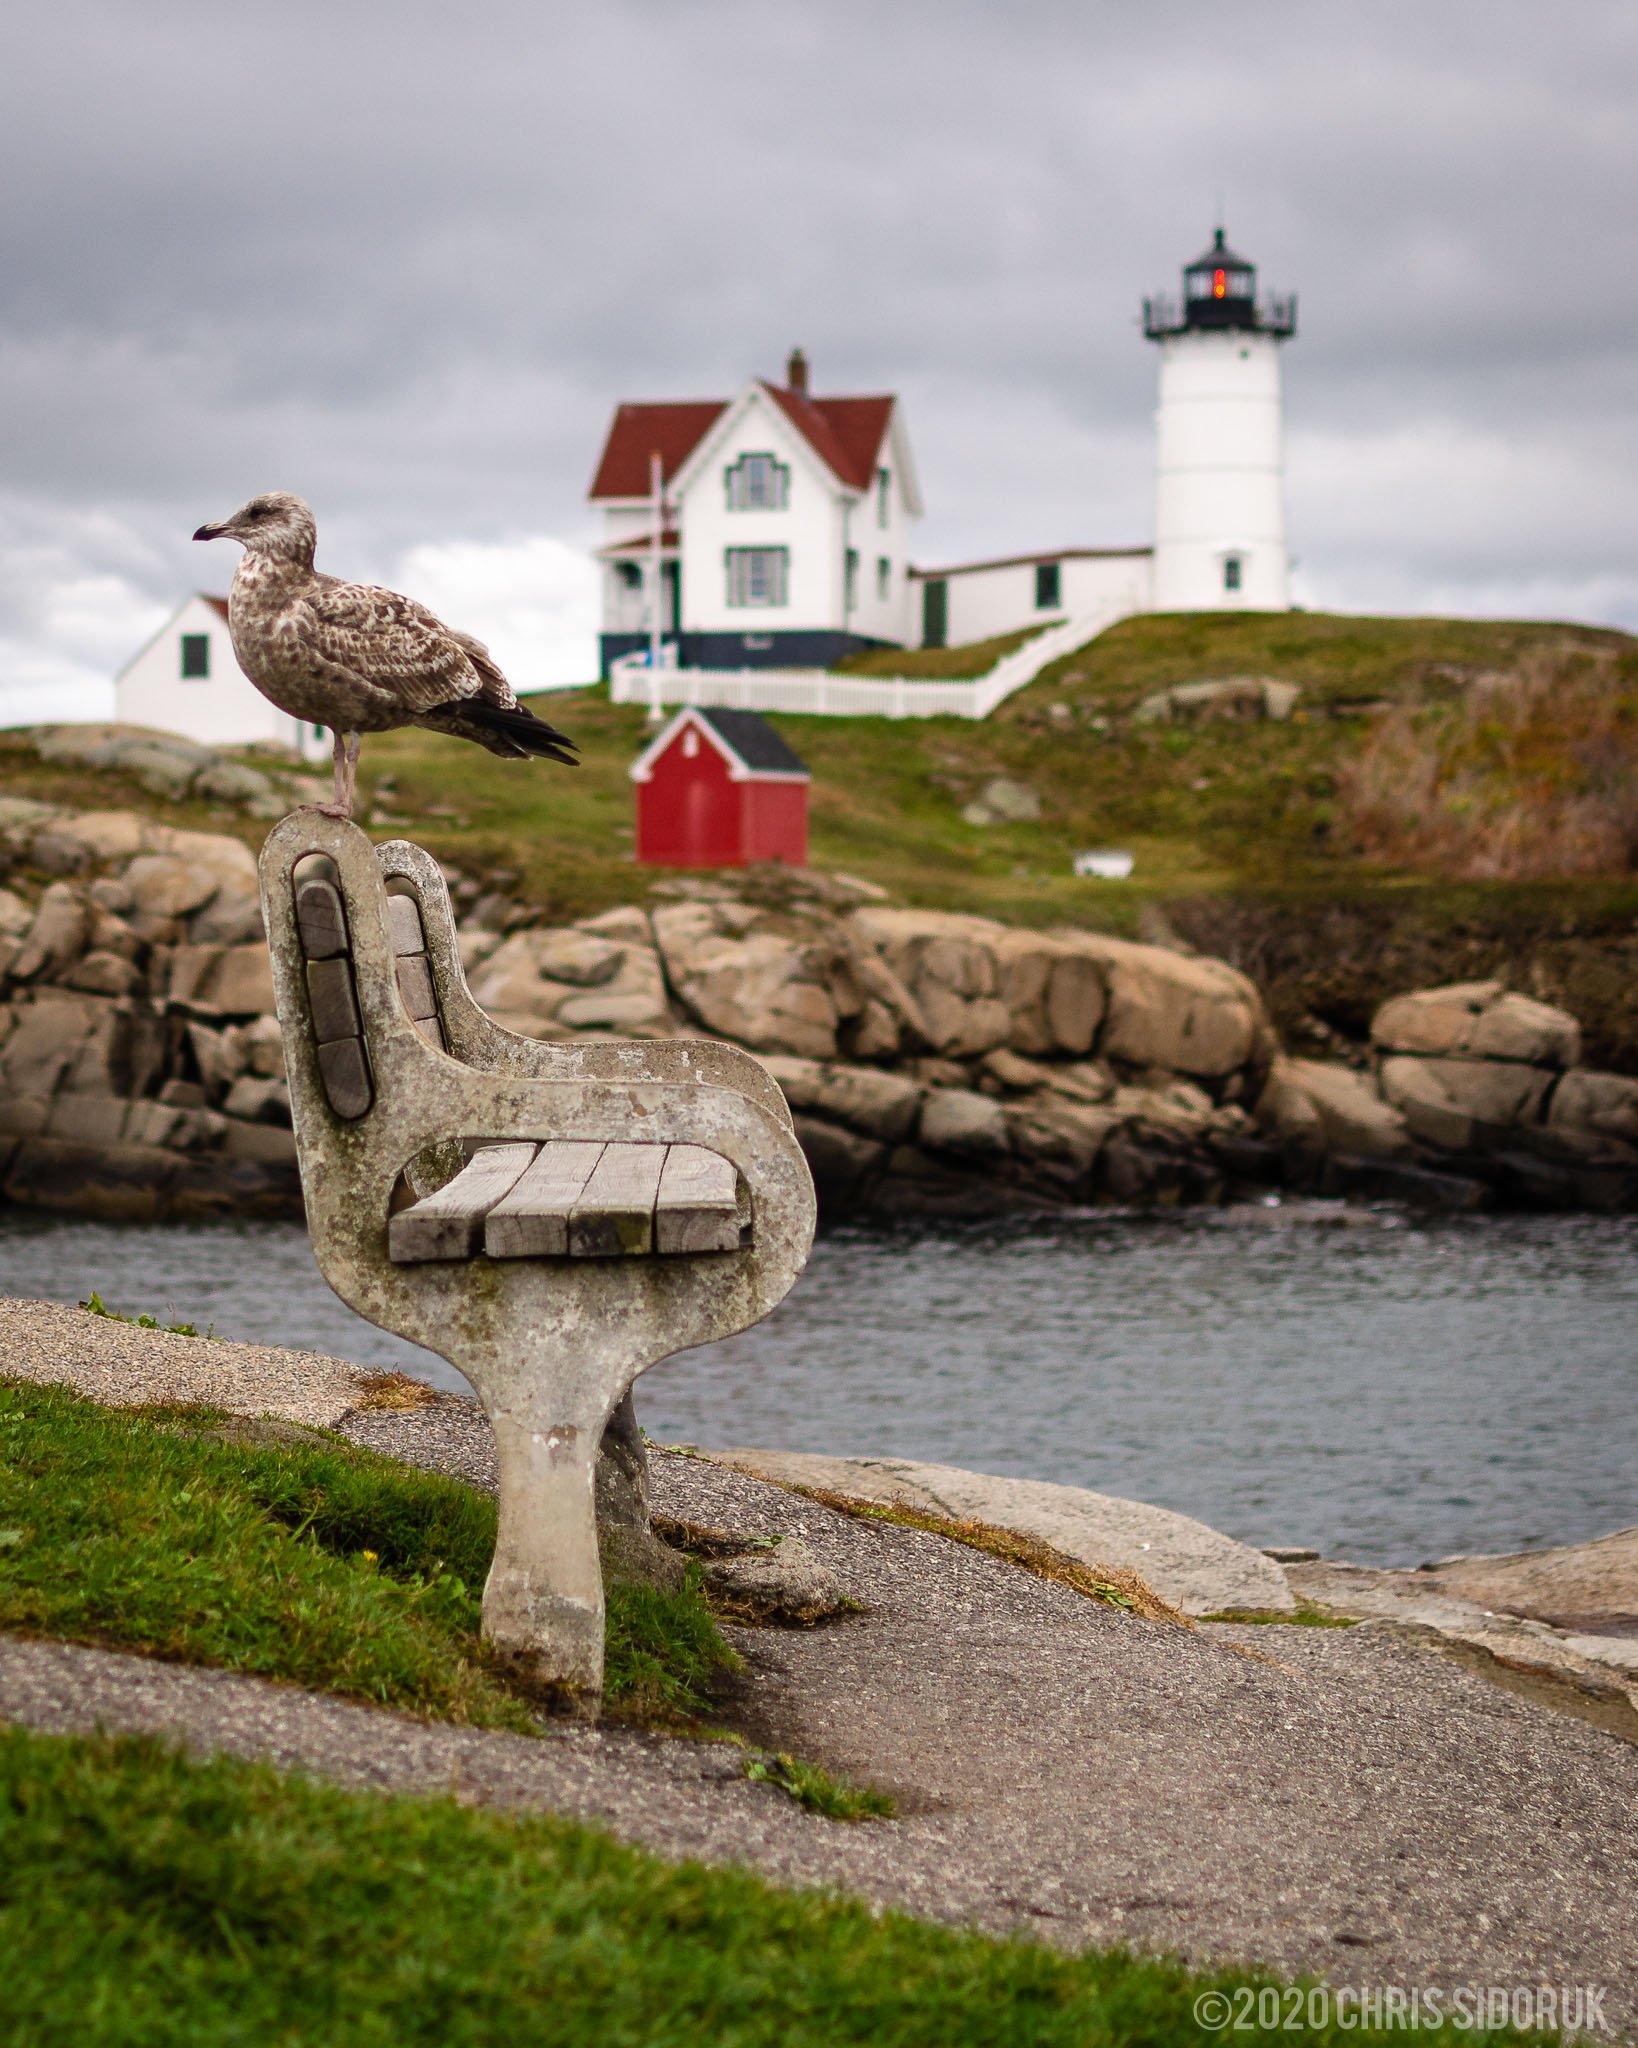
If possible, photograph the location at more than one focal length. A wide composition may show the full coastal environment, while a tighter frame can emphasize the lighthouse and surrounding waves.
Final Thoughts
Nubble Lighthouse is more than a single postcard composition. Its value as a photography location comes from the relationship between a permanent subject and a constantly changing coastal environment.
The lighthouse, keeper’s house, and rocky island provide a stable visual foundation. Light, weather, surf, clouds, and seasonal conditions create the variation.
For the strongest results:
Visit during different times of day
Return under different weather conditions
Explore small changes in position around Sohier Park
Use multiple focal lengths
Pay attention to ocean movement as well as light
Build compositions around the relationship between the lighthouse, water, sky, and foreground
The most recognizable viewpoint is only the starting point. Repeated visits make it easier to understand how the location responds to changing conditions and to develop photographs that feel more personal than a standard scenic image.
For a focused look at individual viewpoints, foreground ideas, and composition options, continue to the Best Nubble Lighthouse Photo Spots guide.
Nubble Lighthouse Photography FAQ
What is the best time to photograph Nubble Lighthouse?
Sunrise is often the best time to photograph Nubble Lighthouse if you want softer light, fewer visitors, and a quieter atmosphere around Sohier Park. Early morning can also bring calm water, coastal haze, or subtle color that works well for wide landscape compositions.
Sunset can produce warmer tones and more dramatic contrast, especially when clouds reflect light across the Atlantic. However, the strongest results depend on the weather, cloud cover, ocean conditions, and the direction of the light rather than the time of day alone.
For repeat visits, photograph the lighthouse during both morning and evening conditions. The same composition can look completely different depending on the light and atmosphere.
Where is the best place to photograph Nubble Lighthouse?
The primary public photography area is Sohier Park in York, Maine. The park sits directly across from the lighthouse and provides clear views of Nubble Rock, the lighthouse, the keeper’s house, and the surrounding Atlantic coastline.
The main overlook provides the most recognizable composition, but moving along the shoreline can change the relationship between the foreground rocks, ocean, and lighthouse. Small shifts in position may create cleaner foreground lines or reduce distracting overlaps.
The lighthouse is located offshore and is not accessible to visitors, so photography is done from the mainland viewing area.
What focal length is best for photographing Nubble Lighthouse?
There is no single best focal length because the location works well with several approaches.
A wide-angle lens in the 16–35mm range is useful for showing the lighthouse within the larger coastal environment. This approach works especially well when the sky, foreground rocks, or moving water are important parts of the composition.
A standard zoom in the 24–70mm range is often the most flexible choice. It allows you to create balanced compositions without making the lighthouse appear too small in the frame.
A telephoto lens in the 70–200mm range can isolate the lighthouse, compress layers of waves, and simplify the scene. Longer focal lengths are especially useful when the ocean is active or when you want the lighthouse to occupy more of the image.
For many photographers, a 24–70mm lens is the most practical starting point, while a wide-angle or telephoto lens adds creative flexibility.
Is a tripod necessary for Nubble Lighthouse photography?
A tripod is not required for every photograph, but it is highly useful when shooting during low light or using longer shutter speeds.
A tripod helps with:
Sunrise and blue-hour photography
Long exposures that smooth moving water
Lower ISO settings for cleaner image quality
Precise composition and repeatable framing
Bracketing exposures when the sky is much brighter than the foreground
For daytime photography with faster shutter speeds, handheld shooting may be enough. If you plan to photograph waves with long exposures, a sturdy tripod is one of the most useful pieces of equipment to bring.
What camera settings should I use at Nubble Lighthouse?
Camera settings depend on the light and the amount of motion you want to show in the ocean.
For a sharp daytime landscape, start with:
Aperture: f/8–f/11
ISO: 64–100
Shutter speed: Adjust for the available light
Focus: Use single-point autofocus or manual focus on the main subject
File format: RAW
For a long-exposure coastal image, start with:
Aperture: f/8–f/11
ISO: 64–100
Shutter speed: Approximately 1–10 seconds
Tripod: Required for stable results
Filter: Neutral-density filter if conditions are too bright
For sunrise or low-light photography:
Aperture: f/8–f/11
ISO: 100–400
Shutter speed: Adjust based on the available light and desired wave motion
Tripod: Recommended
These are starting points rather than fixed rules. Review the histogram and adjust your exposure for the brightness of the sky, ocean, and lighthouse.
Can I photograph Nubble Lighthouse during the winter?
Yes. Winter can produce some of the most dramatic photographs of Nubble Lighthouse because the coastline may experience stronger surf, colder atmospheric conditions, and more dramatic cloud formations.
Winter photography also presents additional challenges:
Strong winds can make tripods less stable
Ice may form on walkways and rocks
Cold temperatures reduce battery life
Ocean spray can collect on the front element
Coastal conditions can change quickly
Bring extra batteries, a lens cloth, weather-resistant clothing, and a stable tripod. Stay on designated public areas and avoid unsafe shoreline conditions.
Is Nubble Lighthouse good for long-exposure photography?
Yes. Nubble Lighthouse is well suited to long-exposure coastal photography because the lighthouse remains stationary while the ocean changes continuously.
Long exposures can:
Smooth moving water
Turn breaking waves into soft patterns
Create motion in clouds
Simplify busy ocean textures
Add contrast between the permanent lighthouse and the changing environment
A shutter speed of one to several seconds can preserve some wave structure. Longer exposures may create a smoother, more minimalist appearance.
The best shutter speed depends on the speed of the water, wind conditions, and the visual effect you want.
Can I use a drone to photograph Nubble Lighthouse?
Drone photography near Nubble Lighthouse requires careful attention to current federal, state, and local rules. Regulations can change, and restrictions may apply because of the lighthouse, surrounding land, nearby visitors, or other protected areas.
Before flying, verify:
Current FAA airspace requirements
Local and state restrictions
Park rules and posted regulations
Weather and wind conditions
Whether takeoff and landing are permitted from the area you plan to use
Do not assume that a location is available for drone use simply because the airspace appears open. Check current rules before every flight and avoid flying over visitors or creating a disturbance.
Is Nubble Lighthouse worth visiting for photographers?
Yes. Nubble Lighthouse is one of the most reliable coastal photography locations in Maine because it combines a recognizable subject with highly variable environmental conditions.
The lighthouse itself remains fixed, but the scene changes with:
Sunrise and sunset light
Cloud cover
Fog and coastal haze
Ocean movement
Seasonal weather
Foreground conditions
Different focal lengths and compositions
The location is especially valuable for photographers who enjoy returning to the same subject under different conditions. A calm summer sunrise and a stormy winter afternoon can produce completely different images from nearly the same viewpoint.
Location
Explore More Photography Guides
Best Nubble Lighthouse Photo Spots
Explore specific viewpoints, foreground ideas, focal-length approaches, and composition options for photographing Nubble Lighthouse from Sohier Park.
Portland Head Light Photography Guide
Photograph another iconic Maine lighthouse with coastal viewpoints, changing weather, and landscape photography opportunities.
New England Photography Guide
Discover scenic photography locations throughout Connecticut, Maine, Massachusetts, and the surrounding region.
Mount Greylock - Bershires, MA | Fall Foliage Photography Guide
A dedicated guide covering peak autumn timing, foliage conditions, and fall landscape compositions.
Best Places to Photograph in Connecticut
Explore coastal landscapes, waterfalls, forests, rivers, historic landmarks, and scenic photography locations across Connecticut.
Best Gear for Landscape Photography
Learn which cameras, lenses, tripods, filters, and accessories can support coastal and landscape photography.
Best Cameras for Landscape Photography
Compare camera features that matter for dynamic range, resolution, weather resistance, portability, and outdoor photography.
Fine Art Print of Nubble Lighthouse
View available Nubble Lighthouse wall art featuring original coastal landscape photography from York, Maine.
Photography by Chris Sidoruk, a Connecticut photographer specializing in coastal landscapes, concert photography, and visual storytelling throughout New England.
The photographs in this guide were created through visits to the Maine coastline, with attention to changing light, weather, ocean conditions, and composition.
Camera and lens choices may vary by image. Photography equipment supports the process, but location knowledge, timing, weather awareness, and careful composition often have the greatest influence on the final result
All photographs © Chris Sidoruk. Images are protected by copyright and may not be used, copied, modified, or redistributed without written permission.
==========