

How to Get Sharp Concert Photos (Focus, Motion & Low-Light Tips)

==========
Last Updated: August 2026
Quick Jump
- Why Concert Photos Come Out Blurry
- Shutter Speed: The Most Important Factor
- Aperture and Depth of Field
- Autofocus Settings That Actually Work
- Back Button Focus for Concert Photography
- Lens Selection and Sharpness
- Timing and Positioning for Sharper Images
- How Editing Affects Perceived Sharpness
- My Personal Sharpness Workflow
- Frequently Asked Questions
Getting sharp concert photos is one of the biggest challenges in live music photography.
Concert photographers are constantly fighting conditions that make sharp images difficult:
fast-moving performers
unpredictable stage lighting
dark environments
limited shooting positions
constantly changing subjects
And the reality is simple:
A perfectly composed photo with great emotion still fails if the subject is blurry.
Sharpness is the foundation of strong concert photography.
This guide explains how to consistently capture sharper live music images by improving:
shutter speed selection
autofocus technique
lens choices
timing
positioning
low-light shooting strategy
Whether you are photographing a small club, theater performance, or large festival stage, these techniques apply to real-world concert photography situations.
Why Concert Photos Come Out Blurry
Before fixing blurry images, you need to understand what caused the problem.
Most blurry concert photos come from three issues:
1. Motion Blur
Motion blur happens when the performer moves faster than your shutter speed can freeze.
Common examples:
a singer moving across the stage
a guitarist swinging their instrument
a drummer hitting cymbals
a performer jumping or moving dramatically
This is the most common cause of blurry concert photos.
2. Camera Shake
Camera shake happens when your hands move while capturing the image.
It becomes more noticeable when:
using slower shutter speeds
shooting with longer lenses
holding heavy camera setups for long periods
Image stabilization can help reduce camera shake, but it cannot freeze a moving performer.
3. Missed Focus
A photo can have the right exposure and still look soft because the camera focused on the wrong area.
Common examples:
autofocus locks onto a microphone stand
focus grabs background lights
subject moves outside the focus area
autofocus struggles in very dark conditions
Learning to control autofocus is just as important as choosing the right shutter speed.
Shutter Speed: The Most Important Factor for Sharp Concert Photos
When photographers struggle with blurry concert images, shutter speed is usually the first thing to adjust.
Concert photography requires balancing:
enough speed to freeze movement
enough light to properly expose the image
A good starting point:
Slower Performers
1/250 second
Works well for:
singers standing at microphones
acoustic performances
slower movements
Typical Live Performances
1/320–1/400 second
A strong general range for many concerts.
Good for:
guitarists
vocalists moving around stage
moderate movement
High-Energy Performers
1/500 second or faster
Useful for:
jumping performers
drummers
energetic stage movement
fast gestures
The Biggest Mistake: Protecting ISO Instead of Sharpness
Many photographers make this mistake:
They lower shutter speed because they want to keep ISO low.
The result:
A cleaner file that is blurry.
A noisy sharp image is almost always better than a clean blurry image.
Modern cameras handle high ISO extremely well, especially full-frame models.
In concert photography:
Sharpness comes first. Noise can often be corrected later.
👉 See the complete exposure approach:
Aperture: Wide Open Helps, But Has Tradeoffs
Fast lenses are extremely valuable for concert photography because they allow more light into the camera.
Common concert photography apertures:
f/2.8 zoom lenses
f/1.8 primes
f/1.4 professional lenses
A wider aperture helps you:
use faster shutter speeds
lower ISO slightly
isolate performers from distracting backgrounds
However, shooting wide open creates another challenge:
Your depth of field becomes much thinner.
At f/1.4 or f/1.8:
the performer's eyes may be sharp
their face may move slightly out of focus
focus errors become more noticeable
When Shooting Slightly Stopped Down Helps
While wide apertures are popular, they are not always the best choice.
Sometimes moving from:
f/1.4 → f/2
or
f/2.8 → f/3.2
can improve consistency.
A slightly deeper depth of field can help when:
performers move unpredictably
multiple band members are in the frame
lighting improves enough to allow it
The goal is not always the widest aperture.
The goal is the highest percentage of usable images.
Exposure Strategy for Sharp Concert Photos
Concert photography is always a compromise between:
shutter speed
aperture
ISO
A practical priority order:
1. Protect Shutter Speed
Movement cannot be fixed in editing.
2. Use the Aperture Your Lens Allows
Take advantage of fast glass when needed.
3. Let ISO Move
Do not sacrifice sharpness to avoid noise.
A typical real-world concert setup might look like:
Fast-moving rock performance
Shutter: 1/500
Aperture: f/2.8
ISO: 3200–6400+
Smaller acoustic venue
Shutter: 1/250
Aperture: f/1.8–f/2.8
ISO: 1600–3200
The exact settings change, but the priority remains the same:
Freeze the moment first.
Autofocus Settings That Actually Work for Concert Photography
Autofocus is one of the biggest differences between consistently sharp concert photos and missed opportunities.
Modern cameras are extremely capable, but they still need the right settings and guidance. In a concert environment, autofocus is working against:
low light
moving subjects
changing backgrounds
flashing stage lights
performers moving toward and away from the camera
The goal is not to let the camera do everything automatically.
The goal is to give the autofocus system the best chance of tracking the right subject.
Use Continuous Autofocus
For moving performers, continuous autofocus is usually the best choice.
Depending on your camera system, this may be called:
Nikon AF-C
Canon AI Servo AF
Sony AF-C
Fujifilm AF-C
Continuous autofocus allows the camera to constantly adjust focus as the performer moves.
Single autofocus modes can work for slower moments, but they become unreliable when:
singers move around the stage
guitarists lean toward the audience
drummers move quickly
performers change position constantly
Use the Right Focus Area
A common mistake is letting the camera choose the entire frame.
In a concert environment, the camera may lock onto:
microphones
instruments
stage lights
background elements
other performers
Instead, use a controlled autofocus area.
Good options include:
small zone autofocus
flexible spot autofocus
expanded focus areas
subject tracking (if reliable on your camera)
The exact setting depends on your camera, but the goal is the same:
Tell the camera where the important subject is.
Eye Autofocus and Subject Tracking
Modern mirrorless cameras have made this much easier.
Systems like:
Sony Real-Time Tracking
Canon Eye Detection AF
Nikon 3D Tracking and Eye Detection
can be extremely useful for concert photography.
However, they are not magic.
Bright lights, microphones, sunglasses, hats, and dramatic lighting can confuse even advanced systems.
Use them as a tool—not as a replacement for understanding focus.
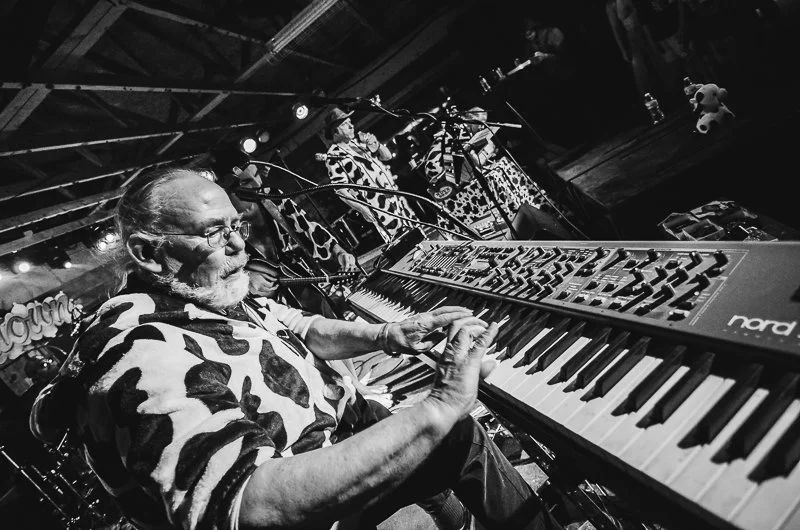
concert photography autofocus subject sharp example
Back Button Focus for Concert Photography
Back button focus is one of the most useful techniques for photographers shooting live music.
Instead of using the shutter button to both:
focus
take the photo
you separate those actions.
Focus is assigned to a button on the back of the camera, while the shutter button only captures the image.
Why Back Button Focus Helps
Concert photography often requires quickly changing between situations.
For example:
A singer may stand still for a moment.
You lock focus.
Then they move across the stage.
You continue tracking without the camera constantly trying to refocus every time you press the shutter.
Benefits include:
better control over focus behavior
easier subject tracking
fewer accidental refocuses
faster response during changing moments
When Back Button Focus Is Especially Useful
It helps most when:
performers move unpredictably
lighting changes constantly
you are switching between compositions quickly
you want more control over timing
It takes some practice to become natural, but many concert photographers never go back once they adjust.
👉 Related guide:
Back Button Focus for Concert Photography
Lens Selection and Sharpness
Your lens choice has a major impact on sharpness.
A great camera body helps, but a poor lens choice can limit your results.
For concert photography, the most important lens characteristics are:
wide aperture
reliable autofocus
optical quality
useful focal length
Why Fast Lenses Help
A lens with a wider aperture allows more light to reach the sensor.
Examples:
f/1.8
f/1.4
f/2.8
More light means you can use:
faster shutter speeds
lower ISO when possible
more reliable autofocus performance
This is especially important in smaller venues where lighting is often limited.
Popular Concert Photography Lens Choices
24–70mm f/2.8
Often considered the most versatile concert photography lens.
Great for:
full-body performer shots
groups
stage interaction
environmental images
70–200mm f/2.8
Ideal for:
larger venues
shooting from farther away
isolating performers
35mm or 50mm Prime Lenses
Excellent for:
small venues
low-light situations
creative storytelling
Their wide apertures can be extremely useful when stage lighting is poor.
👉 Related guide:
Best Lenses for Concert Photography
Stabilization vs Motion Blur
Image stabilization can be helpful, but it is often misunderstood.
Many photographers assume stabilization will solve blurry concert photos.
It will not.
What Stabilization Helps With
Image stabilization reduces camera movement caused by your hands.
It helps when shooting:
slower shutter speeds
static subjects
environmental shots
What Stabilization Does Not Fix
Concert photography problems usually come from subject movement.
A singer moving across the stage can still be blurry at:
1/60
1/100
even 1/200 in some situations
because the performer is moving—not the camera.
For live music photography:
Shutter speed is usually more important than stabilization.
A sharp subject with higher ISO noise is usually better than a blurry image with less noise.
Timing Peak Moments
Sharp concert photography is not only about settings.
Timing plays a major role.
The sharpest images often happen during predictable moments.
Watch for:
a singer pausing before a vocal line
a guitarist holding a pose
a drummer raising a stick
a performer reaching toward the crowd
a dramatic lighting change
These moments often create:
cleaner focus
stronger expressions
better composition
Anticipate Instead of React
The best concert photographers are not just reacting.
They are predicting.
Instead of waiting until the perfect moment appears:
watch performer movement
learn their patterns
prepare your framing
be ready before the action happens
The difference between an average image and a great image is often less than a second.
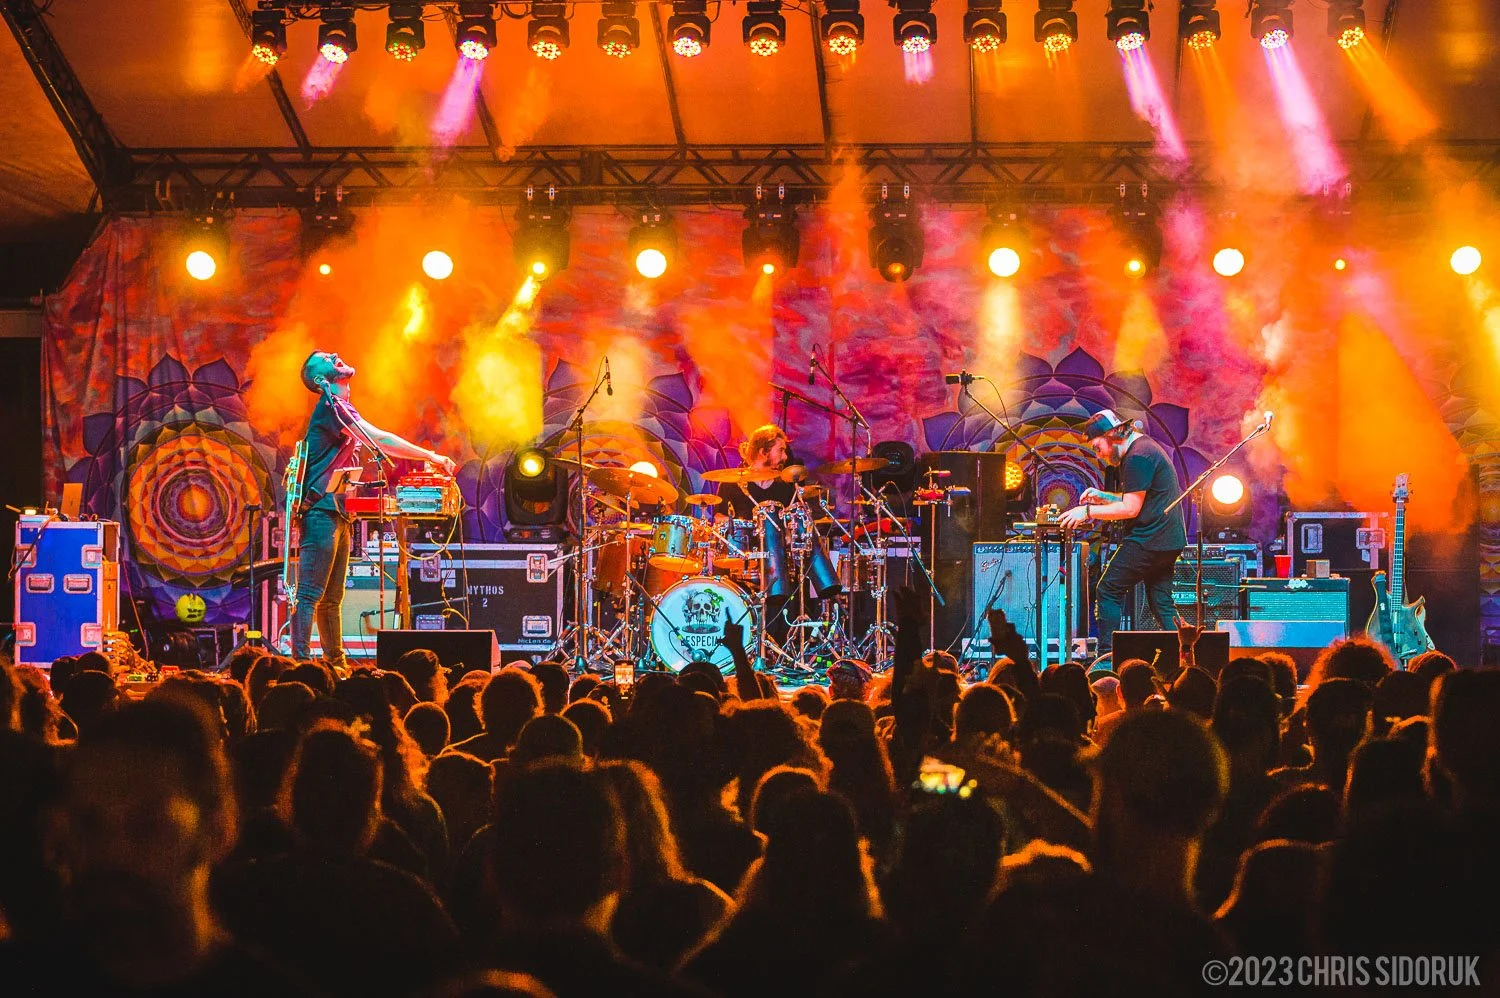
concert photography capturing peak moment sharp image
Positioning for Better Focus
Where you stand affects sharpness more than many photographers realize.
A poor position creates problems:
blocked views
inconsistent focus
distracting backgrounds
difficult compositions
A strong position gives you:
cleaner sightlines
better lighting
easier autofocus tracking
Look for Consistent Lighting
If possible, position yourself where performers regularly enter good light.
Avoid relying only on autofocus.
Good light improves:
contrast detection
subject separation
autofocus reliability
Avoid Shooting Through Too Much Clutter
Crowded stages can confuse autofocus.
Be aware of:
microphone stands
speaker stacks
foreground distractions
other performers crossing the frame
Sometimes moving a few feet changes everything.
Small Venue Challenges
Small venues are some of the hardest environments for sharp concert photography.
You often deal with:
extremely low light
fast performer movement
limited shooting positions
inconsistent stage lighting
The close distance also creates challenges.
At short distances:
movement appears larger
depth of field becomes thinner
focus errors become more obvious
Strategies That Help in Small Venues
For small clubs and bars:
prioritize shutter speed
use fast lenses
avoid shooting wide open all the time if focus becomes inconsistent
anticipate movement
choose your position carefully
Small venues reward photographers who understand timing and technique.
👉 Related guide:
Small Venue Concert Photography Guide
Real-World Concert Photography Workflow
A reliable workflow matters more than constantly changing settings.
Before the show:
choose your main lens
check autofocus settings
confirm memory cards and batteries
set a starting shutter speed
During the performance:
watch lighting patterns
adjust ISO as needed
focus on moments, not volume of shots
review occasionally for sharpness
After the show:
remove obvious misses
compare focus consistency
identify why certain images worked
Over time, this creates instinct.
The goal is not to think about every setting while shooting.
The goal is to build a system where your camera becomes an extension of your timing and creativity.
Common Mistakes That Cause Blurry Concert Photos
Even experienced photographers miss focus or lose sharpness in difficult concert environments.
The good news:
Most blurry concert photos are not caused by having the wrong camera.
They are usually caused by a few common mistakes that can be corrected with better technique and workflow.
Using a Shutter Speed That Is Too Slow
The most common mistake in concert photography is trying to protect ISO by lowering shutter speed.
Photographers often think:
"Can I keep my ISO lower?"
The better question is:
"Is my shutter speed fast enough to capture the moment?"
A slightly noisy image can usually be improved in editing.
A blurry image cannot.
If you are seeing:
blurry hands
soft facial expressions
smeared movement
unclear instrument details
your shutter speed is likely too slow.
Relying Too Much on Image Stabilization
Image stabilization is useful, but it solves a very specific problem.
It helps reduce:
camera shake
hand movement
slower shutter speed issues
It does not stop:
a singer moving across the stage
a drummer hitting cymbals
a guitarist jumping
fast performer movement
A stabilized camera can still produce a blurry subject.
For concerts, shutter speed remains the priority.
Shooting Everything Wide Open
Fast lenses are one of the biggest advantages in concert photography.
However, shooting at the widest aperture available is not always the best choice.
At f/1.4 or f/1.8:
depth of field becomes extremely thin
focus errors become more noticeable
moving subjects can leave the focus plane quickly
Sometimes stopping down slightly improves your success rate.
For example:
A sharp image at f/2.8 is better than a soft image at f/1.4.
The goal is not the widest aperture.
The goal is the highest percentage of usable images.
Letting Autofocus Work Without Guidance
Modern cameras have incredible autofocus systems.
But concerts are challenging environments.
Your camera may see:
microphone stands
guitar necks
stage lights
background performers
audience members
and decide those are better focus targets.
A photographer who understands autofocus control will usually outperform someone relying entirely on automatic settings.
Waiting Until the Moment Happens
Sharp concert photography is partly a timing skill.
If you react after the moment happens, you are already late.
Examples:
A singer jumping.
A drummer hitting a major accent.
A guitarist moving into a pose.
The best photographers anticipate these moments and prepare before they happen.
Better timing improves:
sharpness
expression
composition
storytelling
Overshooting Instead of Improving Timing
Burst shooting can be useful, but it can also hide problems.
Taking hundreds of images of the same moment can create:
more editing time
more near-duplicates
less intentional photography
Professional photographers still use bursts when appropriate, but they rely heavily on:
anticipation
timing
understanding performer behavior
A better goal is not more photos.
It is more keepers.
How Editing Affects Perceived Sharpness
Editing can improve how sharp an image appears.
However, editing cannot create detail that was never captured.
There is a major difference between:
A sharp image that needs refinement
and
A blurry image caused by missed focus or movement
Sharpening
Sharpening can help improve:
edge definition
fine details
overall clarity
It works especially well on:
eyes
facial details
instruments
clothing textures
However, excessive sharpening can make concert images look unnatural.
Noise Reduction
High ISO is a reality of concert photography.
Noise reduction can help:
clean up grain
improve overall appearance
make images easier to view
But too much noise reduction can remove important details.
The goal is balance:
Reduce distraction while keeping the energy of the image.
Contrast and Local Adjustments
Perceived sharpness is also influenced by contrast.
Small adjustments to:
contrast
blacks
texture
clarity
can make a photo feel sharper and more impactful.
This is especially useful with:
backlit performers
colorful stage lighting
atmospheric concert images
AI Editing Tools
Modern editing tools have improved significantly.
Features like:
AI noise reduction
subject masking
selective sharpening
can help improve difficult images.
However:
Editing should enhance a strong capture.
It should not become a replacement for:
proper exposure
good focus
correct shutter speed
👉 Related guide:
My Personal Sharpness Workflow Before Every Show
A consistent process reduces mistakes before they happen.
Here is the approach I recommend for concert photography.
Step 1: Set a Minimum Shutter Speed
Before worrying about ISO, decide how much movement you need to freeze.
Typical starting points:
Slow performers
1/250
Most concerts
1/320–1/400
High-energy performances
1/500+
Step 2: Choose the Right Aperture
Start wide when light is limited.
Examples:
f/1.8 for very dark venues
f/2.8 for professional zoom lenses
f/4 when lighting allows
Adjust based on:
performer movement
number of subjects
lighting conditions
Step 3: Let ISO Adjust Automatically When Needed
Modern cameras are designed to handle high ISO.
I would rather capture:
a sharp ISO 6400 image
than:
a blurry ISO 1600 image
The image you capture is more valuable than the theoretical image quality you lose.
Step 4: Confirm Autofocus Settings
Before the performance begins:
Check:
AF-C / continuous autofocus
tracking settings
focus area
eye detection settings
Do not wait until the first song to discover something is wrong.
Step 5: Watch Before Shooting
One of the biggest improvements photographers can make is simply observing.
Before firing hundreds of frames, look for:
where performers move
where lighting hits
repeated movements
emotional moments
The best photos usually happen when preparation meets timing.
Camera-Specific Considerations for Sharp Concert Photos
The principles of sharp concert photography apply to every system.
However, different camera brands have different strengths.
Sony Cameras
Sony mirrorless cameras are popular among concert photographers because of their:
excellent autofocus tracking
Real-Time Eye AF
strong low-light performance
Cameras like the Sony A7 IV are especially versatile because they combine:
33MP resolution
strong autofocus
reliable high ISO performance
Canon Cameras
Canon cameras are known for:
excellent subject recognition
reliable autofocus
strong color rendering
Models like the Canon EOS R6 Mark II are particularly strong for photographers who prioritize:
low-light performance
fast-moving subjects
hybrid photo/video work
Nikon Cameras
Nikon has long been respected for:
dynamic range
ergonomics
professional build quality
Models like the Nikon Z6 III, Z8, and Z9 offer:
excellent autofocus
strong low-light capability
reliable performance in demanding environments
Older DSLR Cameras
Professional DSLRs can still produce excellent concert photos.
A camera like:
Nikon D850
Canon EOS 5D Mark IV
can still deliver strong results with the right lens and technique.
The photographer behind the camera matters more than having the newest equipment.
Final Thoughts
Sharp concert photos come from a combination of preparation, settings, timing, and experience.
The biggest improvements usually come from understanding the fundamentals:
use a fast enough shutter speed
control autofocus
choose the right lens
anticipate movement
prioritize sharpness over low ISO
Concert photography will always involve challenging conditions.
Lights will change.
Performers will move.
Moments will disappear quickly.
The goal is not to eliminate every technical challenge.
The goal is to build a workflow that consistently captures the moments that matter.
A sharp image with some noise tells the story.
A blurry image does not.
Frequently Asked Questions
What shutter speed should I use for concert photography?
A good starting point is 1/250 second, but many concerts require 1/320, 1/400, or faster depending on performer movement. High-energy performances may require 1/500 or more.
Why are my concert photos blurry even when my shutter speed is fast enough?
If motion blur is not the problem, the issue is likely autofocus. Check your focus mode, focus area, and whether the camera is locking onto the performer rather than another object.
Is ISO noise better than blurry concert photos?
Yes. A sharp image with some noise is usually much more usable than a blurry image with lower ISO. Modern cameras and editing software handle noise extremely well.
Does image stabilization help make concert photos sharper?
Image stabilization helps reduce camera shake but does not freeze subject movement. For moving performers, shutter speed is usually more important.
What autofocus mode should I use for concert photography?
Continuous autofocus is usually the best choice:
Nikon AF-C
Sony AF-C
Canon AI Servo
These modes allow the camera to track moving performers.
Should I shoot concert photography in burst mode?
Burst mode can help capture important moments, but it should not replace timing and anticipation. A thoughtful sequence of images is usually better than hundreds of random frames.
What lens is best for getting sharp concert photos?
Fast lenses are usually the best choice because they allow faster shutter speeds in low light.
Popular options include:
24–70mm f/2.8
70–200mm f/2.8
35mm f/1.8
50mm f/1.8
The best lens depends on your venue and shooting position.
Can editing fix blurry concert photos?
Only partially.
Editing can improve:
noise
contrast
perceived sharpness
But it cannot fully recover an image that is out of focus or has severe motion blur.
==========
All photographs © Chris Sidoruk. Images are protected by copyright and may not be used, copied, modified, or redistributed without written permission.
Related Resources
Continue improving your concert photography workflow:
Best Camera Settings for Concert Photography
Learn the ideal exposure settings for shooting live music in difficult lighting.
Best Lenses for Concert Photography
Find the lenses that help you capture sharp images in low-light environments.
Back Button Focus for Concert Photography
Improve autofocus control and consistency.
Concert Photography Composition Guide
Learn how framing, timing, and positioning create stronger images.
Small Venue Concert Photography Guide
Master the challenges of bars, clubs, and intimate live performances.
Editing Live Music Photos Guide
Build a consistent workflow for high ISO concert images.
