

Best Astrophotography Camera Settings: Comprehensive Guide
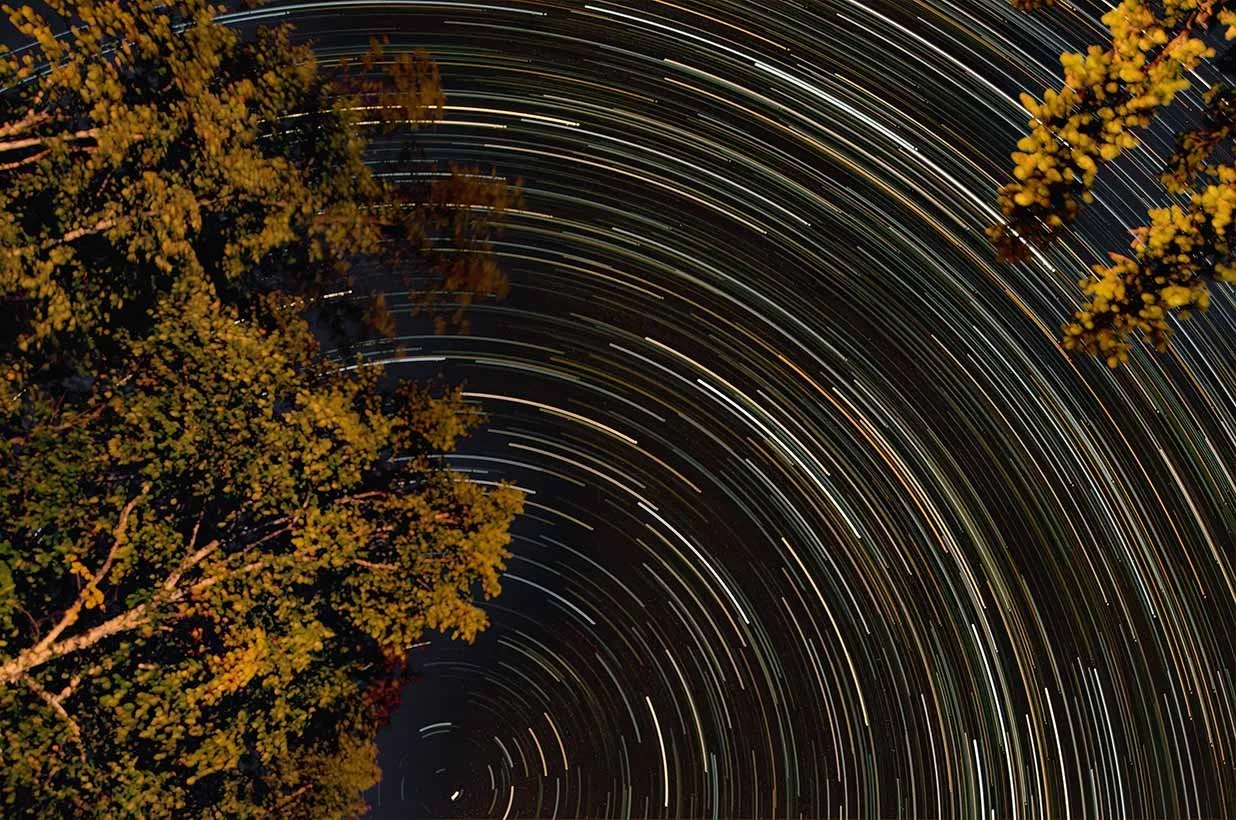
Star Trails in Ludlow, Vermont. | ©2019 Chris Sidoruk
*Some links in this article are affiliate links. If you purchase through them, it helps support my work at no extra cost to you.
==========
Astrophotography is the art of capturing images of the night sky, including the stars, the moon, and the Milky Way. To get the perfect shot, you need to have the right equipment and know the best camera settings. In this article, we will explore the best camera settings for astrophotography, including aperture, shutter speed, ISO, and more.
1. Introduction
Astrophotography is a unique and challenging genre of photography that requires specific techniques and settings to capture images of the night sky. With the right camera settings and equipment, you can create breathtaking images of the stars, the Milky Way, and other celestial objects.
2. Choosing the right camera for astrophotography
Astrophotography is a specialized field of photography that demands specific features from your camera. Your choice between a DSLR (Digital Single-Lens Reflex) and a mirrorless camera is the first decision you'll need to make. Each type has its own set of advantages and considerations:
DSLR vs. Mirrorless Cameras
DSLR Cameras:
Optical Viewfinder: DSLRs come equipped with an optical viewfinder, allowing you to see the actual scene through the lens. This feature is advantageous for framing and composing your shots accurately.
Battery Life: DSLRs often have longer battery life compared to mirrorless cameras, which can be crucial during long night-time photography sessions.
Wide Range of Lenses: DSLRs have been around for a longer time, so they have a broader selection of compatible lenses, including those specifically designed for astrophotography.
Reliability: DSLRs are known for their durability and robust build, making them suitable for outdoor use in various conditions.
Mirrorless Cameras:
Compact and Lightweight: Mirrorless cameras are more compact and lighter than DSLRs, making them easier to transport for astrophotography excursions.
Electronic Viewfinder (EVF): Mirrorless cameras use EVFs, which offer real-time previews of your exposure settings and can provide useful overlays for astrophotography.
Advanced Features: Many mirrorless cameras are equipped with advanced features like in-body image stabilization and high-resolution sensors, which can enhance image quality.
Adaptability: Mirrorless cameras can adapt to a wide range of lenses through adapters, giving you more flexibility with your lens choices.
Full-frame vs. Crop Sensor Cameras
Once you've decided between DSLR and mirrorless, you'll need to consider the sensor size:
Full-frame Cameras:
Greater Light Sensitivity: Full-frame sensors are larger, allowing them to capture more light. This can be advantageous for astrophotography as it helps reduce noise in low-light conditions.
Higher Dynamic Range: Full-frame cameras often have a broader dynamic range, which means they can capture more detail in both the shadows and highlights of your astrophotos.
Crop Sensor Cameras:
Reach and Magnification: Crop sensor cameras provide a "reach" advantage, making them ideal for capturing distant celestial objects. They can essentially act like a teleconverter, magnifying your lenses.
Affordability: Crop sensor cameras are generally more budget-friendly than full-frame options, making them a great choice for beginners or those on a tighter budget.
Low-Light Performance
Regardless of the camera type or sensor size you choose, low-light performance is critical in astrophotography. Look for a camera that has good noise control at high ISO settings. The ability to shoot at higher ISO values without excessive noise will allow you to capture faint stars and deep-sky objects more effectively.
When selecting the right camera for astrophotography, consider your budget, preferences, and the specific features that matter most to you. Whether you opt for a DSLR or mirrorless camera, and whether you choose a full-frame or crop sensor model, what matters most is your understanding of the camera's settings and your ability to use them to capture the beauty of the night sky.
Stock Image by @usukbayer from Unsplash
3. Choosing the right lens for astrophotography
Selecting the right lens is a crucial aspect of astrophotography, as it directly impacts the quality and style of your night sky images. Let's explore the considerations when choosing the perfect lens for your astrophotography endeavors.
Selecting the Perfect Lens
Aperture and Focal Length
Aperture (f-stop): The aperture of a lens plays a vital role in astrophotography. Look for lenses with wide apertures, such as f/2.8, f/1.8, or even wider if possible. A wide aperture allows more light to enter the camera, making it easier to capture faint stars and nebulae. A low f-stop also creates a shallow depth of field, which can help isolate celestial objects.
Focal Length: The choice of focal length depends on the type of astrophotography you want to pursue:
Wide-Angle Lenses (e.g., 14mm to 35mm): These are ideal for capturing the entire night sky, including constellations, the Milky Way, and sprawling star fields. Wide-angle lenses can also create stunning landscape-astro compositions.
Standard and Telephoto Lenses (e.g., 50mm to 200mm): These lenses are better suited for capturing specific celestial objects, such as the moon, planets, and deep-sky objects like galaxies and star clusters. They allow for detailed close-ups.
Wide-Angle vs. Telephoto Lenses
Wide-Angle Lenses:
Pros: Wide-angle lenses are excellent for capturing the grandeur of the night sky. They are perfect for Milky Way photography and creating panoramic shots of the celestial landscape.
Cons: These lenses may not provide as much detail when photographing distant objects like planets or galaxies.
Telephoto Lenses:
Pros: Telephoto lenses excel in capturing distant celestial objects and creating detailed close-ups. They are ideal for lunar and planetary photography.
Cons: Telephoto lenses have a narrower field of view, making it challenging to capture wide celestial vistas like the Milky Way.
Lens Compatibility
Consider the compatibility of your lens with your camera body. Ensure that the lens you choose is compatible with your camera's mount. Additionally, some lenses may require adapters to fit on certain camera models, so check for compatibility before making a purchase.
When selecting a lens for astrophotography, keep in mind that versatility can be valuable. Many astrophotographers opt for a wide-angle lens as their primary choice due to its ability to capture both the grandeur of the night sky and specific celestial objects. However, if you are dedicated to photographing specific objects like planets or deep-sky nebulae, investing in a good telephoto lens is essential.
Lastly, remember that the quality of the lens matters. High-quality lenses will yield sharper and clearer images with minimal aberrations. While they may be more expensive, they can significantly enhance the quality of your astrophotography.
Choosing the right lens for astrophotography is just as important as choosing the right camera. A wide-angle lens with a low aperture is ideal for capturing the night sky.
Some of the best lenses for astrophotography include
Rokinon 14mm f/2.8
( Nikon - Z | Canon - EF | Sony - E ),
Sigma 20mm f/1.4
(Sony - E )
Sigma 14-24mm f/2.8 DG HSM ART Lens
( Nikon - F Mount | Canon - EF )
Sony FE 16-35mm f/2.8 GM II G Master Lens
( Sony - E )
Canon RF 15-35mm f/2.8 L IS USM Lens
( Canon - RF )
Nikon 14-24mm f/2.8
( Z Mount )
4. The importance of a tripod
Stability and Reduced Vibration:
Stability: Astrophotography often requires long exposure times to capture faint celestial objects. Even the slightest movement or vibration can result in blurry or streaked images. A tripod provides a stable platform, ensuring that your camera remains still throughout the exposure.
No Handheld Limitations: When taking long-exposure shots of the night sky, handheld photography is not an option. Even the steadiest of hands will introduce shake into the image. A tripod eliminates this issue, allowing for longer exposure times.
Precise Framing and Composition:
Framing: Composition is crucial in astrophotography. You need to frame the celestial object or scene precisely. A tripod allows you to make fine adjustments to your camera's position, ensuring that your composition is spot-on.
Reduced Distortion: When capturing wide-angle shots of the night sky, any movement can result in distortion or warping of the stars. A tripod keeps the camera still, preventing such distortions.
Tracking Celestial Objects:
Star Trails: If you want to create images of star trails (the apparent movement of stars in the night sky due to the Earth's rotation), a tripod is essential. You'll mount your camera on the tripod and use a tracking device or software to follow the stars' motion while keeping the foreground stationary.
Deep-Sky Objects: When photographing deep-sky objects like galaxies or nebulae, a tripod is necessary to keep the camera fixed on the target for extended periods. This allows you to capture more light and detail.
Long Exposure Photography:
Capture Faint Objects: Many astrophotography subjects, such as nebulae and galaxies, emit faint light. To capture these objects effectively, you'll need long exposure times, which can range from several seconds to several minutes. A tripod is essential for keeping the camera steady during these extended exposures.
Reduce Noise: Longer exposures can also generate more heat within the camera sensor, potentially causing noise. A tripod enables you to capture long exposures without introducing noise from camera movement.
Multiple Exposures and Image Stacking:
Image Stacking: In astrophotography, it's common to capture multiple images of the same subject and stack them during post-processing. A tripod ensures that each image is perfectly aligned with the others, making the stacking process much more effective.
HDR Photography: High Dynamic Range (HDR) techniques are often used in astrophotography to capture both dim and bright parts of a scene. A tripod allows you to take bracketed exposures with precise alignment, which is crucial for HDR processing.
A sturdy tripod is essential for astrophotography. When capturing images of the night sky, even the slightest movement can cause blurry images. A sturdy tripod will keep your camera stable and prevent camera shake.
5. Setting up your camera for astrophotography
Use Manual Mode:
Manual Mode (M): Astrophotography demands precise control over exposure settings. Start by switching your camera to manual mode (M). This mode allows you to have full control over shutter speed, aperture, and ISO.
Aperture (f-stop):
Wide Aperture: Choose a wide aperture (low f-number) to allow more light into your camera. Ideal settings often range from f/1.8 to f/4.0, depending on your lens. A wide aperture helps capture faint stars and celestial objects.
Shutter Speed:
Long Exposure: Astrophotography requires longer exposure times to gather enough light. Start with an exposure time of 20-30 seconds for wide-angle shots of the night sky. For deep-sky objects, exposures can range from several minutes to hours.
Use Bulb Mode: When capturing star trails or exposures longer than 30 seconds, use the "Bulb" mode, which allows you to manually control the exposure duration by using a remote shutter release or intervalometer.
ISO Settings:
Low ISO: Begin with a low ISO setting, typically around ISO 400-800 for wide-angle shots. Lower ISO values reduce noise and result in cleaner images. For deep-sky astrophotography, you may need to use higher ISO values (e.g., ISO 1600-3200) to capture more detail.
White Balance:
Set to Kelvin: Choose a manual white balance setting and set it to a specific Kelvin temperature (e.g., 3200K for tungsten or 5500K for daylight). Avoid using auto white balance, as it can lead to color shifts in your night sky photos.
Image Format:
RAW Format: Shoot in RAW mode rather than JPEG. RAW files contain more data and provide greater flexibility during post-processing, allowing you to correct exposure and color balance more effectively.
Long Exposure Noise Reduction:
Enable Noise Reduction: Turn on long exposure noise reduction if your camera has this feature. It helps reduce noise in long-exposure shots by capturing a dark frame (with the shutter closed) to subtract noise from the image.
Mirror Lock-Up and Remote Shutter Release:
Mirror Lock-Up: In DSLR cameras, enable mirror lock-up to minimize camera vibrations caused by mirror movement during exposure.
Remote Shutter Release: Use a remote shutter release or intervalometer to trigger the shutter without touching the camera. This further reduces the risk of introducing vibrations.
Focus on Manual Mode:
Manual Focus: Set your lens to manual focus mode and use the infinity (∞) symbol as a starting point. Fine-tune focus by taking test shots and adjusting until stars appear sharp.
Live View: Utilize your camera's Live View mode to magnify stars on the LCD screen for precise focusing.
Turn Off Image Stabilization:
Image Stabilization (IS): If your lens has image stabilization, turn it off when using a tripod. Image stabilization can introduce subtle vibrations that affect image quality.
Use a Sturdy Tripod:
Sturdy Support: Mount your camera on a sturdy tripod to eliminate any movement during long exposures. Ensure the tripod is set up on a stable surface.
Check for Light Pollution:
Light Pollution Filters: If you're shooting in an area with significant light pollution, consider using light pollution filters to reduce unwanted artificial light from affecting your images.
Test Shots and Bracketing:
Bracket Exposures: Capture multiple exposures at different settings (e.g., changing ISO or shutter speed) to ensure you have a range of options to work with during post-processing.
By following these steps and continuously experimenting with different settings, you can set up your camera effectively for astrophotography.
Remember that astrophotography often involves a learning curve, so practice and patience are key to improving your skills and capturing breathtaking images of the night sky.
Stock image by @vorosbenisop from Unsplash
6. Focusing for astrophotography
Manual Focus Mode:
Switch your camera lens to manual focus mode. Autofocus often struggles in low-light conditions, making manual focus essential for astrophotography.
Use the Infinity (∞) Symbol:
Start by setting your lens focus to the infinity (∞) symbol. This is usually the starting point for astrophotography, as stars are essentially at an infinite distance from your camera.
Live View Mode:
Activate your camera's Live View mode. This mode allows you to use the LCD screen to compose and focus your shot.
Zoom In on a Star:
Choose a bright star in the night sky and zoom in on it using Live View. Most cameras allow you to magnify the Live View image by 5x or 10x. This magnification helps you see the star more clearly.
Focus Ring Adjustment:
Slowly adjust the focus ring on your lens while observing the magnified star in Live View. Your goal is to make the star appear as small and pinpoint as possible. This indicates that the star is in perfect focus.
Focus Peaking (if available):
Some cameras offer a feature called "focus peaking," which highlights in-focus areas in a specific color (often red or white) in Live View. If your camera has this feature, enable it to help you achieve precise focus.
Test Shots:
Capture test shots at various focus settings to ensure you've achieved optimal focus. Review the images on your LCD screen to confirm that the stars appear as tiny points of light with no noticeable blurriness.
Focus Stacking (Deep-Sky Objects):
When photographing deep-sky objects like galaxies and nebulae, consider using focus stacking. This technique involves capturing multiple images at slightly different focus distances and then blending them in post-processing to create a single, sharp image.
Recheck Focus Periodically:
It's essential to recheck your focus periodically throughout your astrophotography session. Temperature changes, lens creep, and other factors can affect focus over time.
Manual Focus Tape (Optional):
Some astrophotographers use a small piece of tape to mark the focus ring position on their lens. This can be helpful for quickly returning to the correct focus point if the lens is accidentally bumped or adjusted.
Autofocus with a Bright Star (Rare Cases):
In some cases, if you're having difficulty achieving manual focus, you can try using autofocus with a very bright star or planet. Once autofocus locks on, switch back to manual focus to maintain the setting.
Remember that achieving precise focus in astrophotography can be challenging, especially in low-light conditions. Take your time to experiment with different focus techniques and settings until you're satisfied with the results.
A well-focused image is the foundation of stunning astrophotography, so don't rush this crucial step in your night sky photography journey.
7. Capturing the Milky Way
Location and Timing:
Dark Skies: To capture the Milky Way, you'll need to find a location with minimal light pollution. National parks, remote areas, and rural locations often offer the best dark skies. Websites and apps like Dark Sky Finder can help you locate suitable spots.
Moon Phase: Choose a night when the moon is either new (no moonlight) or below the horizon during your shoot. A moonless night allows for better visibility of the Milky Way and faint stars.
Equipment:
Camera: Use a DSLR or mirrorless camera with manual settings. A camera with good low-light performance is ideal.
Wide-Angle Lens: A fast, wide-angle lens with a low f-stop (e.g., f/1.8 to f/2.8) is essential. It allows you to capture more of the Milky Way and gather more light.
Sturdy Tripod: Mount your camera on a stable tripod to eliminate shake during long exposures.
Remote Shutter Release: Use a remote shutter release or intervalometer to trigger the shutter without touching the camera.
Camera Settings:
Manual Mode: Set your camera to manual mode (M) for full control over settings.
Aperture (f-stop): Use the widest aperture your lens allows (e.g., f/2.8 or lower) to capture more light.
Shutter Speed: Start with an exposure time of 20-30 seconds. Experiment with longer exposures, but be cautious of star trailing, which can occur with exposures over 30 seconds.
ISO Settings: Begin with an ISO setting of 800-1600. Adjust it higher if needed to capture more detail in dimmer parts of the Milky Way.
White Balance: Set your white balance to a Kelvin temperature that suits your preference (e.g., 3500K-4000K for a slightly warmer tone or 5000K-5500K for a cooler tone).
Long Exposure Noise Reduction: Enable long exposure noise reduction to reduce noise in your images.
Composition:
Foreground Elements: Include interesting foreground elements, such as landscapes, trees, or structures, to add depth and context to your Milky Way shots.
Rule of Thirds: Use the rule of thirds to compose your image. Position the Milky Way along one of the thirds' lines for a visually pleasing composition.
Shooting:
Take Test Shots: Capture several test shots to assess exposure and focus. Adjust settings as needed.
Bracket Exposures: For challenging lighting conditions, bracket your exposures to capture different levels of detail in the Milky Way and foreground. Bracketing involves taking multiple shots at varying exposures.
Shoot in RAW: Always shoot in RAW format to retain the most image data for post-processing.
Post-Processing:
Noise Reduction: Use software like Adobe Lightroom or Photoshop to reduce noise and enhance the quality of your Milky Way images.
Contrast and Color Correction: Adjust contrast, color balance, and saturation to bring out the Milky Way's beauty.
Stacking (Optional): Consider image stacking for even cleaner and more detailed Milky Way photos. Stacking involves combining multiple exposures of the same scene to reduce noise and enhance detail.
Practice and Patience:
Milky Way photography takes practice. Be patient and keep experimenting with different settings, locations, and compositions to improve your skills.
Capturing the Milky Way is a captivating journey into the night sky. With the right equipment, settings, and patience, you can create breathtaking images that showcase the stunning beauty of our galaxy.
8. Capturing star trails
Location and Timing:
Dark Skies: As with Milky Way photography, choose a location with minimal light pollution for clearer and more defined star trails.
Moon Phase: Aim for a night when the moon is absent or in its early phases (new to crescent). A bright moon can wash out the fainter stars and make star trails less visible.
Equipment:
Camera: A DSLR or mirrorless camera with manual settings is ideal.
Wide-Angle Lens: A fast, wide-angle lens with a low f-stop (e.g., f/2.8 or lower) is essential for capturing a broad section of the night sky.
Sturdy Tripod: Mount your camera on a stable tripod to eliminate vibrations during long exposures.
Remote Shutter Release: Use a remote shutter release or intervalometer to trigger the shutter without touching the camera.
3. Camera Settings:
Manual Mode: Set your camera to manual mode (M) for full control over settings.
Aperture (f-stop): Use a wide aperture (e.g., f/2.8) to allow more light to enter the lens.
Shutter Speed: Star trails are created by taking long exposures. Start with an exposure time of 15-30 minutes (900-1800 seconds). The longer the exposure, the longer the star trails will appear.
ISO Settings: Begin with a low ISO setting (e.g., ISO 100-400) to minimize noise in your images. Adjust it higher if needed to capture more stars.
White Balance: Set your white balance to a Kelvin temperature that suits your desired color tone (e.g., 3500K-4000K for a warmer tone or 5000K-5500K for a cooler tone).
Long Exposure Noise Reduction: Enable long exposure noise reduction to reduce noise in your images.
Focusing:
Manual Focus: Switch your lens to manual focus mode.
Use Live View: Activate Live View mode on your camera's LCD screen.
Zoom In on a Star: Select a bright star in the night sky and use Live View to zoom in on it.
Adjust Focus: Slowly adjust the focus ring until the star appears as a tiny, pinpoint light. Achieving precise focus is crucial for sharp star trails.
Mark the Focus Ring: If desired, mark the focus ring's position with tape or a marker to quickly return to the correct focus point if it's accidentally moved.
Composition:
Foreground Elements: Consider including interesting foreground elements like landscapes, trees, or structures to add depth and context to your star trail images.
Polar Alignment (Optional): For perfectly circular star trails, you can align your camera's view to the North Star (Polaris) in the Northern Hemisphere or the Southern Cross in the Southern Hemisphere.
Shooting:
Take Multiple Exposures: To create longer star trails, take multiple exposures consecutively, one after the other. Use your remote shutter release or intervalometer to control the timing.
Continuous Shooting: Set your camera to continuous shooting mode to ensure there are no gaps between exposures. The gapless sequence of images will result in seamless star trails.
Interval Between Exposures: The interval between exposures depends on your desired star trail length. Experiment with intervals of a few seconds to a minute between shots.
Post-Processing:
Stacking Images: Import your star trail images into software like StarStaX or Adobe Photoshop. Stack the images to create a single composite image with continuous star trails.
Editing: Adjust contrast, brightness, and color balance as needed during post-processing. Consider enhancing foreground elements for a balanced composition.
Practice and Patience:
Capturing stunning star trails may require practice and patience. Be prepared to spend several hours in the field to create longer trails.
With the right equipment, settings, and techniques, you can capture mesmerizing star trails that showcase the Earth's rotation and the motion of the stars across the night sky.
Star trail photography offers a unique and captivating way to explore the wonders of the cosmos.
Stock Image by @romenig from Unsplash
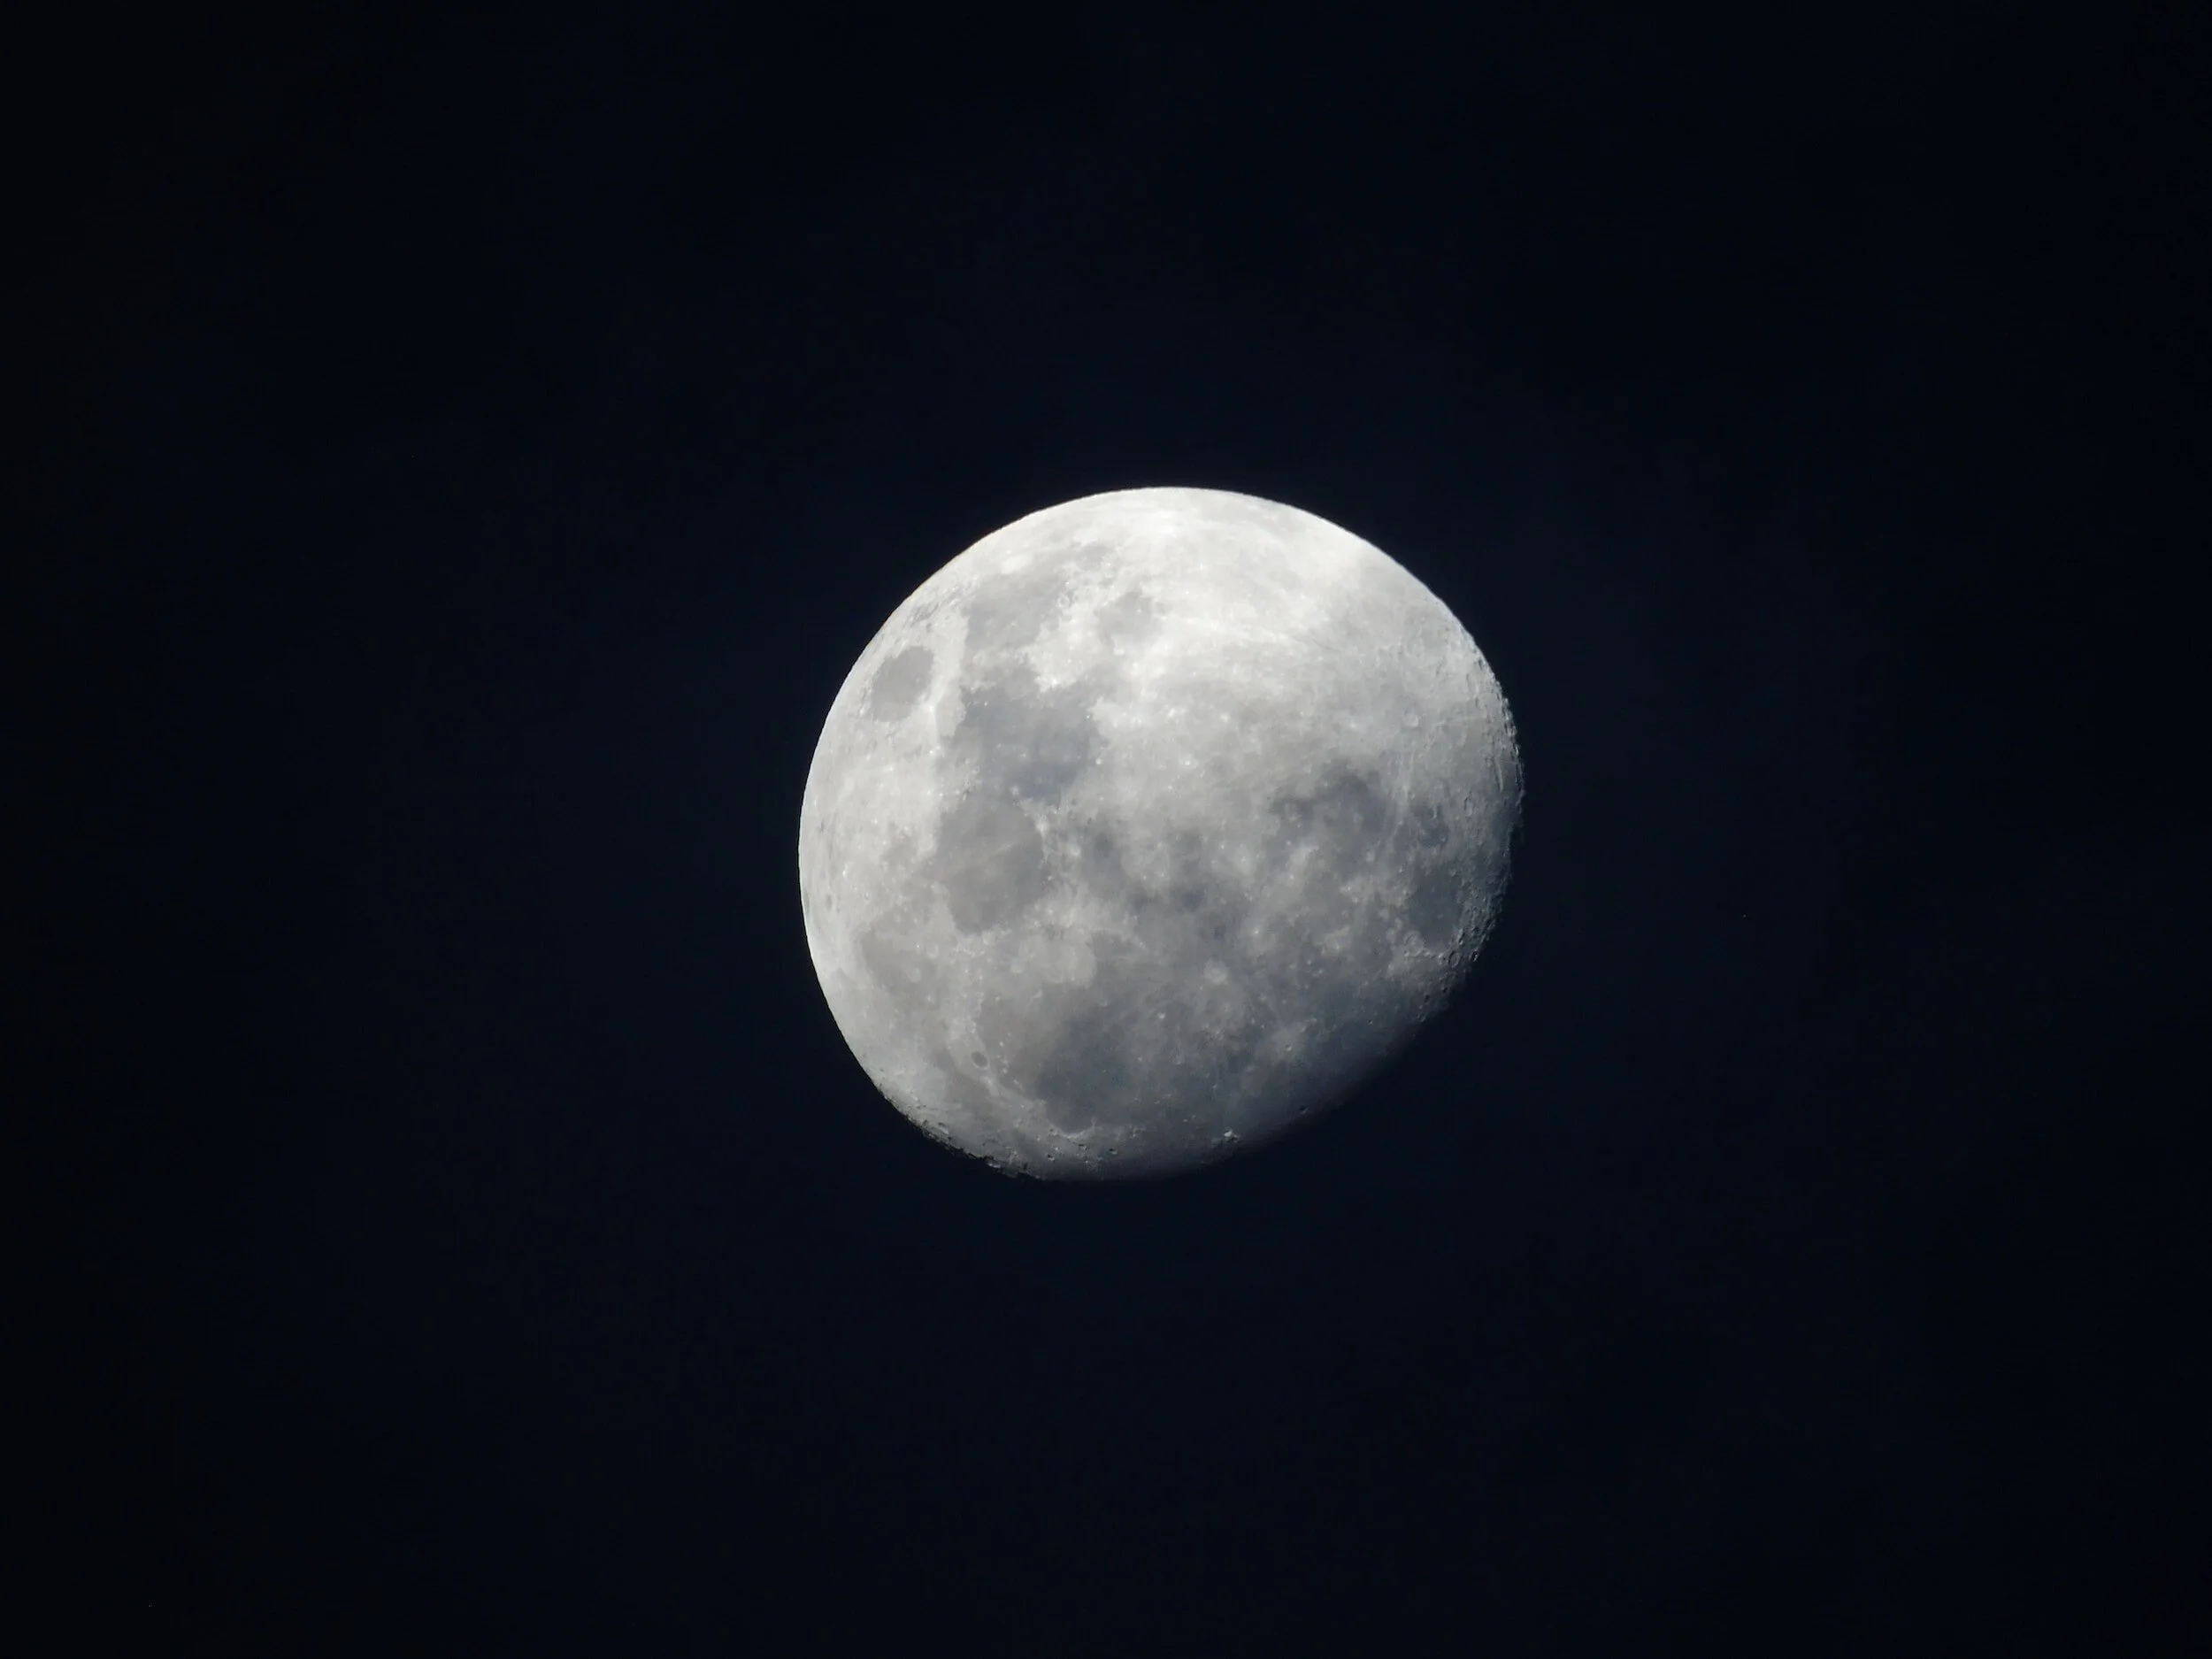
9. Tips for capturing the moon
Choose the Right Gear:
Telephoto Lens: A telephoto lens with a focal length of at least 200mm is recommended for detailed shots of the moon. Longer focal lengths, such as 300mm or 400mm, allow for extreme close-ups.
Tripod: Use a sturdy tripod to ensure stable shots, especially if you're using a telephoto lens with high magnification.
Remote Shutter Release: A remote shutter release or cable release minimizes camera shake when taking photos.
Mirror Lock-Up (Optional): If your camera has this feature, enable it to further reduce vibration during the shot.
Timing and Phases:
Plan Your Shoot: Use moon phase calendars or apps to plan your moon photography. The best time to capture the moon is during the first and last quarters when the moon's surface is illuminated at an angle, creating beautiful shadows that reveal details on the lunar surface.
Golden Hour: Consider capturing the moon during the golden hour (shortly before sunset or after sunrise). The warm, soft light can enhance the moon's appearance.
Manual Mode and Settings:
Manual Mode (M): Set your camera to manual mode for full control over settings.
Aperture: Use a narrow aperture (higher f-stop, e.g., f/8 to f/11) to ensure a sharp focus across the moon's surface.
Shutter Speed: For a correctly exposed moon, start with a shutter speed of 1/125 to 1/250 seconds. Adjust as needed based on your camera's metering.
ISO: Begin with a low ISO setting (e.g., ISO 100 or 200) to maintain image quality and reduce noise.
Focus:
Manual Focus: Set your lens to manual focus mode.
Zoom In on the Moon: Use Live View to zoom in on the moon's surface and achieve precise focus. Focus on the moon's craters and details for the best results.
Exposure Bracketing (Optional):
Consider capturing a series of shots with different exposures (bracketing). This can help you achieve the perfect exposure for both the moon's surface and the surrounding landscape.
Composition:
Include Foreground Elements: For more dynamic shots, include interesting foreground elements such as trees, buildings, or mountains. This adds context and scale to your moon photos.
Rule of Thirds: Compose your shot using the rule of thirds. Position the moon along one of the thirds' lines for a balanced composition.
Post-Processing:
In post-processing software like Adobe Lightroom or Photoshop, you can enhance your moon photos by adjusting contrast, sharpness, and color balance.
If you've captured a series of bracketed exposures, consider merging them into an HDR (High Dynamic Range) image to bring out details in both the moon and the foreground.
Experiment and Learn:
Moon photography often involves experimentation and practice. Don't be discouraged if your first attempts don't turn out as expected. Continue learning and refining your techniques.
With these tips and techniques, you'll be well-equipped to capture stunning images of the moon, from close-ups of its surface features to incorporating it into breathtaking landscapes. Moon photography offers endless opportunities for creativity and exploration in the realm of astrophotography.
10. Post-processing your astrophotography images
Import and Organize:
RAW Files: Begin by importing your RAW astrophotography images into post-processing software like Adobe Lightroom or Adobe Camera Raw. RAW files contain more data and provide greater flexibility for adjustments.
Organize: Create a folder structure to keep your images organized. Use descriptive file names to easily identify each image.
Basic Adjustments:
Exposure: Start with basic exposure adjustments. Use the exposure slider to balance the overall brightness of the image. Pay attention to the histogram to avoid overexposure or underexposure.
Contrast: Adjust the contrast slider to enhance the image's dynamic range. Carefully balance contrast to bring out details without causing clipping in the highlights or shadows.
White Balance: Fine-tune the white balance to control the color temperature of the image. For astrophotography, cooler (bluer) temperatures are often preferred.
Noise Reduction:
Luminance Noise: Apply luminance noise reduction to reduce the grainy appearance caused by high ISO settings. Adjust the slider to find the right balance between noise reduction and retaining image detail.
Color Noise: Apply color noise reduction to reduce any unwanted color speckles in the image.
Sharpening:
Capture Sharpening: Apply capture sharpening to enhance the overall sharpness of the image. Adjust the sharpening amount, radius, and detail to achieve the desired level of sharpness.
Masking: Use masking to target sharpening only to the areas with fine details (e.g., stars) while avoiding noise in smooth areas.
Lens Corrections:
Chromatic Aberration: Enable chromatic aberration correction to reduce color fringing caused by lenses.
Lens Profile Corrections: Enable lens profile corrections to correct distortions, vignetting, and other lens-related issues.
Graduated Filters and Radial Filters:
Graduated Filters: Use graduated filters to selectively adjust exposure, contrast, or color temperature in specific areas of the image. This is useful for balancing the brightness of the sky and foreground.
Radial Filters: Apply radial filters to create adjustments that radiate from a central point. This can be helpful for enhancing the central subject or reducing the effect of light pollution near the horizon.
Stacking (Optional):
Image Stacking: If you've captured multiple images of the same scene (common in deep-sky astrophotography), use specialized software like DeepSkyStacker or Sequator to align and stack the images. Stacking reduces noise and enhances details.
Local Adjustments:
Brush Tool: Use the brush tool to apply local adjustments, such as enhancing the brightness of specific stars, reducing noise in certain areas, or enhancing details in nebulae or galaxies.
Color Grading:
Saturation and Vibrance: Adjust the saturation and vibrance sliders to enhance or tone down the colors in your astrophotography images.
HSL/Color Mixer: Fine-tune individual color channels using the Hue, Saturation, and Luminance (HSL) or Color Mixer panel to achieve the desired color balance.
Final Export:
File Format: When you're satisfied with your adjustments, export the image in a suitable file format, such as JPEG or TIFF, depending on your intended use (web, print, etc.).
Image Size: Resize the image to your desired dimensions if necessary.
Quality Settings: Adjust the quality settings to ensure the image retains its quality during export.
Backup and Archive:
Make backup copies of your processed images and store them securely. Astrophotography images can be time-consuming to capture, so safeguard your work.
Continuous Learning:
Astrophotography post-processing is a skill that improves with practice and learning. Keep exploring new techniques and refining your workflow to achieve the best results.
Remember that post-processing is a creative process, and the specific adjustments you make can vary depending on your artistic vision and the characteristics of your astrophotography subject.
The key is to enhance the visual impact of your images while preserving the integrity of the night sky and celestial objects you've captured.
11. Common mistakes in astrophotography
There are several common mistakes in astrophotography that can ruin your images. These include using too high of an ISO, using a low aperture, and not focusing correctly. To avoid these mistakes, take your time and experiment with different settings until you get the perfect shot.
12. Conclusion
Astrophotography is a beautiful and challenging genre of photography. To capture images of the night sky, you need to have the right equipment and know the best camera settings. By following the tips in this article, you can create breathtaking images of the stars, the Milky Way, and other celestial objects.
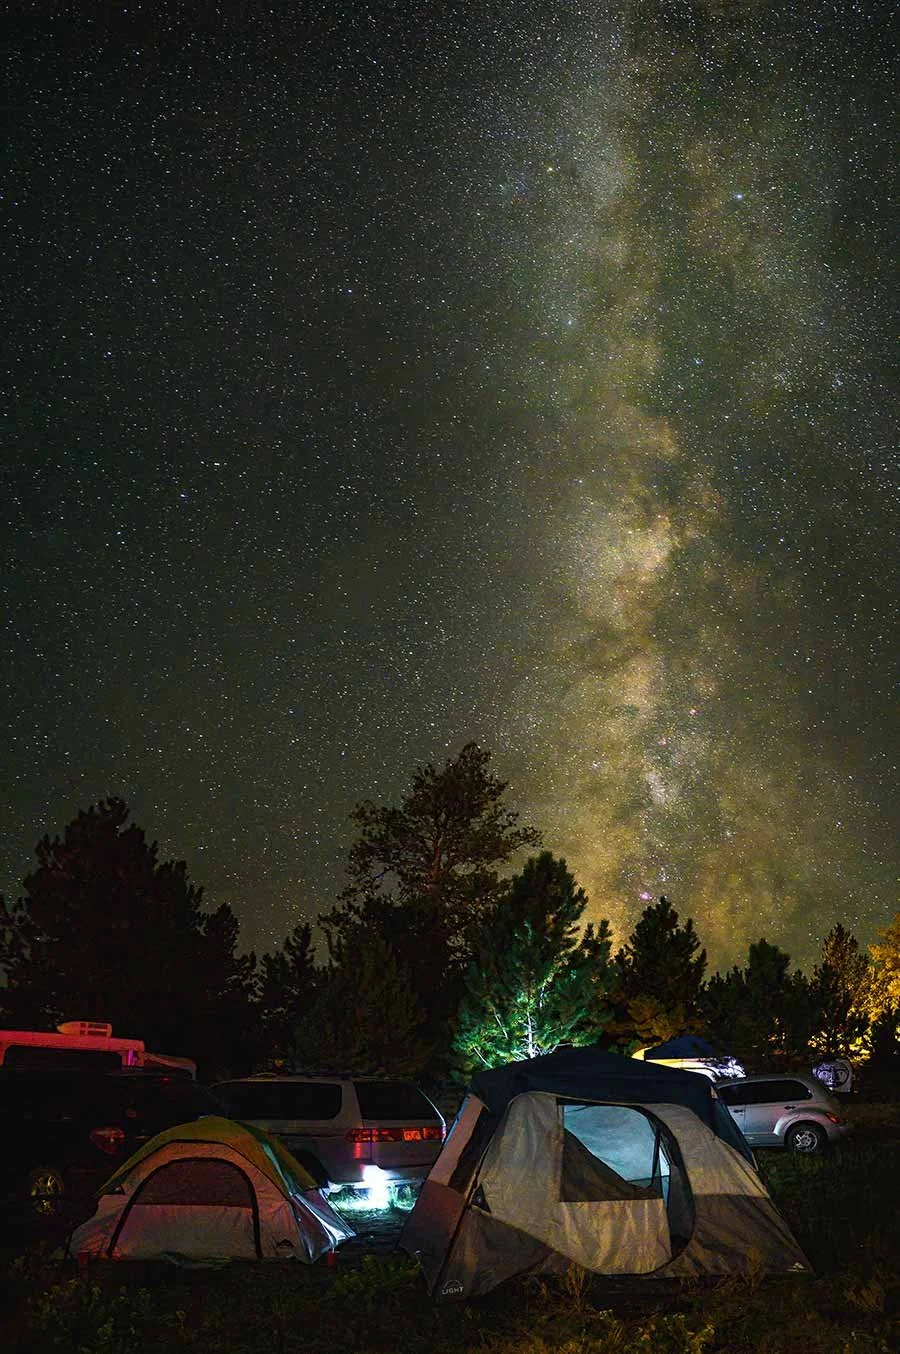
The Milky Way in Colorado. | ©2021 Chris Sidoruk
13. FAQs
What camera is best for astrophotography?
There is no one-size-fits-all answer to this question since different cameras have different capabilities and features. However, in general, cameras with full-frame sensors and high ISO capabilities are ideal for astrophotography.
You can find my article on the best cameras for astrophotography here.
What lens is best for astrophotography?
A wide-angle lens with a low aperture is best for astrophotography since it allows more light to enter the camera and capture more of the night sky.
Some popular choices include the Canon RF 15-35mm f/2.8 L IS USM Lens, Nikon NIKKOR Z 14-24mm f/2.8 S Lens, and Sony FE 16-35mm f/2.8 GM II G Master Lens.
How do you focus for astrophotography?
Focusing for astrophotography can be challenging since autofocus may not work correctly in low light conditions. The best approach is to use manual focus and Live View. First, set your lens to manual focus and then zoom in on a bright star using Live View. Adjust the focus ring until the star appears sharp and in focus.
How do you capture the Milky Way?
To capture the Milky Way, you need to find a location with minimal light pollution, set your camera to a low aperture (f/2.8 or lower), a long shutter speed (20-30 seconds), and a high ISO (3200-6400). Use a tripod and experiment with different compositions and exposures to get the perfect shot.
What are common mistakes in astrophotography?
Some common mistakes in astrophotography include using too high of an ISO, using a low aperture, and not focusing correctly. It's also essential to consider factors such as light pollution, weather conditions, and the position of the stars and other celestial objects in the sky. To avoid these mistakes, take your time and experiment with different settings until you get the perfect shot.
==========
Explore more: