

Multiple Exposure Photography (2026: Creative Techniques + Real-World Workflow)
multiple exposure photography example layered image
Last Updated April 2026
Multiple exposure photography is one of the most creative techniques you can use with a camera.
Instead of capturing a single moment, you’re combining multiple images into one frame—creating something that feels layered, abstract, or even surreal.
This guide breaks down how to actually use multiple exposures in real-world shooting, not just theory.
What Is Multiple Exposure Photography?
Multiple exposure photography combines two or more images into a single frame.
Traditionally, this was done with film by exposing the same frame multiple times. Today, most digital cameras and editing software allow you to recreate the effect easily.
The result:
layered subjects
motion effects
surreal compositions
Two Ways to Create Multiple Exposures
In-Camera Multiple Exposure
Many modern cameras have a built-in multiple exposure mode.
Basic process:
Enable multiple exposure mode
Take your first image (usually the subject)
Take your second image (background or texture)
Camera blends them together
👉 Most systems allow multiple frames, not just two
Post-Processing (More Control)
You can also create multiple exposures in editing software.
This method gives you:
full control over blending
ability to adjust opacity and masking
more consistent results
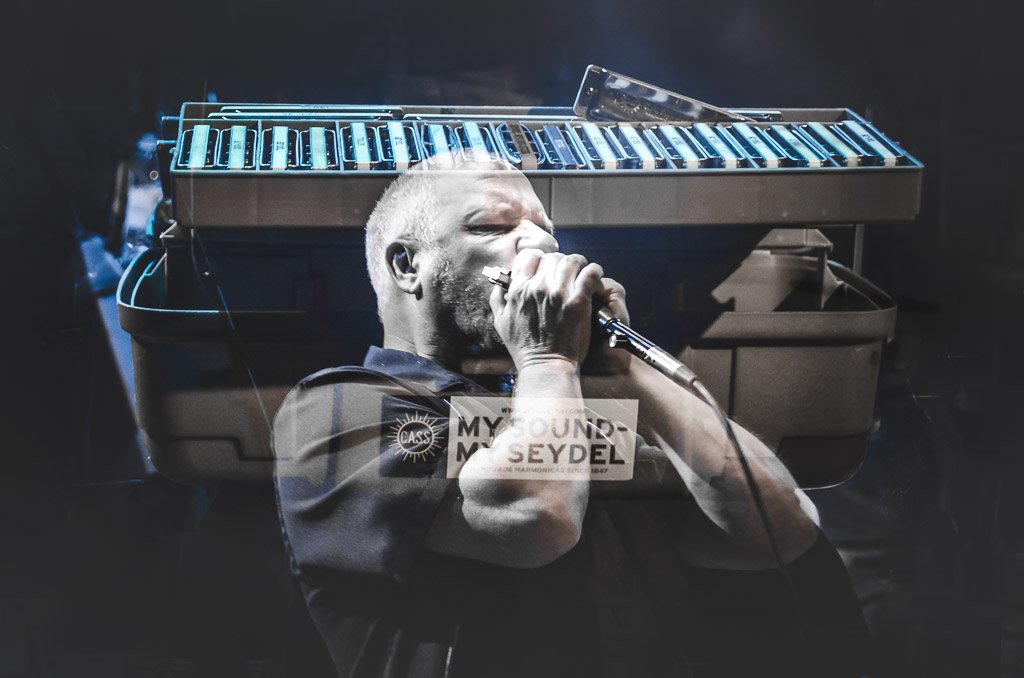
The Most Important Concept: Contrast
The success of a multiple exposure comes down to contrast.
You want:
one image with strong highlights (subject)
one image with detail (background or texture)
High contrast helps shapes remain visible when blended.
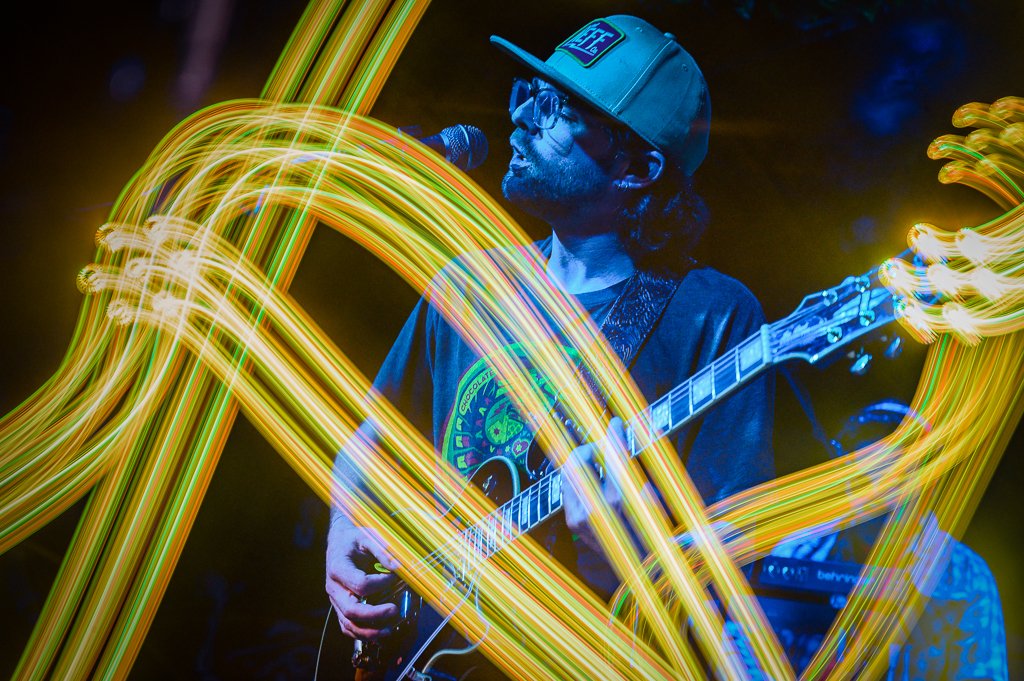
multiple exposure concert photography effect
Best Subjects for Multiple Exposure
Some combinations work better than others:
silhouette + landscape
portrait + texture
movement + static background
👉 The key is simplicity in one image, detail in the other
Step-by-Step: Simple Multiple Exposure Setup
Step 1 — Choose Your Subject
Start with a clean subject:
person
object
strong shape
Step 2 — Shoot for Separation
Use:
plain background
strong lighting
clear edges
This makes blending easier later.
Step 3 — Capture the Second Layer
This can be:
trees
city textures
crowd scenes
abstract patterns
Step 4 — Combine and Adjust
In-camera:
👉 review and reshoot if needed
In editing:
👉 adjust blending + masking
Multiple Exposure for Concert Photography
This technique works extremely well in live music.
You can:
show movement across a stage
layer lighting effects
create energy in a single frame
It’s especially effective for:
guitar movement
crowd interaction
lighting transitions
👉 Pair with composition techniques:
Concert Photography Composition Guide
Multiple Exposure for Landscape Photography
In landscapes, multiple exposure can be used more subtly.
Examples:
blending motion (water, clouds)
layering textures
creative composites
👉 See related workflow:
Bracketing Photography Guide
Common Mistakes
too much detail in both images
poor subject separation
overcomplicating the composition
relying on editing to fix weak shots
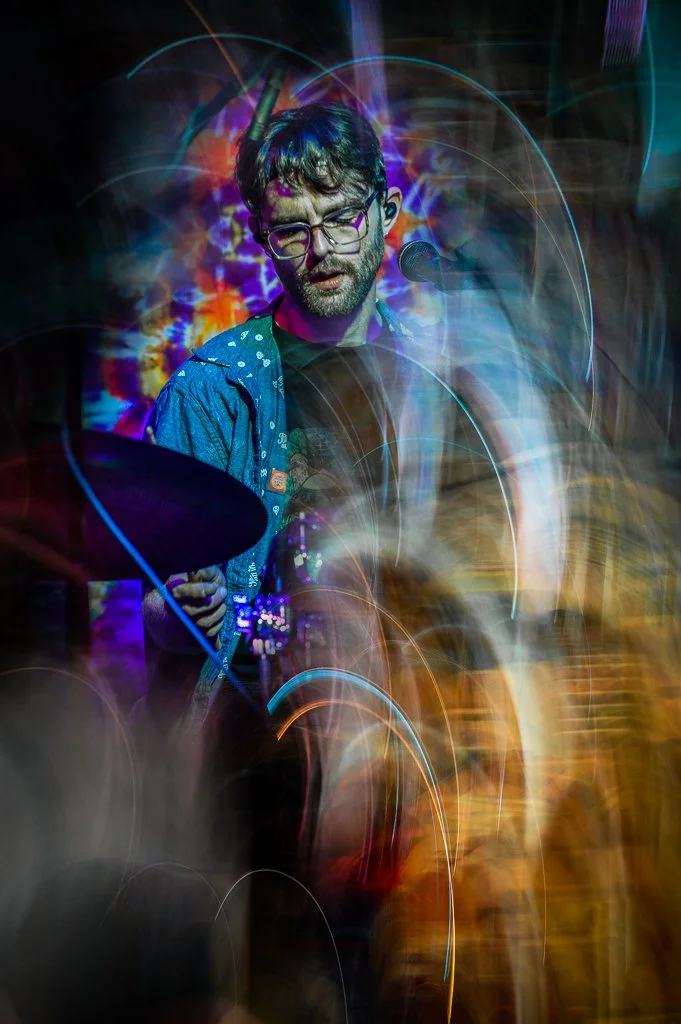
multiple exposure concert photography creative blend
Final Thoughts
Multiple exposure photography isn’t about technical perfection.
It’s about:
experimentation
layering ideas
creating something unique
The best results usually come from simple combinations executed well.
Frequently Asked Questions
What is multiple exposure photography?
It’s a technique that combines multiple images into a single frame to create layered or artistic results.
Can you do multiple exposure on digital cameras?
Yes. Many modern cameras include a built-in multiple exposure mode.
Is multiple exposure better in-camera or in editing?
In-camera is faster and more organic, while editing gives you more control.
What images work best for multiple exposure?
High-contrast images with clear shapes and simple backgrounds tend to work best.
==========
All images © Chris Sidoruk. No use, copying, or redistribution without license.
Explore more: