

Sunrise Photography Guide (2026)
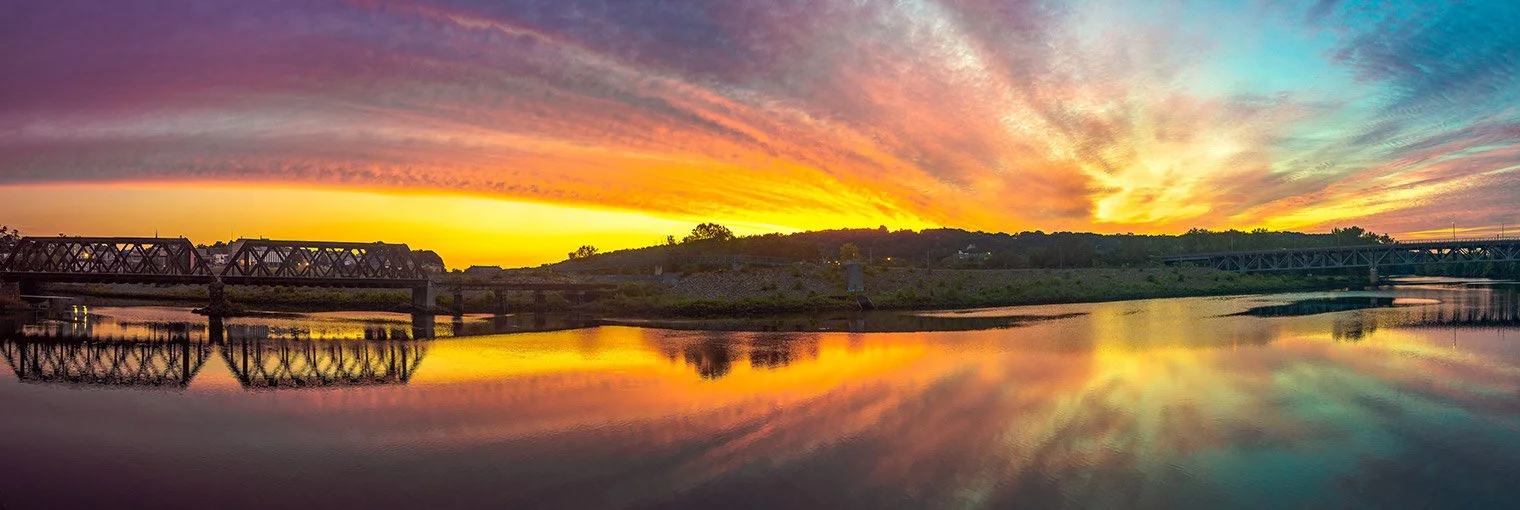
Panoramic Sunrise over the Housatonic River in Shelton, CT. ©2020 Chris Sidoruk
==========
Last Updated: August 2026
Quick Jump
Settings, Timing, Planning & Composition for Better Sunrise Photos
There's a reason so many landscape photographers willingly wake up at 4:00 a.m.
Sunrise offers light that simply doesn't exist at any other time of day. Colors are softer, shadows are longer, the air is often cleaner, and popular locations are usually quiet before crowds arrive. When conditions come together, sunrise can transform an ordinary landscape into something extraordinary.
The challenge is that sunrise rewards preparation far more than luck.
The best photographs often happen before the sun even clears the horizon, and the window of ideal light can disappear in just a few minutes. Showing up late or scrambling to compose after the light arrives usually means missing the strongest images.
In this guide, you'll learn how to plan a successful sunrise shoot, choose the right camera settings, work with changing light, improve your compositions, and avoid the most common mistakes photographers make.
Quick Take
If you're heading out tomorrow morning, remember these essentials:
Arrive 30–45 minutes before sunrise
Scout your composition before it gets bright
Start with ISO 100 whenever possible
Use a sturdy tripod in low light
Watch the sky both before and after sunrise
Stay at least 30 minutes after the sun rises
Many of my favorite sunrise photographs were captured after other photographers had already packed up.
Why Sunrise Photography Is Worth the Early Alarm
Sunrise and sunset often get grouped together, but they create noticeably different photographic opportunities.
Sunrise typically offers:
cleaner air
calmer wind
softer colors
lower atmospheric haze
fewer people
calmer water for reflections
These conditions often produce cleaner, sharper landscape photographs than those captured later in the day.
Morning also tends to have more atmospheric conditions like:
fog
mist
frost
dew
low clouds
These elements can completely transform an otherwise familiar location.
Sunrise vs. Sunset Photography
Both are excellent for landscape photography, but each has different strengths.
| Sunrise | Sunset |
|---|---|
| Smaller crowds | Larger crowds |
| Cleaner atmosphere | More haze |
| Cooler color palette | Warmer colors |
| Calmer wind | Often windier |
| Better reflections | More disturbed water |
| Requires early wake-up | Easier schedule |
Smaller Crowds
Sunrise: Smaller crowds
Sunset: Larger crowds
Atmosphere
Sunrise: Cleaner atmosphere
Sunset: More haze
Color Palette
Sunrise: Cooler color palette
Sunset: Warmer colors
Wind
Sunrise: Calmer wind
Sunset: Often windier
Reflections
Sunrise: Better reflections
Sunset: More disturbed water
Schedule
Sunrise: Requires early wake-up
Sunset: Easier schedule
Neither is objectively better.
However, photographers willing to wake up early often discover that sunrise provides quieter locations and more consistent shooting conditions.
Planning Your Sunrise Shoot
The biggest mistake beginners make isn't poor camera settings.
It's poor planning.
By the time the sky begins changing color, you should already have:
your composition chosen
tripod positioned
lens cleaned
camera settings dialed in
foreground identified
The only thing left should be taking photographs.
Trying to make all of these decisions after the light appears usually leads to rushed compositions and missed opportunities.
Scout Your Location Ahead of Time
Whenever possible, visit your location before the day you plan to photograph it.
Look for:
foreground interest
potential leading lines
obstacles
parking
walking distance
safety concerns
Even a quick afternoon visit can make a sunrise session much less stressful.
Check Sunrise Direction
The sun doesn't rise in exactly the same location every day.
Depending on the season, sunrise can shift dramatically along the horizon.
Apps like:
PhotoPills
The Photographer's Ephemeris
Sun Surveyor
allow you to predict precisely where the sun will appear.
This makes planning compositions much easier.
Weather Can Matter More Than the Sun
Clear skies aren't always ideal.
Some of the best sunrise photographs happen when clouds catch the first light of day.
Ideal conditions include:
High Clouds
Often produce colorful skies.
Excellent for:
dramatic landscapes
reflections
panoramas
Broken Clouds
Frequently create:
shafts of light
changing illumination
dramatic skies
Often considered the sweet spot for sunrise photography.
Fog
Morning fog can simplify busy scenes while adding atmosphere and depth.
It works especially well around:
lakes
rivers
forests
valleys
Completely Overcast
Not always ideal for colorful sunrises, but excellent for:
waterfalls
woodland photography
intimate landscapes
long exposures
When Should You Arrive?
One of the biggest misconceptions about sunrise photography is that you should arrive at sunrise.
You shouldn't.
A better schedule looks like this:
60 minutes before sunrise
Arrive
Walk to your location
Set up
45 minutes before sunrise
Compose
Focus
Check exposure
30 minutes before sunrise
Begin shooting
Sunrise
Continue photographing changing light
20–40 minutes afterward
Continue working as foreground illumination improves
Many photographers pack up far too early.
Some of the best light occurs after the sun has cleared the horizon and begins illuminating foreground subjects.
Understanding Blue Hour, First Light & Golden Hour
Sunrise isn't one moment.
It's a progression of changing light.
Blue Hour
Occurs before sunrise.
Characteristics:
cool tones
soft light
longer exposures
city lights remain visible
Ideal for:
waterfronts
skylines
architecture
First Light
This is when the sky begins glowing even though the sun remains below the horizon.
Many landscape photographers consider this the most beautiful stage of sunrise.
Colors often include:
pink
orange
purple
magenta
without harsh shadows.
Golden Hour
Begins shortly after sunrise.
Now the landscape receives direct sunlight.
Expect:
warm tones
long shadows
increased contrast
rapidly changing exposure
Understanding these transitions helps you anticipate changing conditions instead of reacting to them.
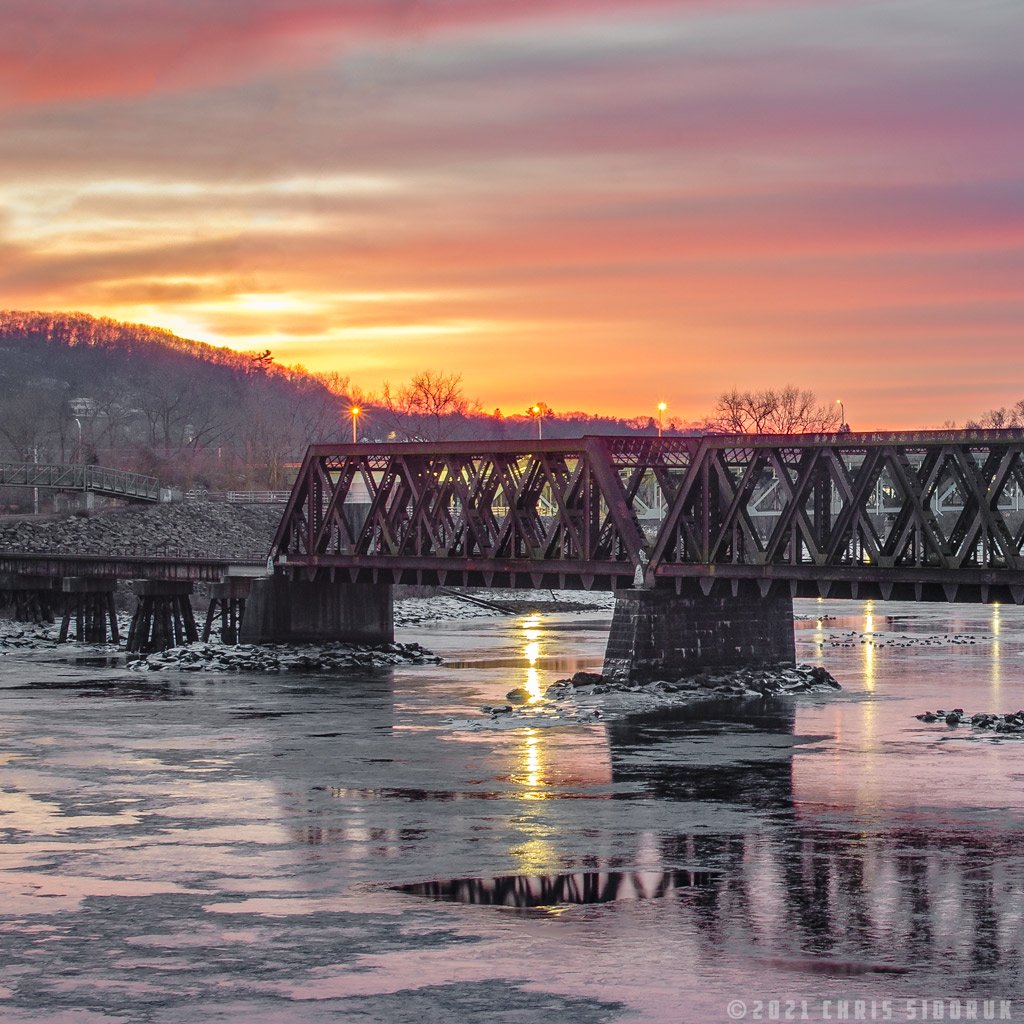
Sunrise in Shelton, CT, over the partially frozen Housatonic River. ©2021 Chris Sidoruk
Camera Settings for Sunrise Photography
Sunrise photography is one of the easiest situations to overcomplicate.
The light changes quickly, but a simple starting point works for most landscape scenes.
A strong baseline setup:
File Format: RAW
ISO: 100
Aperture: f/8–f/11
Focus Mode: Single-point autofocus or manual focus
White Balance: Auto or Daylight
Metering: Evaluative / Matrix / Multi
From there, adjust your shutter speed based on the scene.
Landscape Sunrise Settings Example
For a typical landscape:
Camera Settings
ISO 100
f/8
1/5 second
tripod mounted
This keeps:
image quality high
depth of field strong
noise minimal
Sunrise Settings for Moving Water
For waterfalls, rivers, and oceans:
Camera Settings
ISO 100
f/8–f/11
1–30 seconds
tripod required
Longer exposures create:
smoother water
softer movement
more peaceful images
A neutral density filter may be needed once sunlight becomes stronger.
👉 Related guide:
Best ND Filters for Long Exposure Photography
Sunrise Settings for Handheld Shooting
Sometimes a tripod isn't practical.
For handheld sunrise photography:
raise ISO when needed
use wider apertures if necessary
prioritize shutter speed
Example:
ISO 400
f/4
1/125 second
A sharp image is always better than a technically perfect but blurry one.
Exposure Strategy: Protect Highlights First
Sunrise scenes often contain extreme brightness differences.
You may have:
dark foreground
bright sky
colorful clouds
reflective water
The biggest mistake is exposing only for the foreground and losing the sky.
Instead:
Protect the Highlights
The sunrise sky usually contains the most important detail.
If highlights become pure white, that information cannot be recovered.
A common approach:
Meter for the brightest part of the sky
Slightly underexpose if necessary
Recover shadows during editing
Modern RAW files provide excellent flexibility, especially from full-frame cameras.
Use Exposure Compensation
When shooting in aperture priority mode, exposure compensation is extremely useful.
A good starting point:
Start at 0 EV
Check the histogram
Adjust between -0.3 and -1.0 EV if highlights are clipping
This helps preserve:
sunrise colors
cloud detail
sun glow
Understanding Histograms for Sunrise Photography
The LCD preview on your camera can be misleading.
The histogram is much more reliable.
For sunrise landscapes, watch the right side of the histogram.
If it is pushed too far right:
→ highlights may be lost
If it is too far left:
→ shadows may become difficult to recover
A balanced histogram is usually preferred, but sunrise scenes often intentionally lean slightly darker to protect bright areas.
Dynamic Range and HDR Techniques
Sunrise is a perfect example of when dynamic range matters.
A single exposure may not capture:
bright sky
dark foreground
shadow detail
There are three common solutions.
Option 1: Use RAW Files
The simplest approach.
Modern RAW files allow you to recover:
shadow detail
highlight detail
color information
Option 2: Exposure Bracketing
For extremely high-contrast scenes:
Take multiple exposures:
Example:
-2 stops
0 stops
+2 stops
Then blend them during editing.
This is useful for:
mountain scenes
city skylines
backlit landscapes
Option 3: Graduated ND Filters
A graduated neutral density filter darkens only part of the image.
Example:
Bright sunrise sky:
⬇️
Darkened with filter
⬇️
Balanced exposure with foreground
Modern full-frame cameras provide excellent dynamic range for challenging sunrise scenes.
ND Filters for Sunrise Photography
ND filters are commonly associated with long exposures, but they are also extremely useful at sunrise.
They allow you to:
slow shutter speeds
smooth water
capture cloud movement
maintain lower ISO
Common strengths:
| Filter | Effect |
|---|---|
| ND8 (3 stop) | Slight motion blur |
| ND64 (6 stop) | Moderate long exposures |
| ND1000 (10 stop) | Dramatic daylight long exposures |
ND8 (3 stop)
Effect: Slight motion blur
ND64 (6 stop)
Effect: Moderate long exposures
ND1000 (10 stop)
Effect: Dramatic daylight long exposures
For most landscape photographers, a 6-stop or 10-stop ND filter provides the most creative flexibility.
Graduated ND Filters: Are They Still Useful?
Graduated ND filters were more common before modern RAW processing improved.
Today, many photographers rely on:
RAW editing
exposure blending
HDR software
However, graduated ND filters can still be valuable when:
shooting directly into bright skies
photographing reflections
wanting a faster workflow
Hard-edge filters work well for flat horizons.
Soft-edge filters are better for mountains, trees, and uneven landscapes.
Why a Tripod Matters for Sunrise Photography
A tripod is one of the biggest upgrades you can make for sunrise photography.
It allows you to:
use lower ISO
capture sharper images
create long exposures
carefully compose
A tripod is especially important when shooting:
before sunrise
waterfalls
rivers
ocean waves
panoramas
Tripod Setup Tips
For maximum sharpness:
disable image stabilization when appropriate
use a remote shutter or timer
avoid extending the center column
wait for vibrations to stop
Small movements become obvious in long exposures.
Related Guide: Best Tripods for Landscape Photography
Choosing the Right Lens for Sunrise Photography
The best sunrise lens depends on the type of landscape you photograph.
Wide-Angle Lens (Most Popular)
Best for:
mountains
beaches
large landscapes
dramatic skies
Typical range:
14mm–24mm full frame
Advantages:
captures large scenes
emphasizes foreground
creates depth
Standard Zoom (Most Versatile)
A 24-70mm equivalent lens is one of the most useful landscape choices.
Great for:
sunrise compositions
travel photography
changing conditions
It allows you to quickly adjust without changing lenses.
Telephoto Lens (Often Overlooked)
Long lenses are excellent for sunrise.
They work well for:
compressed landscapes
mountain layers
isolated details
sun shots
A 70-200mm or 100-400mm lens can create completely different sunrise images.
See Related: Best Lenses for Landscape Photography
Sunrise Composition Techniques
Beautiful light alone does not create a great photograph.
Strong composition is what separates memorable sunrise images.
Include Foreground Interest
A common beginner mistake is pointing directly at the sky.
Instead, include something in the foreground:
rocks
trees
shoreline
flowers
architecture
Foreground elements create depth.
Use Leading Lines
Leading lines guide the viewer through the image.
Examples:
roads
bridges
fences
rivers
trails
They help connect foreground and background.
Use Reflections
Calm morning conditions often make sunrise reflections possible.
Look for:
lakes
ponds
rivers
tidal pools
A reflection can double the visual impact of a sunrise.
Create Layers
Depth creates stronger landscape images.
Look for:
foreground
middle ground
background
Examples:
trees → mountains → sky
shoreline → water → horizon
Long Exposure Sunrise Photography
Sunrise is one of the best times for long exposure photography.
Before the sun becomes too bright, you can create:
silky water
moving clouds
smooth reflections
atmospheric landscapes
A typical setup:
tripod
ISO 100
f/8–f/11
ND filter if needed
shutter speed from several seconds to several minutes
Long Exposure Subjects That Work Well
Water
Creates:
smooth textures
flowing movement
simplified scenes
Clouds
Moving clouds can add:
direction
energy
drama
Waves
Long exposures can transform chaotic water into:
soft patterns
mist
smooth surfaces
Creative Sunrise Elements to Look For
Fog and Mist
Fog is one of the most powerful sunrise conditions.
It adds:
atmosphere
depth
mystery
Best locations:
rivers
lakes
valleys
forests
Silhouettes
When photographing toward the sun, silhouettes can create powerful images.
Good subjects:
trees
buildings
people
bridges
Expose for the bright sky and allow the subject to become dark.
Sunstars
A small aperture can create a starburst effect around the sun.
Try:
f/16
f/18
f/22
The effect depends on the lens design.
Sunstars work especially well with:
mountains
trees
architecture
Field Workflow Example
A simple sunrise workflow:
Before sunrise
arrive early
compose
set tripod
test exposure
First light
capture wide compositions
photograph changing colors
Sunrise
adjust exposure quickly
capture direct sunlight
After sunrise
look for shadows
photograph details
try longer exposures
The best images often happen when you slow down and keep working after the obvious moment has passed.
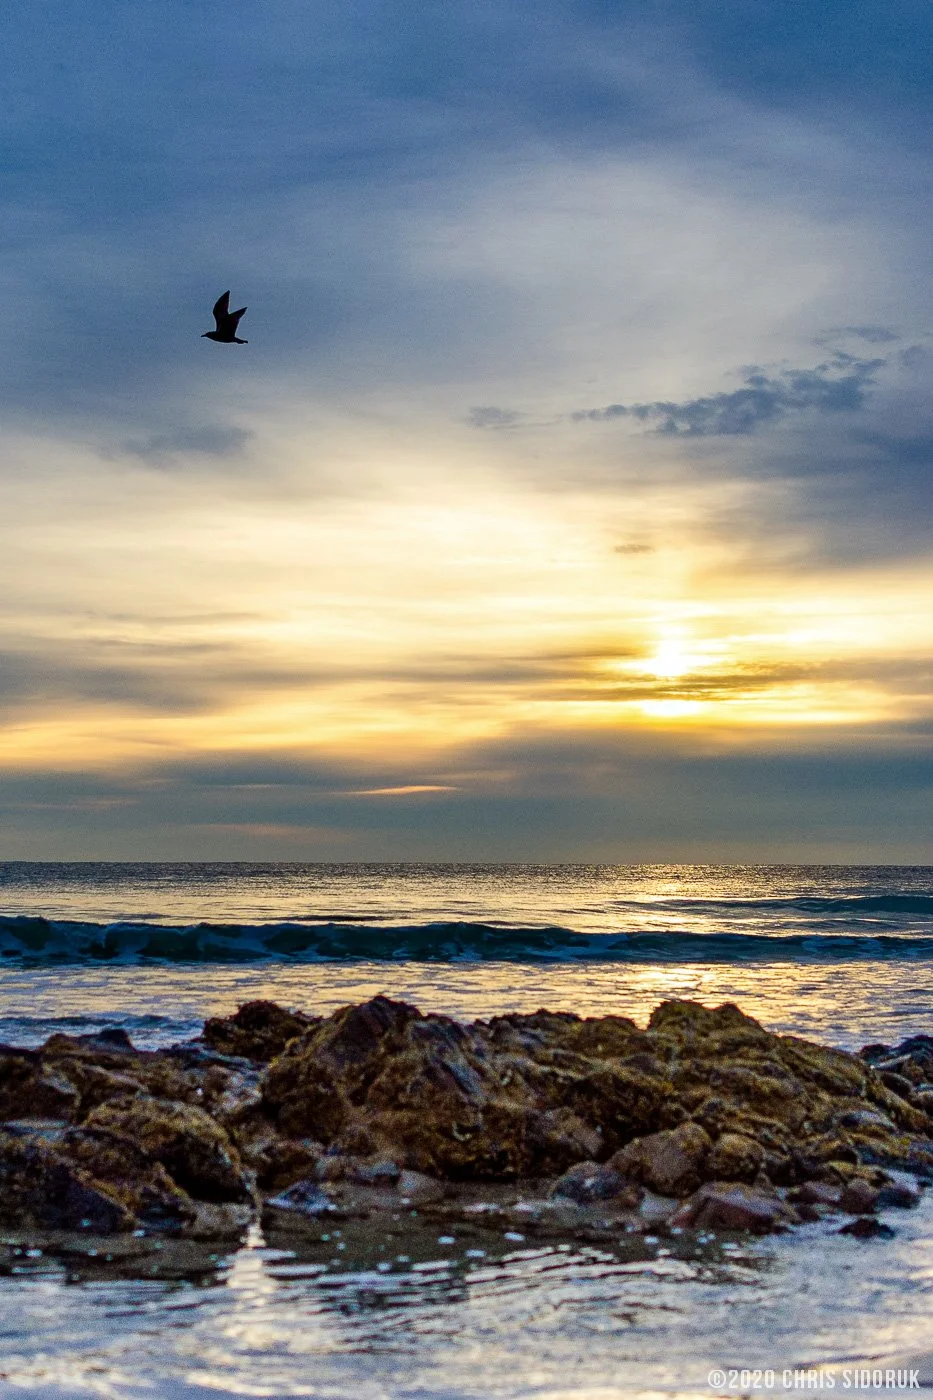
Sunrise at Wells Beach in Wells, Maine. ©2020 Chris Sidoruk
Common Sunrise Photography Mistakes
Sunrise photography rewards preparation.
Most disappointing sunrise images are not caused by bad equipment. They usually happen because of poor planning or missed opportunities.
Here are the mistakes that hurt results most.
Arriving Too Late
The biggest mistake is arriving at sunrise instead of before sunrise.
The best light often happens:
during blue hour
before the sun appears
during the first few minutes of changing color
By the time the sun is fully above the horizon, many of the best moments may already be gone.
Better approach:
Arrive 30–45 minutes before sunrise whenever possible.
This gives you time to:
scout compositions
set up your tripod
adjust camera settings
capture changing conditions
Ignoring the Weather Forecast
Clear skies are not always the best sunrise conditions.
Some of the most dramatic sunrise images happen with:
scattered clouds
fog
light haze
changing weather
Clouds catch early sunlight and create:
stronger colors
texture
depth
A completely cloudless sky can sometimes produce a less interesting image.
Focusing Only on the Horizon
A sunrise is not just the sun.
Many photographers make the mistake of pointing directly toward the sunrise and ignoring the rest of the scene.
Look around for:
reflected light
mountains glowing behind you
trees catching side light
changing shadows
foreground details
The best image may not be where the sun rises.
Using the Wrong Exposure
Sunrise scenes have extreme contrast.
Common problems:
blown-out skies
crushed shadows
flat colors
Solutions:
shoot RAW
monitor the histogram
bracket exposures when needed
protect highlights
Leaving Too Early
One of the most common mistakes:
The photographer leaves after the sun appears.
However, some of the best light happens:
10–30 minutes after sunrise
when shadows become visible
when warm light hits the landscape
The sunrise event is often just the beginning of the shoot.
Editing Sunrise Photos
Good sunrise photography starts in the field, but editing helps reveal what the camera captured.
The goal is not to create unrealistic colors.
The goal is to restore:
natural contrast
atmosphere
depth
color balance
Start With White Balance
Sunrise light can shift quickly.
Depending on conditions, images may appear:
too blue before sunrise
too warm after sunrise
Adjust white balance carefully.
A slightly warmer image often works well, but avoid pushing colors beyond what was actually present.
Recover Highlights
Bright sunrise skies often contain valuable detail.
Use highlight recovery to bring back:
cloud texture
sun glow
sky gradients
Avoid reducing highlights too aggressively, which can create unnatural-looking skies.
Lift Shadows Carefully
Foreground areas may appear dark.
Shadow recovery can reveal:
trees
rocks
buildings
landscape details
However, lifting shadows too much can create:
noise
flat images
unnatural contrast
Add Contrast and Depth
A strong sunrise image usually benefits from:
moderate contrast
controlled saturation
local adjustments
Useful adjustments:
darken distracting areas
brighten important subjects
enhance warm light selectively
Panorama Sunrise Photography
Sunrise is one of the best times for panoramic photography.
Wide scenes often benefit from stitching multiple images together.
A panorama allows you to capture:
larger landscapes
more sky detail
greater resolution
Panorama Shooting Tips
For best results:
use a tripod
keep exposure consistent
overlap images by 30–50%
shoot manually
Avoid changing:
shutter speed
aperture
ISO
white balance
between frames.
This creates a more seamless final image.
Sunrise Photography With a Smartphone
Modern smartphones can produce impressive sunrise images.
The biggest advantages:
always available
computational HDR
easy editing
However, composition matters even more.
Smartphone Sunrise Tips
Use:
grid lines
exposure lock
RAW mode if available
foreground elements
Avoid:
digital zoom
shooting only the sun
excessive HDR processing
A well-composed phone photo can outperform a poorly composed camera image.
Seasonal Sunrise Photography Tips
Sunrise photography changes dramatically throughout the year.
Spring Sunrise Photography
Spring offers:
fresh vegetation
reflections
morning fog
Look for:
rivers
wetlands
forests
Summer Sunrise Photography
Summer sunrise happens earlier, but conditions can be excellent.
Advantages:
warm colors
calm mornings
coastal opportunities
Challenges:
very early wake-up times
stronger sunlight arrives quickly
Fall Sunrise Photography
Fall is one of the strongest seasons for sunrise landscapes.
Look for:
colorful foliage
misty mornings
mountain overlooks
The combination of warm leaves and soft morning light can create dramatic images.
Winter Sunrise Photography
Winter creates unique opportunities.
Benefits:
fewer crowds
clear air
snow reflections
Challenges:
cold batteries
difficult conditions
shorter shooting windows
Keep batteries warm and bring protection for your gear.
Sunrise Photography Planning Checklist
A simple checklist before every sunrise shoot:
Before Leaving
☐ Check sunrise time
☐ Check weather forecast
☐ Confirm location access
☐ Charge batteries
☐ Format memory cards
Gear Checklist
☐ Camera
☐ Wide-angle lens
☐ Telephoto lens (optional)
☐ Tripod
☐ ND filters
☐ Remote shutter/timer
☐ Extra batteries
On Location
☐ Arrive early
☐ Scout composition
☐ Set tripod
☐ Check histogram
☐ Capture multiple compositions
Real-World Sunrise Setup Example
A typical landscape sunrise setup:
Camera:
Full-frame mirrorless camera
Lens:
16–35mm or 24–70mm
Settings:
ISO 100
f/8
tripod mounted
RAW format
Accessories:
polarizer if reflections need control
ND filter for long exposures
remote shutter
The goal is not complicated gear.
The goal is being prepared before the light changes.
Final Thoughts
Sunrise photography is less about waking up early and more about being prepared for a short window of changing light.
The photographers who consistently capture great sunrise images usually do three things well:
They arrive early
They understand exposure
They compose beyond the obvious
The camera matters, but timing and preparation matter more.
A simple setup used at the right moment will outperform expensive gear used without a plan.
If you enjoy landscape photography, sunrise is one of the best ways to learn how light, composition, and patience work together.
Frequently Asked Questions
What is the best time to take sunrise photos?
The best time is usually before sunrise during blue hour and the first few minutes after the sun appears. The light changes quickly, so arriving early gives you the most opportunities.
What camera settings should I use for sunrise photography?
A strong starting point is:
ISO 100
f/8–f/11
RAW format
tripod
shutter speed adjusted for available light
Adjust based on the scene and creative goal.
Do I need a tripod for sunrise photography?
You do not always need one, but a tripod is highly recommended for:
long exposures
low ISO shooting
maximum sharpness
panoramas
What lens is best for sunrise photography?
A wide-angle lens is the most common choice because it captures large landscapes and dramatic skies. A 24–70mm zoom is also extremely versatile, while telephoto lenses work well for compressed landscapes and distant details.
Should I use an ND filter for sunrise photography?
An ND filter is useful when you want longer exposures to capture:
smooth water
moving clouds
atmospheric effects
A 6-stop or 10-stop ND filter covers most landscape situations.
Why do my sunrise photos look boring?
Common reasons include:
weak composition
arriving after the best light
no foreground interest
flat weather conditions
poor exposure balance
Great light helps, but composition creates the image.
Is sunrise better than sunset for photography?
Neither is always better.
Sunrise often offers:
fewer people
cleaner atmosphere
cooler colors
calmer conditions
Sunset often provides:
warmer light
easier access
more dramatic skies
Both can produce excellent landscape images.
How do I photograph the sun without ruining the image?
Avoid pointing directly at the sun for long periods.
Use:
smaller apertures for sunstars
proper exposure settings
foreground elements
reflections
Be careful with prolonged direct sunlight through the lens, especially with longer focal lengths.
What weather is best for sunrise photography?
The best conditions often include:
scattered clouds
light fog
calm winds
changing weather patterns
Perfectly clear skies can work, but clouds often create more dramatic images.
==========
All photographs © Chris Sidoruk. Images are protected by copyright and may not be used, copied, modified, or redistributed without written permission.
